Replacing electrical wiring in a panel house: subtleties, rules and recommendations

In any house built in Soviet times, sooner or later, major repairs will have to be done, including the home electrical network. Firstly, the old network can no longer cope with modern loads. Secondly, it was made with aluminum wires, which are now widely changed to copper wires. Replacing the wiring in a panel house presents certain difficulties. It is not so easy to move the outlet or switch to any place convenient for you. Nevertheless, these difficulties are of a purely physical nature, as for the electrical part, it is no different from wiring in ordinary houses. So it is quite possible to do without a professional electrician by doing the wiring repair yourself.
Content
What is a panel house?
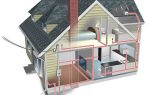
Panel houses were built back in Soviet times. They were a kind of economy option, because they combined the speed of construction and the low cost of building materials. The panel structure was built from reinforced concrete slabs, which were made at special factories by pouring concrete into metal reinforcement. These slabs (or panels) were of two types - for floors or ceilings and for walls.
The panel structure is akin to a house of cards, each wall in it is a load-bearing one. There can be no question of any redevelopment here, just touch one wall, the whole house will be formed. Nowadays, such buildings are rarely erected, and people do not particularly want to purchase housing in panel houses. Still, brick buildings are considered more comfortable for living. They retain heat better, have increased noise insulation, and, of course, it is much easier to carry out repair work and redevelopment in them. Especially when it comes to the question of how to replace the wiring.
Features of electrical wiring in panel houses
The laying of electrical wiring in a panel house was mainly carried out in special channels (or furrows), which were provided and made in reinforced concrete slabs at the factory.
The locations of these furrows were strictly regulated, as were the openings for switches and sockets.
That is, there was no chance to move the switching device to another, more convenient place. The ceiling slabs also had special grooves for laying wires in them to the lighting fixtures.
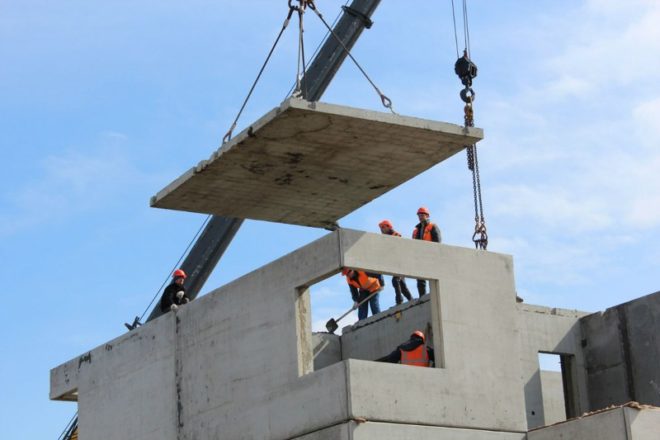
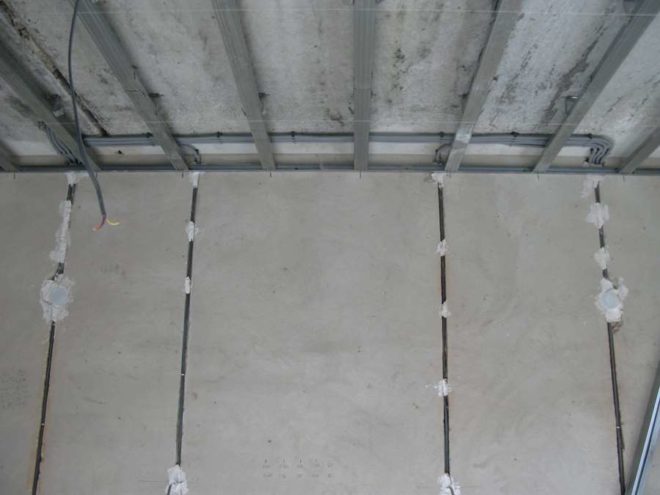
Another option, according to which the electrical wiring was mounted in a panel house - in the space between the ceiling and wall plates, this place was then covered with a plinth. Also, wires were laid in the tile joints.

Pay special attention to these nuances, because if you have to replace electrical wiring in a panel house with your own hands, you need to at least know where to look for ways to run old wires. We should try to use them for new wiring to the maximum, because the installation of strobes in reinforced concrete slabs is a very time consuming task.
In the video, the replacement of the wiring on the ceiling, laid through the internal voids of the slab:
Wiring options for a panel house
Before you change the electrical wiring, clearly determine which method suits you best.
The most affordable option is to lay wires along the surfaces of walls and ceilings under the plaster. In this case, the cable is directly attached to the surfaces.You can pre-stretch it into a pipe: steel, electrical plastic, corrugated plastic or flexible metallized. Fastening to surfaces is carried out with special clips, clamps or brackets, for which you will need to drill small holes. After the conductors are fixed, a layer of plaster is applied. With this method, you can stretch individual lines not only to lighting fixtures, but also to powerful household appliances (air conditioners, water heaters).
The disadvantage of this option is that additional monetary and physical costs will be required for plastering surfaces.
Wiring in a panel house can also be placed on the floor, if in the future you make a concrete screed on top. The conductors are pulled into corrugated pipes, laid on the floor and poured with concrete. The wires are also installed in the false ceiling. The only drawback is that you cannot mount sockets on the floors and ceilings, you still have to install them on the walls, and until that point you have to grind the surface or lay the wires under the plaster.
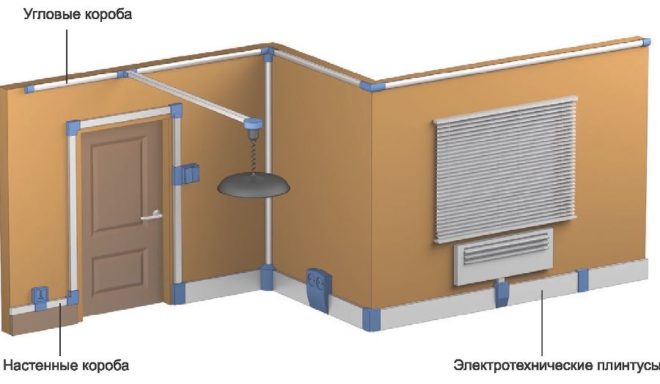
Replacing the electrical wiring in a panel house can generally be performed using an open installation method.
In this case, the conductors are mounted in pipes or special plastic cable ducts. It is advisable to choose places for laying where the possibility of mechanical damage to the box with the cable will be minimal. This, of course, is not the best option from the point of view of aesthetics, but the installation of such wiring can be performed when the repair in the apartment has already been completely completed.
The method of chipping also remains relevant, only in concrete slabs it will require significant physical and time costs.
Slitting panel plates
We have already mentioned that it is forbidden to touch load-bearing panel walls, this also applies to strobing. But the ban is more related to the installation of horizontal strobes. It is quite acceptable to make grooves for wires vertically. At the same time, there are still some restrictions, the grooves cannot be made too deep, which can lead to a weakening of the structure (a depth of no more than 10 mm is allowed). The most important thing when installing the strobes is not to break the metal fittings.
No zigzags and oblique lines are allowed, grooving to sockets and switches is performed strictly with straight verticals.
The minimum distance between the gas supply pipes and the grooves must be 40 cm. The grooves for the electrical wiring must be at least 15 cm away from the window and door openings.
For cutting strobes, you need a special tool that costs decent money. It's good if you get the opportunity to rent it from a professional electrician.
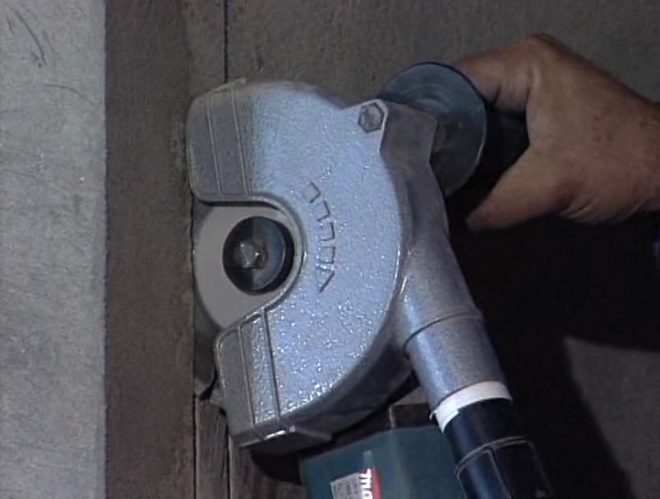
You need a grinder and a diamond disc is required for it, only it can cope with such a durable material as concrete. On the wall, it is first necessary to outline the route for laying the wire, and then along these lines make two parallel cuts at a distance of 2 cm from each other. Now you need a hammer drill, with its help the remnants of concrete between the cuts are removed.
Of course, a wall chaser would be ideal. This tool in its essence resembles a grinder, only it has diamond discs built into it.
The distance between the discs can be adjusted in advance, as well as the depth of the cut furrow.
Another main advantage of the wall chaser is that it is equipped with a vacuum cleaner, assembly dust does not go beyond the casing. The only drawback is the price, in this case even rental will be expensive.
Hole mounting
If replacing the wiring in a panel house involves new places for sockets and switches, then another difficult stage of work will be required - to drill holes for them in a concrete wall.
What do you need for this?
- A pencil with a ruler (or tape measure).
- Perforator and drill for it with a diameter of 8 mm.
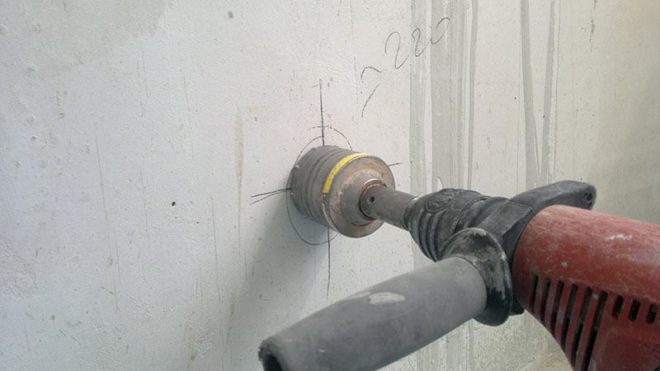
- A special attachment - a crown for mounting flush mounts in concrete (about 70 mm in diameter).
- The shovel is a special perforating nozzle for removing the remaining concrete from the hole.
In the place where the switching device should be in the future, draw a circle along the diameter of the socket. Determine its center and make a hole in it 50-60 cm deep using a hammer drill with a drill. Now put a concrete bit on the tool and outline the contour of the future hole. Reinstall the drill and drill 12-14 holes along the marked circle (this greatly facilitates and speeds up the process of mounting the hole). Put on the crown again and drill now to the full depth (50-60 mm). It remains only to put on a paddle and knock out the remaining concrete.
All stages are clearly shown in the video:
Make holes for the junction boxes in the same way if you will not be using the old ones.
Distribution board
As a rule, earlier in panel houses, an electric energy meter and an introductory machine for an apartment were installed on the stairwells. Now one machine is not enough, the shield is assembled from residual current devices (RCDs) and individual circuit breakers for each group of consumers.
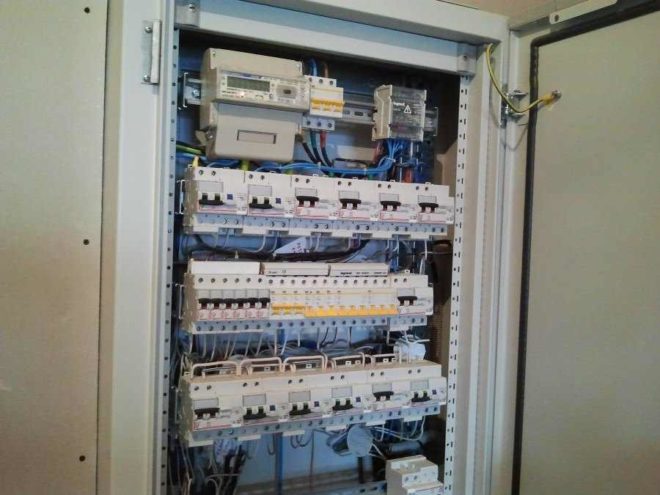
In principle, the meter and the introductory machine can remain on the site. Moreover, this is required by the energy supplying organization for the smooth taking of readings from the meter.
You can assemble the rest of the switchboard layout yourself and install it at the entrance to the apartment. In this case, it is best to use a metal or plastic special box, that is, you will have a wall-mounted switchboard. In a panel house, making it hidden is very problematic, just imagine what size a niche will need to be hollowed out in a reinforced concrete slab. Choose among the material at your discretion. The plastic box will be more practical, less weight and more attractive in terms of aesthetics. The metal box is characterized by durability and reliability.
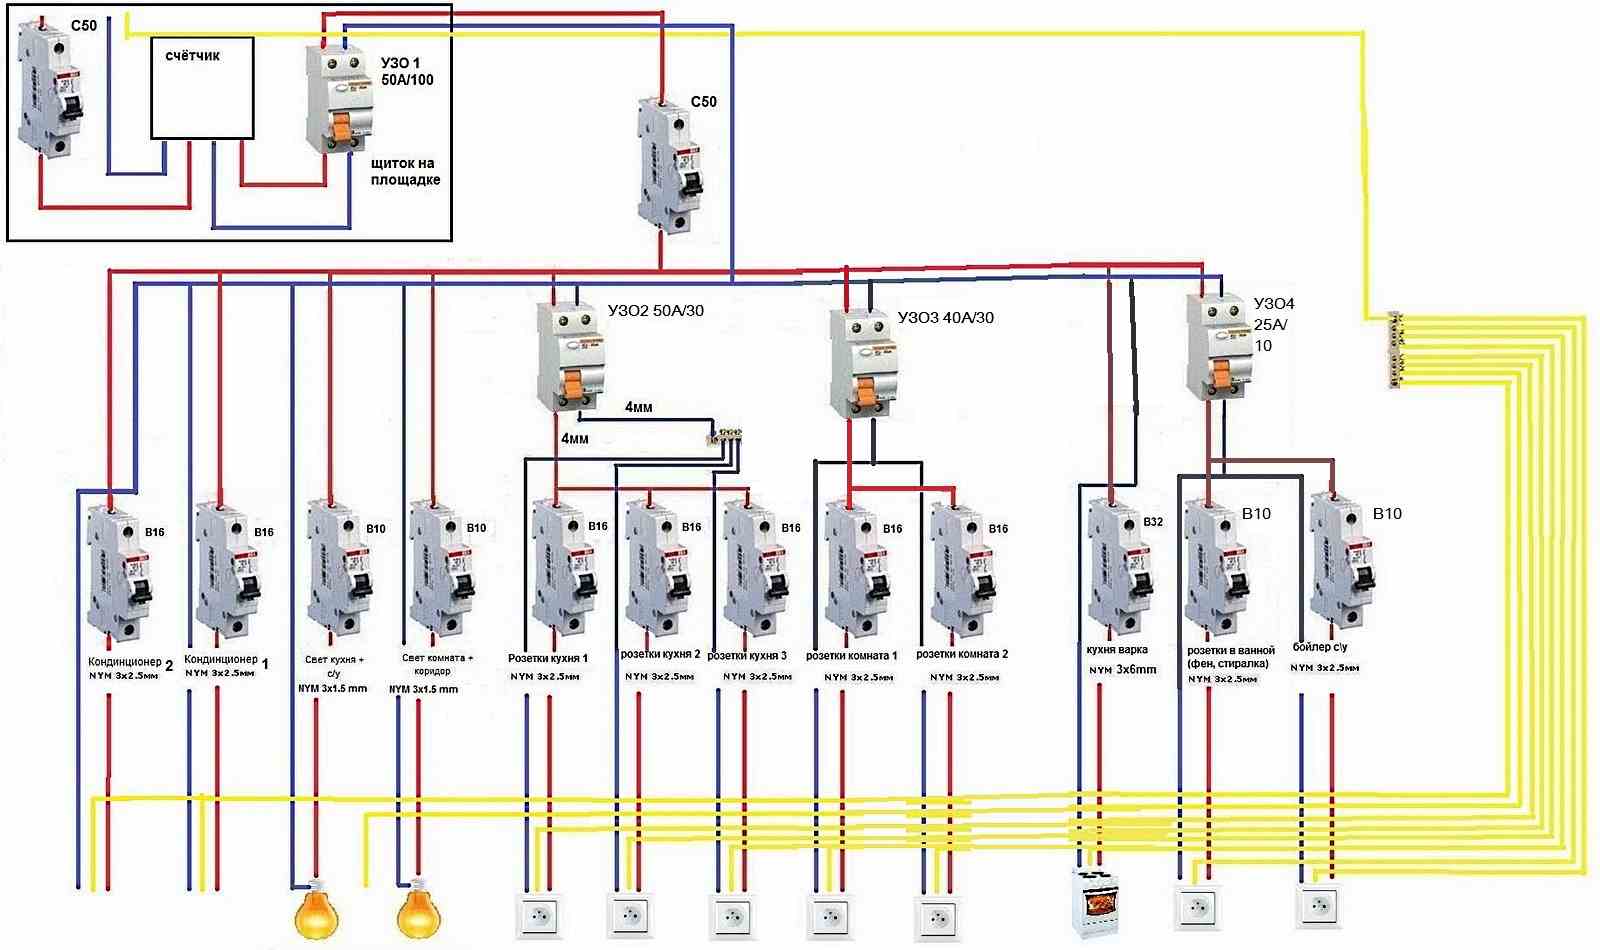
Think over the cable branching scheme from the lead-in box in advance.
It is recommended to supply the lighting and outlet groups with separate machines. For each branch, as well as for powerful consumers, an individual automatic machine is installed.
Such a scheme is also convenient because if there is a need for repair work on one of the branches of the power grid, it will be enough to turn off the required automatic machine, and not leave the entire apartment without voltage.
Phased wiring replacement
Before changing the wiring, you need to dismantle the old wires. The beginning of all work should be the cessation of the supply of electricity to the workplace, that is, you need to turn off the input machine to the apartment and check that there is really no voltage.
Remove old switches and sockets, open junction boxes and disconnect wire commutation points. Sometimes in panel houses it is possible to pull out the entire wire from the old groove through the junction box. But more often than not, they simply begin to gently pull out the conductor from the box, if in some place it is firmly stuck in the gutter with alabaster mortar, then with the help of a chisel and hammer, release it. In principle, if you will not use some of the old grooves, then do not fool your head, leave the former wire there, just carefully insulate it on both sides.
Place the conductors in the grooves for the new wiring and fix them with plaster or alabaster mortar. Install junction boxes and socket boxes in the pre-drilled holes, wind the wires into them. Make the necessary connections in the boxes, plug in sockets and switches.
In the video, the result of the work of electricians in a panel house:
We have told you the basic nuances of replacing wiring in a panel house.This type of work is still classified as complex, in fact, being a major overhaul of the entire electrical home network. Therefore, realistically assess your strength, it may be better to invite a professional electrician.