Connecting a two-button switch - diagram and all the nuances of connection
 Regardless of how each of us is familiar with electricity and the laws of electrical engineering, everyone knows the simplest device "switch". During the whole day we use it more than a spoon or a fork - at home, at work, in public places. Therefore, it is so important to get to know this device better, find out what it consists of, what types there are, what the principle of operation is based on and how to properly connect it to the electrical network. In this article, we propose to talk in detail about a device that is in the middle between the simplest and more complex. This is a two-key switch. Those who are engaged in the repair of the electrical network on their own at home will certainly be interested in the connection diagram of the two-button switch.
Content
Appointment
Despite all the variety of devices for controlling lighting (button, cord, chain, slider, dimmers, remote switches, timers), the keyboard option still remains classic. And the principle of operation is the same for everyone: the operating mechanism has two main positions ("on", "off") and performs two main functions - to close the electrical circuit and apply voltage to the lighting element, open the circuit and remove voltage from the lamp.
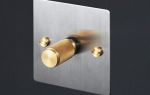
A two-key switch is installed in household electrical networks with voltages up to 1000 V, the main purpose of its use is to turn on and off chandeliers, bulbs, lamps. The main advantage of the 2-key switch is the two contact terminals at the output, to which two independent groups of lighting fixtures can be connected.
 The installation of a two-key household switch is used in the following cases:
- When the apartment has a separate bathroom and both rooms are located side by side through the wall. In this case, it will be very convenient to connect a double light switch and install it just on the wall partition between the doors of both rooms. One key will turn on the lamps in the bathroom, the second key will turn on the light in the toilet.
- Connecting a two-button switch is advisable when a chandelier with five or more arms, or spotlights on the ceiling is mounted in a large hall or office space. It is not always required that all the bulbs in the chandelier light up at once, sometimes a dim light is enough. For example, you can apply voltage to only two lamps by turning on one key. The second key will remain disabled, the rest of the lamps in the luminaire will not light up, thereby saving energy. Indeed, in the case when there is a one-button switch, when it is pressed, all the lamps in the chandelier light up at once. And if you count how much each extra burning light bulb consumes a kilowatt, then in a month you get a decent amount in rubles. Why pay extra?
- Often, a double switch for two bulbs is also used in country houses. It is most advisable to install it in rooms located close to the exit to the street. One key turns on the light in this corridor, and the second - the street lamp.
Kinds
Before connecting the switch, you need to clearly determine which switching device you need. By design, they can be installed indoors and outdoors. At first glance, it seems that there is no difference - there are two keys in one and the other.If you look in more detail, you will understand that they differ in many respects - scope, installation method, type of electrical wiring.
For indoor installation
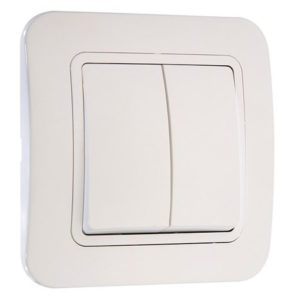 This is the most common type of light switch, it is also called "recessed" in another way, it is mounted in the wall, used in residential premises and office buildings.
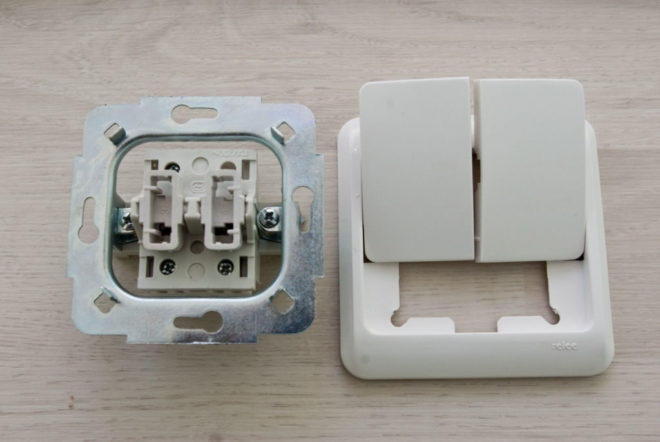
The connection diagram of such a two-button switch provides for the use of hidden electrical wiring. This is when the wires are laid in special grooves made in the wall (electricians call them strobes) or inside the frame plasterboard walls.
In order to connect this type of device, you will also need to additionally mount a socket box, which is a mounting box. The socket is inserted into a hole in the wall, to which the grooves with wires fit, and already in it is the working part of the switch. The socket boxes, in turn, are also of two types: for plasterboard and concrete walls.
You, of course, guess how much dirt and dust there can be in an apartment when, with the help of a grinder, grooves are cut in the wall and a hole is knocked out for installing a socket. Therefore, it is advisable to combine the installation of hidden wiring and the installation of internal switches with general repair work in the room.
For outdoor installation
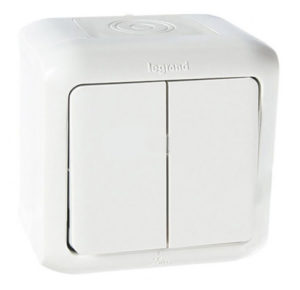 An external type switch is connected with open wiring. This is when electrical wires are laid along the walls. They can be laid in metal, plastic or flexible corrugated pipes, in special ducts or cable channels made of plastic. Or they can run right along the walls on porcelain insulators. This method, one might say, is already outdated, not very popular, but even now there are situations when the wiring cannot be hidden inside the wall.
Most often, the connection diagram for a double switch for two lamps is used in summer cottages. And since country houses are often made of wood, here the outdoor switching device has found its widest application. This wiring method and type of switch are also used in outbuildings, sheds, basements, cellars, garages, as well as in utility and industrial premises.
Of course, you cannot compare hidden and open wiring, external and internal switches in terms of aesthetics. Naturally, the room looks prettier when the wires are all hidden, and not dangling along the walls. But in terms of the speed and ease of wiring and connecting the switch, the outdoor type wins.
Options and tips for selection
Before connecting a two-button light switch, it would not be superfluous to familiarize yourself with the main characteristics of this switching device. In the modern market for electrical goods, their selection is so huge that you can get confused.
Any model is created for a certain value of the operating current, as a rule, it is 4A, 6A and 10A. If you need to connect a chandelier with a large number of lamps, for reliability, it is better to choose a device with a rated operating current of 10A.
To connect the switching device to the mains, wires with a cross section of 1.5 to 2.5 mm2 are usually used. In most switches, wires are connected to its terminals using screw clamps. Now there are more modern models with spring-loaded terminal blocks, in which the installation of the wire is much easier, you just need to insert the stripped tip into the clamping device. We advise you to opt for this option when buying switches.
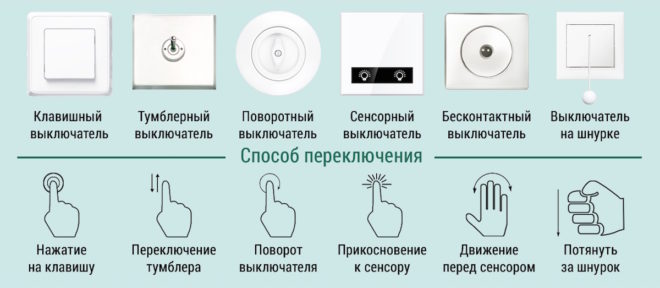
You can ask the seller what mechanism the keys work on - cam or swing. And also what the base of the switch is made of, it can be metal or ceramic, the second option is preferable and safer due to the low thermal conductivity of ceramics.
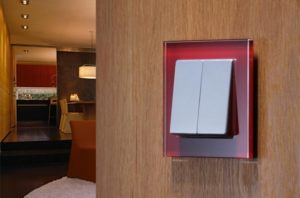
Now it is easy to choose a model that suits your interior, there is a huge selection of switches in any color on the market.
When buying, be sure to click the keys, they should work clearly, fix well, and emit a characteristic click when turned on and off.
Modern models are often made backlit. This is very convenient, you can safely stop your choice on this option. In the dark, entering the room, you can easily determine the location of the device by the luminous elements.
Choosing a switch from the point of view of an interior designer (video):
Constructive device and principle of operation
A switch with 2 keys is arranged is not difficult.
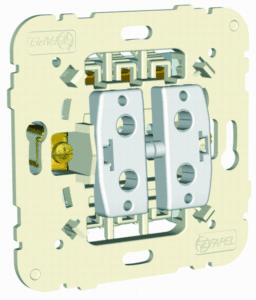 The main part is a working mechanism installed in a socket box. It is fixed in the junction box in two ways, depending on the switch model:
- using a metal frame in which there are specially designed holes for this;
- using spacer lugs.
The main part of the working mechanism is three contacts:
- one incoming, which must be connected with a wire to the power source;
- two outgoing ones, from them the wires go to two groups of lighting devices (or to two different rooms - a toilet and a bathroom).
All these contacts are stationary, and the connection between them is carried out using movable contacts located also in the working part.
The switch also has a protection consisting of two keys and a frame, they are made of plastic. Each key is attached to one drive mechanism, by pressing it will close the incoming and outgoing contacts, thereby supplying voltage to one group of lamps. The frame made of dielectric material is attached from above to exclude the possibility of touching the working part of the switch with the hand. It is fixed with latches or two screws.
Now let's summarize all this a little. From the junction box, a wire comes to the incoming fixed contact of the switch, it receives voltage from the power source. You press one key, with the help of a movable contact, the stationary ones (incoming and one outgoing) are closed, through the resulting closed circuit, the voltage goes to one group of lamps and the lamps in it light up. Similarly, press another key, and bring into operation the second group of lamps.
The reverse process is exactly the opposite. We pressed the key in the opposite direction, the movable contact opened the circuit between the incoming and outgoing fixed contacts, the voltage along the broken chain can no longer flow and the lamps on the lamps do not burn.
Connection diagram
 The wiring diagram for a two-button switch for two lights provides that the room has already been mounted:
- Junction box. It should be located under the ceiling (10-30 cm below it). You can install a new box or use an existing one, the main thing is that it is convenient for you to work in it.
- 2-key switch. There are no special requirements for its location, now, as a rule, the apparatus is installed at the level of an adult's lowered hand.
- There are lamps in two rooms (for example, a bathroom and a toilet). The main work will be done with cartridges.
So, the equipment is installed, it remains only to connect everything electrically to each other, apply voltage to the double switch, and from it to the lamps.
A two-core wire is suitable for the junction box, which supplies "phase" and "zero" from the mains.
There are three wires to the double switch. One of the junction box, through which the "phase" will flow to the incoming fixed contact, two more phase wires connecting the fixed outgoing contacts with the lamp holders.
In the lamp holder there are two contacts, one is connected to the "phase", to the second a zero core is attached, which is connected to the "zero" of the supply network in the junction box.
In the junction box, the wires are connected by twisting or using special clamps. If you use the first method, be sure to insulate the place of twisting well and put PVC tubes on top. It is very important that all contact connections are as reliable as possible. Poor contact will result in heat build-up and equipment failure.
The assembled circuit of the double switch is tested by turning on the input machine to the apartment, then by alternately pressing the switch keys and checking the operating state of the lamps (they should light up).
For a more complete understanding of the switch connection, we recommend watching this video:
Now you know how to connect a double switch, you are familiar with its characteristics, parameters, varieties and selection conditions. It remains only to ensure the correct operation of the device. Don't hit the keys with strength and the switch will serve you for many years.