Calling cables and wires when repairing wiring in an apartment

Checking wires and cables is a necessary procedure after complete or partial replacement of household wiring. In addition, it is necessary to ring the wiring in an apartment or car when an electrical fault occurs, but the exact location of its localization is unknown. Of course, it is easier and safer to use the services of a specialist to check electrical communications. But the electrician from the management company sometimes waits for days, and the prices of private craftsmen are very high. Therefore, more and more often, owners prefer to carry out simple work related to electricity on their own. And in this article we will talk about how to check the wiring in the apartment without resorting to outside help.
Content
Continuity of electrical wires and cables during the laying phase
The installation of new home wiring is always associated with certain difficulties, due to which the integrity of the conductors can be violated even before the trunk is used.
The new line is most often laid inside the grooves, or simply over the wall, which is then covered with a layer of plaster and subjected to other finishing work. An initial check of the wiring is done before the strobe is sealed or the wall is plastered.
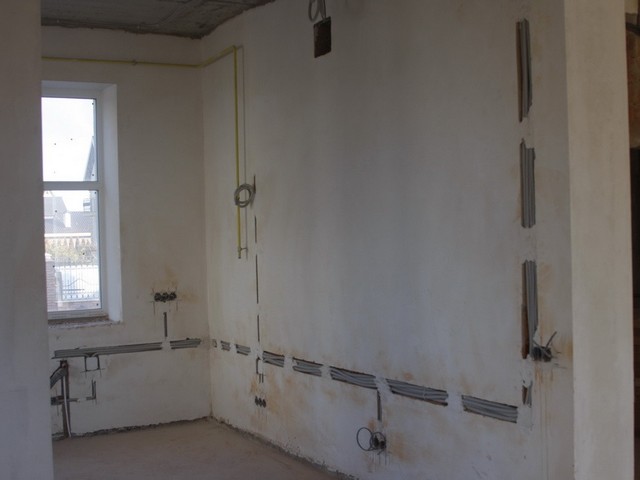
If the master was too lazy to do this, then it is possible that, after an unsuccessful attempt to turn on the light or use an outlet, he will have to chisel the plaster or open a groove in the thickness of the wall.
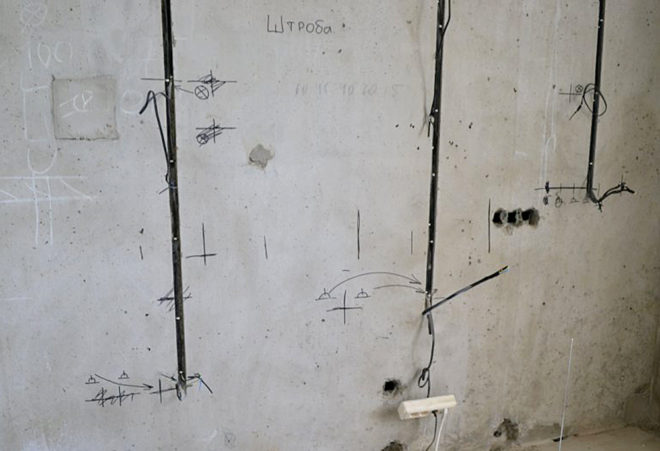
A wire breakage at the initial stage can occur due to the fault of both electricians and finishers. To avoid unpleasant consequences and unnecessary work, it is necessary to lay an electric line according to a diagram drawn up in advance. Before wiring the wires in the wall, it is necessary to check the wiring for an open circuit.
How to make sure that the wiring is working properly?
First of all, you need to make sure that the phase and neutral cables, as well as the ground wire, do not contact each other - that is, in the absence of a short circuit. If the quality of the conductor's insulation leaves much to be desired, then under the influence of high voltage it can be damaged, which with a high degree of probability will lead to a short circuit. Therefore, when buying an electric wire, you should not save too much and buy a cable focusing on the lowest price. If you are in doubt about the integrity of the insulating layer, check the line with a megohmmeter.
Having laid the line, you should not close up the strobe and plaster the wall without first inspecting the surface of the cable along its entire length for mechanical damage.
If the line is not closed, and no damage is detected during visual inspection, it is called for a break.
How the continuity of the wiring is performed during installation is in the following video:
How to ring the wiring in the apartment?
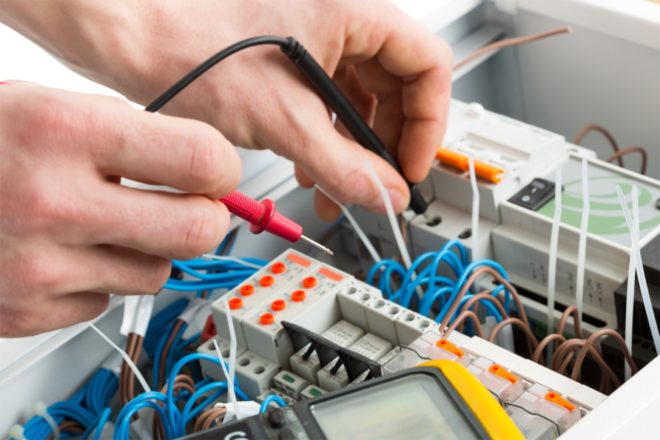
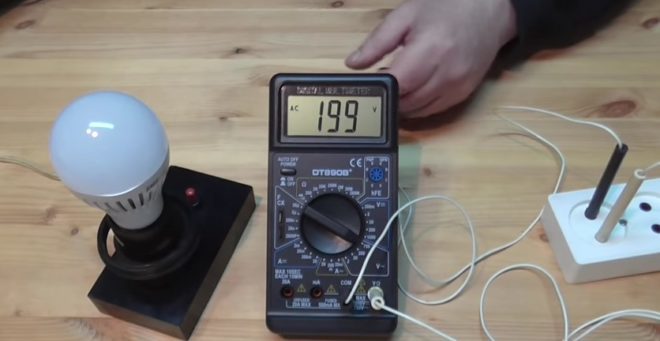
The most common way to check the health of an electrical line is to dial with a multimeter (tester). A multimeter is a measuring device with which you can measure various electrical characteristics:
- Current strength.
- Voltage.
- Resistance.
There are two main types of these testers: digital and analog (arrow). Moreover, the principle of their work is the same.The price of an ordinary multimeter is low, and we recommend that every owner have such a device in stock, since it will become a reliable assistant in almost any procedure related to electrical measurements and installation.
By setting your tester in the dial mode, you can easily check the presence of a contact on any part of the wiring, diagnose it for an open circuit, and also check the operability of the outlet or switch.
How to ring an electrical cable with a multimeter?
Do-it-yourself wire dialing using a tester is performed in the following order:
- Set the multimeter switch to the dial mode (as a rule, an LED icon is drawn opposite this division).
- The black test lead must be installed in the COM jack (sometimes it is indicated by a grounding sign or an asterisk). The red cable is inserted into the jack marked with Ω (or R).
- Switch on the tester (if it is not provided for its automatic activation when the handle is turned).
- Touch one probe to the other. The signal that sounded in this case will notify about the serviceability of the meter and its readiness for operation.
- On the wire under test, remove the insulation from the ends and strip them until a metallic sheen appears, and then touch them with the probes.
If the integrity of the cable is not violated, then the device will emit a sound signal, and 0 will appear on its display. The absence of sound and the number 1 on the display indicates that the tested conductor is cut off.
The whole process is clearly seen on video:
Household wiring dialing
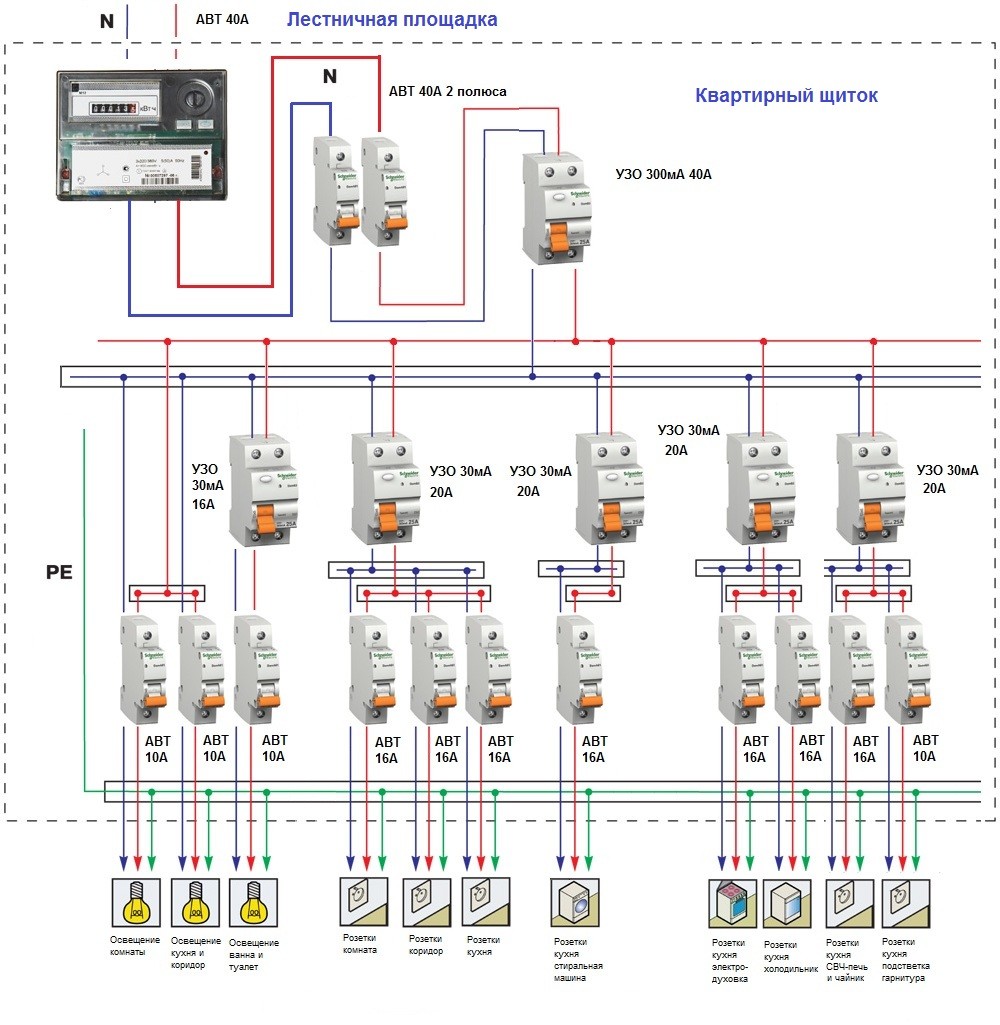
We are talking about an apartment in which the wiring of power lines meets modern standards and requirements: a separate line goes to each room, and its power is supplied through its own "machine".
If the light in the room suddenly goes out, but at the same time it burns normally in all other rooms, then first of all you need to check whether the lighting device is working properly. Before starting work, the power supply of the room must be turned off. If the lamp of the lamp is transparent, the broken filament will be immediately visible; if not, you will have to ring it with a multimeter.
First you need to see if the machines in the switchboard have worked or not. If they are on, the problem most likely lies in the socket, switch or the light bulb itself, and the wiring is working properly. When the machine is triggered, it is necessary to check all the elements of the circuit, except for the switch, including the switch itself.
The machine did not work
If the light goes out and the switch remains on, then you first need to ring the switch. If it is working properly, then when the element is in the on position, the multimeter should emit a sound signal, and in the off position, the number 1 should be displayed on the display if there is no sound.
Further verification takes place in the following order:
- Turn on the multimeter in voltage measurement mode, and then check the input and output of the circuit breaker.
- If there is a potential difference on the machine, unscrew the bulb from the socket and touch one probe to its central contact, and the second to the base. If at the same time there is no signal, and the display shows 1 or 0, the lamp is faulty.
- If the check showed that the light bulb is working, you should proceed to testing the cartridge. Having disassembled the lighting device, you need to inspect the connected conductors and contacts. If visual inspection does not reveal any problems, the problem is not in the cartridge.
Such a check usually allows one to establish that one of the listed items is defective. After replacing or repairing it, the problem disappears.
The machine worked
If the light in the room was turned off along with the operation of the machine, first of all, you should check the cartridge and the integrity of the cables connected to the lamp. How this is done was described above.
If no faults are found, you need to ring the wiring with a multimeter.
Damage to it does not happen often, but sometimes it does, for example, when installing decorative parts or installing suspended ceilings.
The procedure for dialing the electric line is as follows:
- Disconnect the supplied cable and lay it aside with a screwdriver.
- Unscrew bulb from socket.
- Put the multimeter in dial mode. With one of the probes, touch the zero core, and with the second, touch the end of the disconnected wire. At the same time, the tester's sound signal will notify about the shorting of the electrical wiring.

- After making sure that there is a short circuit, you need to find and then open the junction box and disconnect the conductors in it from each other.
- Check all cable groups for short circuit. To determine a closed area, you must first ring the circuit tester located on the apartment electrical panel. A signal that sounded at the same time will indicate a malfunction of the conductor leading from the shield to the junction box. If it is OK, then the diagnosis continues until a damaged cable is found.
An example of finding a wire break in the video:
From this material, you learned how to ring out the wiring for troubleshooting with a multimeter. This procedure is quite simple, but when it is carried out, as during any other electrical work, safety precautions should be strictly observed.