Three-phase voltage monitoring relay - purpose, installation and configuration

To use your home power supply safely, you need to ensure it is well protected. This is understood by the overwhelming majority of users, therefore, automatic switches are installed in all power lines, and often RCDs are installed along with them. However, these devices are not enough to protect the network from all negative factors. The machine will save the line from overload and short-circuit, the RCD will protect humans and pets from leakage current. But in the event of malfunctions in a three-phase network (this may be a break in one of the three phase cables, a neutral conductor, as well as a voltage surge caused by a thunderstorm), these devices are useless. You can prevent negative consequences by connecting a 3-phase voltage monitoring relay.
Content
Three-phase voltage relay: purpose and principle of operation
This device, as the name implies, is designed to control the potential difference in a three-phase network. Its indicator is 380V. Of course, there are small limits within which the voltage can fluctuate without harming the wiring and connected equipment. But if it gets too high or, on the contrary, low, serious problems arise.
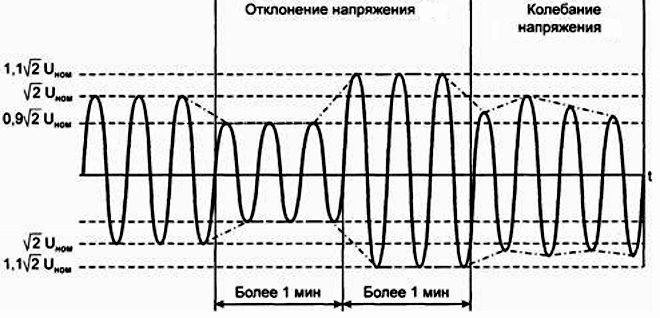
Too much voltage causes the cable insulation to overheat and melt. In addition, under its influence, household appliances included in the circuit burn out. If the potential difference is too small, then due to a decrease in power in the operation of the equipment, malfunctions begin, and some devices are turned off. For electric motors, the consequences of a voltage drop are even more serious - the units simply burn out. By installing a relay to monitor the phases, these problems can be prevented.
Many owners of private houses are deterred from buying phase control relays by the rather high price of the product. But the installation of this device in a three-phase network is quite justified, because the elimination of the consequences of a line failure together with connected devices will cost tens, or even hundreds of times more expensive. Not to mention the fact that a voltage failure in the 380V network can cause a fire.
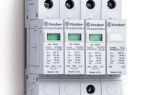
Now on sale there are various types of ILV, differing from each other in design features and functionality. But they all work according to the same principle.
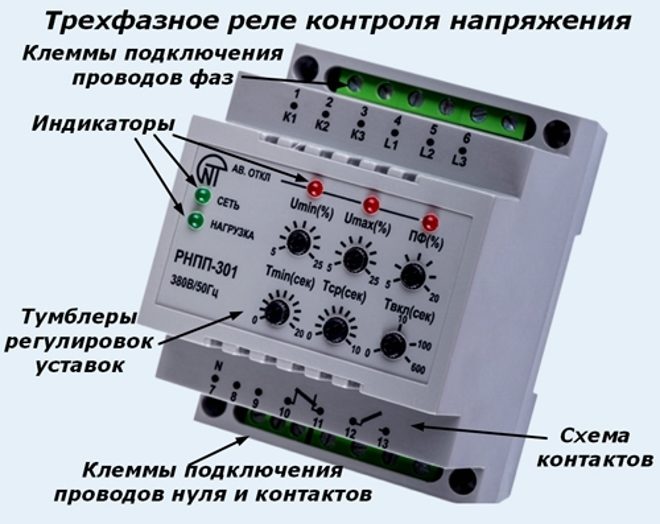
The mains voltage monitoring relay (3-phase) has a microcontroller in the circuit, through which the device monitors the potential difference in the phases.

When the voltage value on one conductor changes under the influence of the controller, an electromagnetic relay is turned on. This happens automatically. The contacts of the instrument open and the power supply to the line is cut off. After the voltage parameters return to normal, the current will again be put into the circuit. No outside intervention is required for this.
You can use a tester to check the ILV. If the device is in good working order, then when the probes of the multimeter touch the contacts numbered 1 and 3, the display of the measuring device should show the number "1". When the probes are closed contacts 2 and 3, the tester should show "0".
Installation procedure
Monitoring relays are usually mounted on a DIN rail. The devices may differ from each other in the connection scheme, but since it is applied to the body of the device, there are usually no problems with connecting the RKN. The connection of the input contacts to the line should be made through the starter.
The relay connection diagram is shown in the figure below.
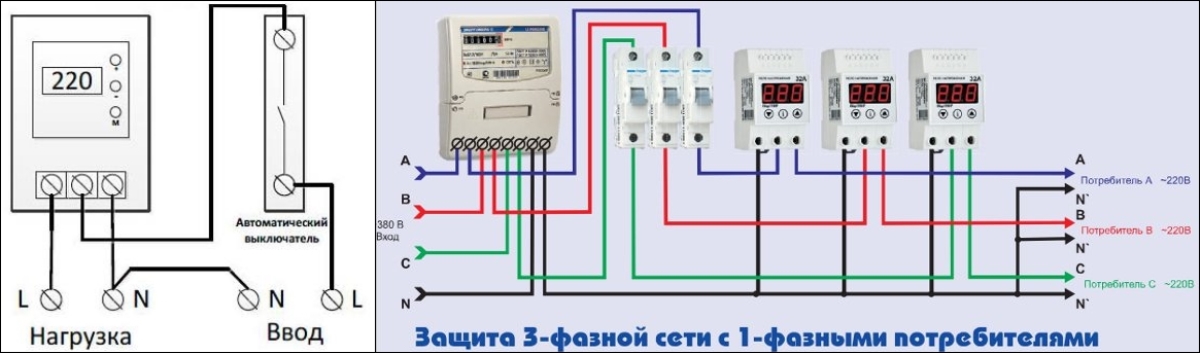
It is important to ensure good contact at all connections. Do not twist, especially when connecting cables to the contactor. It is best to purchase special tips for this purpose - they are quite inexpensive.
RKN is connected to a three-phase power grid through wires. Copper cables with a diameter of 1.5-2.5 sq. mm are quite suitable for this purpose.
Clearly about the connection on the video:
How to set up a voltage relay?
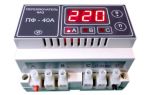
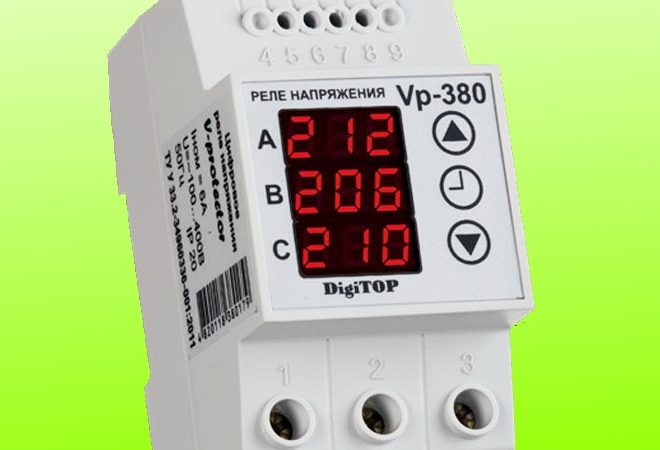
Let's consider the procedure for setting up the device using the example of the VP-380V device. When the device is already connected to the circuit, you need to apply power. Then we look at the display readings:
- While the device is not energized, the digits displayed on it flash.
- The appearance of dashes on the display may indicate a changed phase sequence, or the absence of one of them.
- If the connection is made correctly, and the network parameters are correct, after 15 seconds the relay contact 1-3 closes, and the power will begin to flow to the contactor coil, and then to the line.
- If the device screen blinks for a long time, the contactor will not turn on. Check the connection - most likely there was a mistake somewhere.
After making sure that the connection is correct, you can proceed to the settings. Next to the relay screen, there are 2 tuning buttons with triangular designations.
On one button, the top of the triangle is directed upwards, on the other - downward. Press the upper button to set the maximum shutdown limit. In this position, you need to keep it for 2-3 seconds. In the center of the monitor, a number corresponding to the factory level will be displayed. After that, by pressing the buttons, set the desired upper limit for switching off the control device.
The lower limit is set in the same way. The device will be programmed automatically, 10 seconds after the end of the setting. In this case, all set parameters will be saved in the relay memory.
How to set the re-disconnection time?
On the body of the device, next to the display, there is a button for setting the reclosing time. It is located between the ▲ and ▼ buttons, indicated by the clock icon. After pressing and holding it, the display will show the adjustment number set at the factory. Most often it is 15 seconds.
What does this feature do? If, for example, a potential difference occurs on one phase that exceeds the limit values, the relay will disconnect the mains supply.
After the voltage has returned to normal, the control device will turn on the power supply after the period set at the factory setting (15 seconds). To change the value, hold down the setting button until this number appears on the screen. After that, set the desired number by manipulating the upper or lower button. The step of change provided by the device is 5 seconds.
How to adjust phase imbalance?
To set the interval between voltage readings on different phase conductors, press the upper and lower buttons simultaneously. The value of the factory setting will appear on the screen; as a rule, it is 50V. This indicates that the relay will stop supplying power when the phase voltage difference is 50V.
You can change this value by pressing both buttons at the same time, and then setting the desired number up or down.
More details about the settings on the example of one of the models in the video:
Conclusion
In this article, we figured out in detail what a three-phase voltage relay is for and how to configure it.
It is not difficult to connect and configure the device, this procedure will take no more than 30 minutes. If the installation was completed without errors, the relay will provide reliable protection of the home line from voltage surges in the supply network.