How to ring the wires with a multimeter
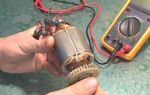
If you need to find a malfunction of equipment or electrical wiring, one of the operations that is performed first is to test the cables and wires with a multimeter (tester) to check the serviceability of the circuit (no breaks in it), the presence of a short circuit and determine its resistance (if necessary ). Thus, it is possible to easily and quickly enough check the lamp, iron, switch, fuse, transformer for serviceability. How to ring the wires with a multimeter correctly will be discussed in this article.
Content
What you need to know about the device to ring the wires

If you plan to ring the wiring in the apartment, you need to know a few fundamentally important facts about multimeters. First of all, it is worth noting that you can check the wire with the simplest device. An inexpensive Chinese model with minimal capabilities is quite suitable.
But at the same time, it is most convenient to use a device that has a dial function itself. In order to set the handle of the device to the appropriate position, it is necessary to turn it in the direction of the diode icon (as an option, an image of a sound wave can be additionally applied). This means that when checking the continuity of the wire, a beep will sound when the contacts are closed.
But the presence of a soundtrack is completely optional for the continuity of the wires with a multimeter. An open circuit will be indicated by a unit on the display indicating that the resistance level between the probes is higher than the measurement limit. If there is no damage in the investigated area, the resistance value will be displayed on the screen, which, ideally, should tend to zero (provided that you work in small household networks).
Sequence of actions when dialing
- Before ringing the circuit with a multimeter, you need to turn the handle of the device to the desired position.
- Install the ends (test leads) into the corresponding sockets. The black wire goes into the socket marked COM (sometimes it can be marked with "*" or the grounding sign), and the red wire goes into the socket where the Ω sign is indicated (sometimes they put the R sign). It should be noted that the Ω sign can be applied either separately or in combination with the designations of other units of measurement (V, mA). This is the correct position of the test leads, which will allow you to observe the polarity during further measurements. Although if only the integrity of the wires is checked, their mutual position will not affect the result obtained.
- Switch on the device. For this, a separate button can be provided or switching on can occur automatically when the knob is turned to the desired position when choosing the measurement limits or operating mode.
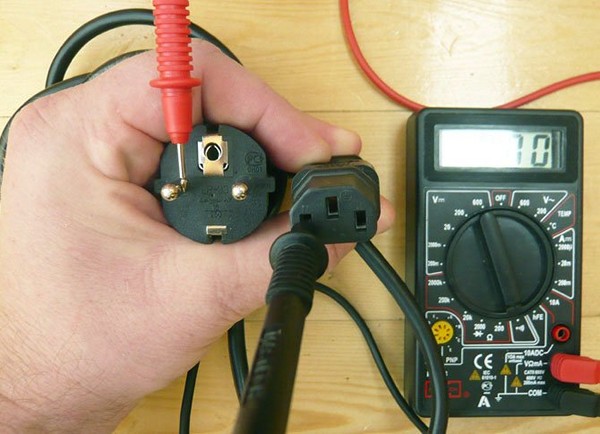
- Close the measuring ends together. If a signal sounds, it means that the device is working properly and is ready for operation.
- Take the cable or wire under test (its ends must first be stripped of insulation, stripped to a metallic sheen, dirt and oxides removed from the surface). Touch the test leads to bare areas of the conductor.
- In case of continuity, a beep will sound and the meter reading will either be 0 or indicate the resistance value. If the display shows 1 and there is no sound signal, it means that the tested conductor is broken.
Safe dialing rules using a multimeter
Working with electricity does not allow unprofessionalism, therefore, there is a certain list of rules that make it as accurate, fast and safe as possible.
- It is most convenient to use special tips at the ends of the test leads for continuity, which are more commonly called "crocodiles". They will make the contact stable and free your hands when taking measurements.
- When dialing, always the tested circuit must be previously de-energized (even low-current batteries must be removed). If there are capacitors in the circuit, they must be discharged by shorting. Otherwise, the device will simply burn out during work.
- Before checking the integrity of a long conductor during measurements, it is important not to touch the bare ends with your hands. This is due to the fact that the resulting readings may be incorrect.
When a multi-core cable is ringing, it is necessary to separate and strip all existing cores from both ends. After that, you need to check the circuit for the presence of short circuits: for this, a "crocodile" is fixed on each core one by one, all the rest are touched with the other measuring end in all possible combinations.

In this case, the sound signal will mean the presence of a short circuit between the tested cores. This may not be of practical importance for small cross-sectional multicore cables operating in low-current networks, but when working with high voltage it is fundamentally important.

To determine the integrity of the cores, the same operation is performed, only at one of the ends of the cable, all the stripped cores are twisted together. When searching for a break, it is important to take into account that the absence of a sound signal at any of the ends will indicate a violation of the integrity of the conductor.
We call the wiring in the apartment with a multimeter
Consider, as an example, a modern apartment in which the wiring is done in accordance with current requirements and regulations. This means that when laying the lines for lighting and powering the outlets, separate wires were laid in each of the rooms for them. Each of these circuits is powered from the apartment panel through a separate circuit breaker.
If the light has disappeared in one of the rooms, first it is worth checking the serviceability of the lamp. Before starting work, it is necessary to de-energize the room / apartment, depending on the power supply scheme. When an opaque incandescent lamp is used in a luminaire, it is difficult to visually determine the integrity of the filament, so a multimeter and its continuity function will be required. Let's figure out in stages how to do this correctly.
First you need to check the shield for the presence of triggered machines. In the first case, they will be in the on position (then the malfunction may be hidden in the room switch, lamp or socket). The likelihood of damage to the wiring in such a situation is small. If the device has worked, you will need to check everything except the room switch, including the switchboard itself.
If the machines did not work

- Make sure that there is voltage at the input and output of the machine. If it is, you can proceed to further verification.
- Prepare the device for operation and check its serviceability by short-circuiting the measuring ends.
- Unscrew the lamp from the socket.
- With one of the measuring probes touch the base (the metal part of the threaded lamp), and the second touch the central contact of the lamp (the insulated center of the end part of the base).
- A beep and a readout other than 0 or 1 mean that the lamp is working properly. If it is faulty, you need to replace it, which will be the solution to the problem.
- We check the cartridge for serviceability. To do this, you need to disassemble the lamp, make sure the integrity of the supplied wires and contacts. If everything is in order, then the cause of the breakdown is not in the cartridge. If faults are found, they must be eliminated. The lamp must not be screwed in yet.
- We check the serviceability of the room switch. To do this, remove the plastic cover, unscrew the screws and take it out of the mounting box. We inspect the equipment for the appearance of carbon deposits, check the tightening of the fasteners. If everything is in order, you need to install the measuring ends of the tester on the contacts of the switch. The appearance of a sound signal when dialing in the on position will indicate that the equipment is working properly. In this case, the wires do not need to be disconnected.
During such a check, as a rule, a malfunction is revealed, which becomes the cause of all the troubles. Eliminating it allows you to quickly solve the problem.
If the machine is triggered
To ensure electrical safety during work, in this case, the voltage is turned off using a general apartment machine. Next, the health of the cartridge and the wires connected to the lamp is determined according to the algorithm described above. In the absence of faults, you need to check the wiring itself using a multimeter and a dial function. Such malfunctions are rare enough, but they still happen, for example, when installing suspended ceilings or decorative interior elements.
In this case, the wiring call is performed as follows.
- Using a screwdriver, disconnect the supplied conductor (if the installation is done correctly, it is at the bottom) and take it to the side. The "zero" of this group is, as a rule, on the zero clamp under the machines.
- We unscrew the incandescent lamp from the holder. With the help of a tester, ready for operation, we check the line by connecting one of the measuring probes to "zero", and the other to the disconnected conductor. If the device beeps, then the wiring is shorted.
- In this case, in the room under the ceiling above the switch, we find and open the junction box. Disconnect the wires.
- We check all groups of wires for a short circuit.
To determine the section of the circuit in which there is a short circuit, we again check the circuit on the apartment panel with a multimeter. If the signal sounds, it means that it is the wire laid from the shield to the box in the room that needs to be repaired. Otherwise, the search will need to continue until the result is obtained.
Video
From all of the above, we can conclude that having a multimeter with a dial function in the house is an objective necessity for any home craftsman. With such a device, in most cases, it will be possible to quickly eliminate minor malfunctions without seeking help from specialists.