Setting up and using the programmable socket
Controlling electrical appliances that require periodic switching on for a certain time: street lighting, heating, aquarium compressor - can be carried out by smart sockets with a countdown function. The socket timer can be mechanical or electronic. Each of them has its own characteristics and functionality.
Content
Functions
The timer socket can be used for a wide range of applications.
Above all, a programmable household socket allows you to save energy. She will turn off the electric heating during the absence of the owners and turn it on before they arrive for the period of time necessary to reach normal temperature. Not every socket with a timer is designed to control powerful heating devices, so when buying, you should read the instructions.
An automatic socket with a timer allows you to regulate outdoor lighting and control irrigation in an automatic mode. She will also control the electrical equipment of aquariums, terrariums and swimming pools according to a given schedule.
Electronic timers allow programming of a time schedule without a rigid time reference, with random on-off cycles. This mode of operation simulates the presence of people, with their actual absence in the house, which will scare off the criminally-minded contingent.
Sockets with countdown timers are also available. Devices of this type are used in washing machines and electric stoves. The required time is indicated by turning the knob of the time relay, after its counting the load is switched off.
Timer types
The considered devices are divided according to the principle of operation of timers into mechanical and electronic.
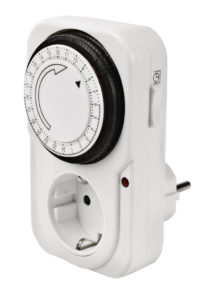
The simplest version of a mechanical timer is a countdown timer based on a clock mechanism, which is wound by turning the knob.
The most popular are sockets with mechanical daily programs. Since the clockwork motor requires electricity to operate, they are sometimes called electromechanical timers. Batteries are used as backup power. The load management program is created mechanically by a series of segments at 15 minute intervals.
An electronic timer for a household outlet makes it possible to set the execution of programs for a week and a month, as well as display the real time and parameters of the set programs on the liquid crystal display.
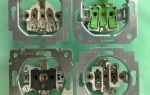
Features of the electromechanical timer
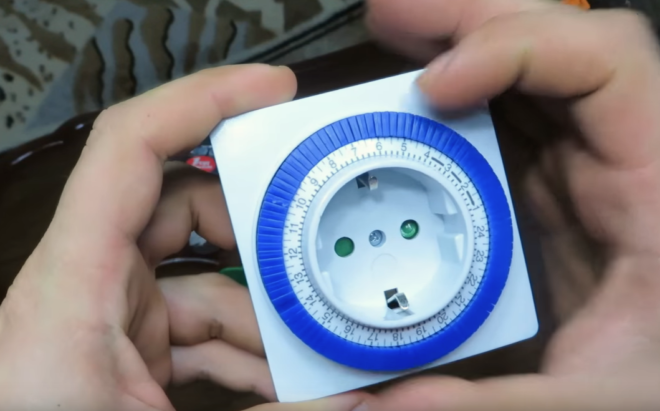
 A mechanical socket with a disk timer is programmed using a rotating actuator disk and buttons (petals) located around its circumference. The disc is marked with risks at 15 or 30 minute intervals. The buttons can be used to switch the load on and off. Models are available in which the raised button will turn off, for others - the opposite. On the side of the timer there is a button for switching the operating mode - continuous voltage supply and adjustable.
These devices allow switching the load with an interval of 15 minutes without limiting the number of switching operations. But it is practically impossible to install programs with a complex algorithm, and even more so arbitrary ones. Mostly daily and weekly cycles are used.
Setting instructions
How to set up a mechanical timer for an outlet correctly, the instructions for the device clearly show. It all comes down to the following steps:
- set the mode switch to the position of constant voltage supply;
- by rotating the executive disk, set the real time - a mark with its value opposite the stationary one;
- to set the connection-disconnection time periods, press or release the buttons corresponding to the required period;
- insert the plug of the connected device into the timer plug;
- connect to a power outlet;
- Move the mode selection button to the "Adjustable" position.
The device emits a low buzzing sound during operation. The set mode can be performed every day. When editing it, the socket with the timer must be disconnected from the mains.
For more information on setting up a mechanical outlet, see the following videos:
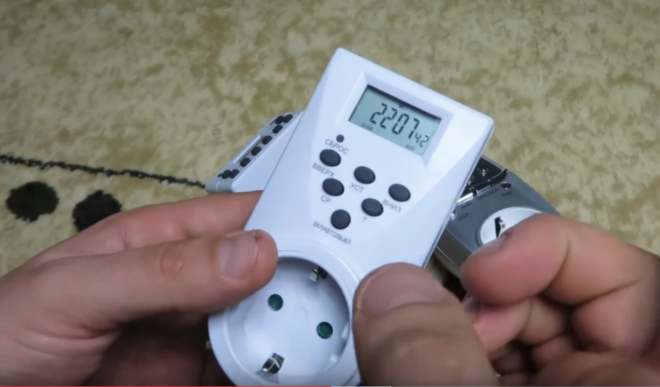
Electronic timers
These devices make it possible to set up to 140 programs for controlling electrical appliances. Many of them have a mode of operation that creates a "presence" effect, which allows you to control the lighting in the house in a chaotic manner at a given time (for example, from 19.00 to 24.00). The smallest segment of the set time is 1 minute.
The advantages of electronic timers are:
- the ability to specify the days of the week for the implementation of a given program
- manual and automatic switching on;
- autonomy of work - the capacity of the backup battery allows you to save the settings for 4 days;
- a separate program with a validity period of more than 2 years.
Setting the electronic timer
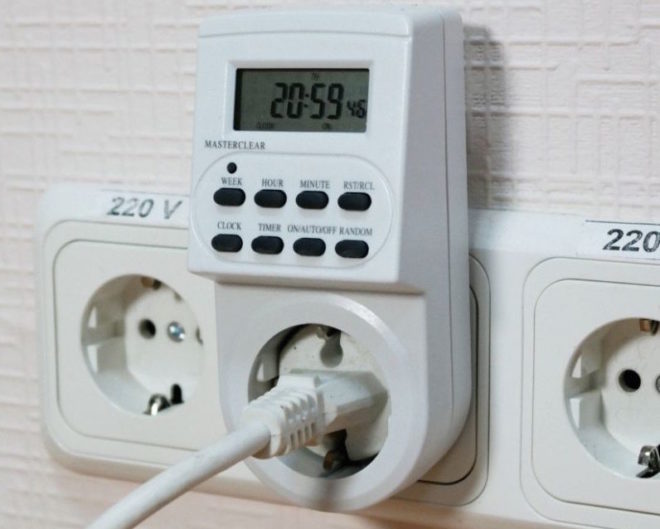
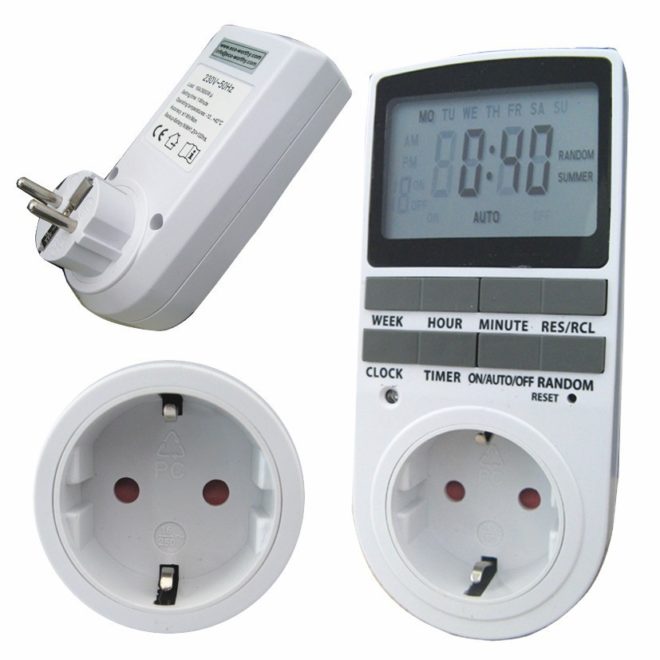
Before setting up an electronic timer, you need to know what the available keys are for:
- MASTER CLEAR - completely clears all device data.
- CLOCK - multipurpose, responsible for:
- Real time setting. Pressed together with HOUR, MIN, WEEK;
- switching time formats - twelve and twenty four hours. Pressed together with TIMER;
- setting of winter or summer time paired with ON / AUTO / OFF.
- TIMER - programming the time of delays. Pressed together with WEEK, HOUR, MIN and CLOCK keys.
- WEEK - used to set the day of the week.
- HOUR - sets the hours.
- MIN - sets the minutes.
- ON / AUTO / OFF - turns on the desired operating mode - ON / AUTO / OFF.
- RANDOM - turns on the presence mode.
- RST / RCL - disables and enables programs.
The setting begins with the real time setting. When the CLOCK key is held down, the hours are set with the HOUR key, and the MIN key for the minutes. The desired format, 12 or 24 hours, is set with the TIMER key.
The day of the week is set using 2 keys. First CLOCK is pressed and the day of the week is selected with the WEEK key. The choice of summer or winter time is made by pressing the ON / AUTO / OFF key while pressing and holding CLOCK.
Operating modes
Electronic timers have four main operating modes:
- off, regardless of the configured settings, load control is disabled. To enable the mode, set the Manual OFF value with the ON / AUTO / OFF key;
- included. Switching to this mode is carried out by selecting the Manual ON value with the ON / AUTO / OFF key;
- auto. This mode is activated when the AUTO mode is selected with the ON / AUTO / OFF key. Then the installed program starts to run;
- execution of the "presence" mode. It turns on after pressing the RANDOM key and setting the value to R.
To create programs, press the TIMER key. You can select previously created programs with it. Then perform the following sequence of actions:
- by short pressing TIMER, the indicator will show ON 1. This informs that the load connection time is being adjusted;
- the WEEK key selects the day of the week. The hours and minutes are set with the HOUR and MIN keys.
- after setting the connection time, the TIMER key is pressed again - the indicator will show OFF 1. After that, in the above order, the disconnection time is set;
- setting up the next program is similar. A quick view of the created programs is carried out by pressing and holding TIMER;
After completing all settings, CLOCK is pressed to save them and turn off the programming mode. A smart socket with a digital timer is ready for use.
Learn more about the electronic timer settings in this video:
As a result, when choosing timers, one should take into account that the cost of electronic devices is much higher than electromechanical counterparts. Their purchase is justified if there is a need for a weekly or monthly execution of a given program or for use in the "presence" mode. If a regulator with a daily cycle is required, preference should be given to an outlet with a mechanical timer.