How to properly connect wires together
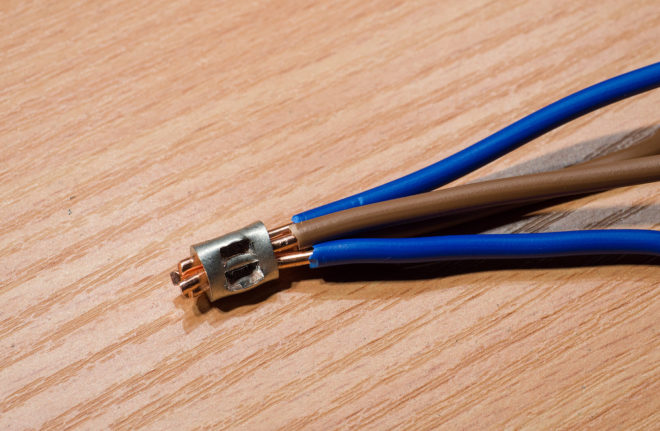
To ensure that the power supply in your homes is always of high quality, uninterrupted and reliable, it is very important to correctly connect the wires during installation work. There are many ways, we will consider each separately in detail with its advantages and disadvantages, with step-by-step instructions for performing switching. We will also pay attention to the eternal question of electricians - how to connect wires, the cores of which are made of different metals (for example, copper and aluminum).
Content
Removing the insulating layer from the wires
I would like to immediately dwell on a question that will be common to any method. Before connecting the wires to a common electrical unit, they must be stripped from the upper insulating layer.
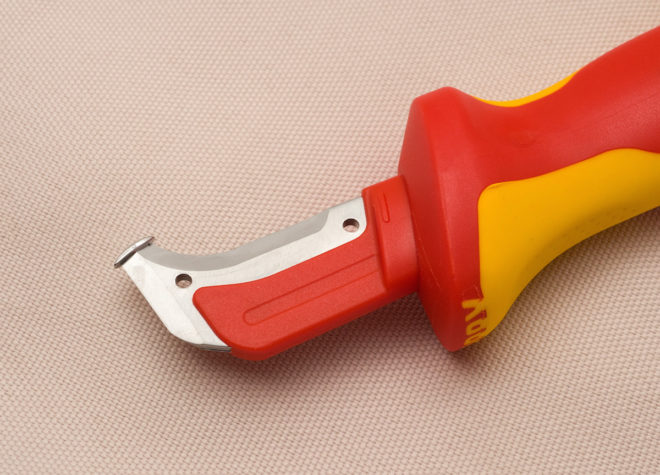
This can be done with an assembly knife. This method is simple, but there is a high probability of damage to the conductive core. To do everything right, you must clearly follow the step-by-step instructions:
- Place the wire on a flat surface (such as a table).
- Press it down with your left index finger.
- Take a knife with your right hand and lightly press it into the insulating sheath of the wire. To avoid snagging the metal core, position it at an angle towards the cut. If the angle is right, there is a possibility of a circular cut in the core, as a result of which it can subsequently break.
- Holding the knife in this position. With the index finger of your left hand, slowly rotate the conductor one full turn, thus cutting the insulation around the entire circle.
- It remains only to pull off the cut piece of insulation.
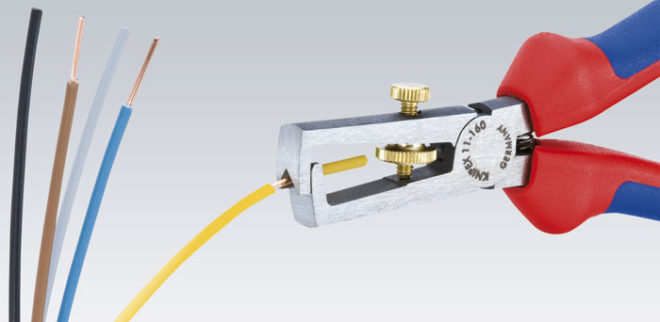
Professional electricians now necessarily have such a device as a stripper in their arsenal. It is a multifunctional tool that can be used to strip a wire or strip a cable. It can be simple, semi-automatic, and automatic. The most important thing is that when the insulation is removed with a stripper, the conductor is not damaged. For each standard core diameter, such a tool has a calibrated hole with a cutting edge.
The length for which it is necessary to strip the conductors of the wires is different for each connection method.
Twisting
Let's start with the simplest and most well-known method - twisting. It can also be called the most ancient, it is not for nothing that electricians call twisting among themselves the “old-fashioned method”.
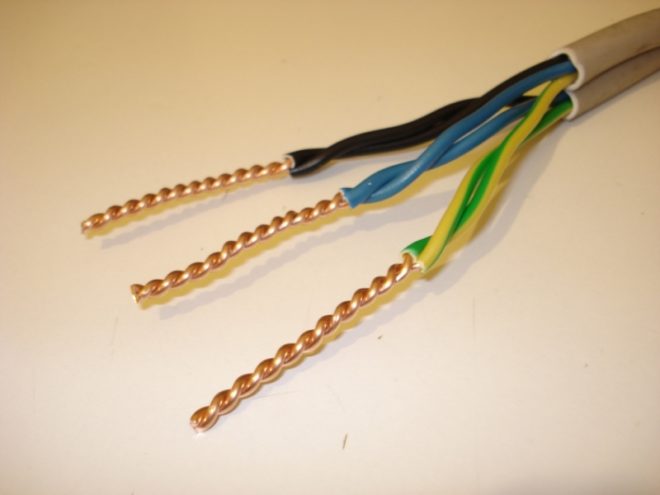
We will not tell you that such a wire connection is durable and reliable. According to the main document in electrical engineering PUE ("Electrical Installation Rules"), twisting is generally prohibited, despite the fact that half a century ago it was used everywhere. The fact is that in those days, the load in the apartments consisted only of lighting, radio or TV. Considering the current load in modern apartments with a huge amount of household appliances used daily, then no old insulation, conductor cross-sections and wire connection methods are suitable anymore.
Nevertheless, we will talk about twisting, and even in the first place, because it is the main stage of such connection options as welding and brazing.
Positive sides
The most important advantage of twisting is that it requires absolutely no material costs. All you need is a knife to remove the insulating layer from the wires and pliers to make the connection.
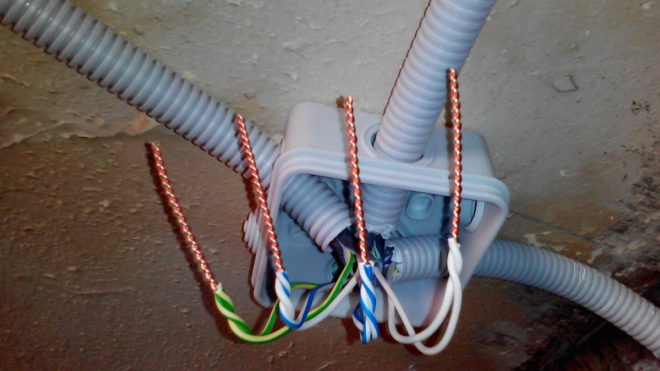
The second indisputable advantage of twisting is the simplicity of execution.You do not need any special knowledge or skills, it can be done by anyone who has ever held pliers in his hands.
In twisting, you can connect several wires at the same time, but their total number should not exceed six.
Negative sides
The main disadvantage of twisting is its unreliability; it weakens over time. This is due to the fact that residual elastic deformation is present in the cores of the cable or wire. In the place of twisting, the transition resistance increases, which is fraught with contact failure and heating. In the best case, you will find it in time and re-seal the connection, in the worst case, a fire may occur.

By means of twisting, it is impossible to connect electrical wires made of different metals. As an exception, you can twist copper and aluminum wire, but only if the copper core is previously tinned with solder.
In electrical engineering, there are concepts of a detachable or non-detachable connection. So twisting does not apply to either one or the other. A detachable connection is characterized by the fact that its ends can be disconnected many times. In twisting, this cannot be fully done, every time after the next promotion and twisting of the veins, they will deteriorate. It is also impossible to call a twist an integral connection, because it lacks the necessary concepts of strength, reliability and stability for this. This is another drawback of the twist connection.
Mounting
If for some reason you do not have the opportunity to use other methods of connecting electrical wires, you can use a twist, just do it well. Very often it is used as a temporary option and is subsequently replaced by more reliable switching methods.
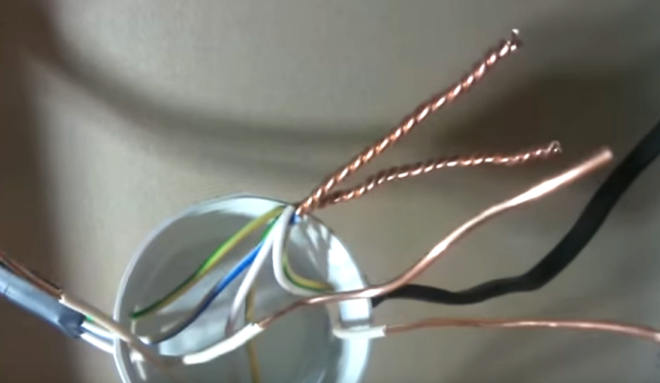
How to connect wires using twists? To begin with, the veins are stripped by 70-80 mm. The main thing is to twist all the switched conductors into one single twist at the same time, and not wind one around the other.
Many people mistakenly begin to twist the conductors together from the place where the insulating layer ends. But it is better in this place to clamp both veins with some pliers, and with the second to grab the ends of the wires and make rotational movements in a clockwise direction.
If the wire is small, you can twist it by hand. Align the conductors with the insulation cutoff and hold them firmly in place with your left hand. Bend all the switched ends into one single bend at an angle of 90 degrees (a bend length of 10-15 mm will be sufficient). Hold this fold with your right hand and rotate it clockwise. This must be done firmly and firmly. If it is already difficult to twist with your hands at the end, use the pliers as described above. Once the curl is flat and beautiful, you can trim the fold.
You can also connect several wires in this way, but then, to make it easier to twist them, make the bend longer, somewhere on the order of 20-30 mm.
How to properly twist the wires is shown in this video:
There is also a way to twist wires using a screwdriver, see about it here:
For twisting wires with a special tool, see here:
Now the resulting twist must be carefully insulated. For this, electrical tape is used. Do not feel sorry for it, wind it in several layers, and not only isolate the connection itself, but also step 2-3 cm over the insulation of the cores. Thus, you will ensure the insulating reliability of the twist and protect the contact connection from moisture.
It is also possible to insulate the wire connection using thermal tubes. The main thing is not to forget to put the tube on one of the wires to be connected in advance, and then put the twists in place. Heat shrinks the heat pipe, so slightly heat its edges, and it will firmly grip the wire, thereby providing reliable insulation.
If the twisting is done with high quality, it is likely that it will serve you for many years, provided that the load current in the network is normal. But still, it is better not to stop at this stage and strengthen the joint by welding or soldering.
Soldering
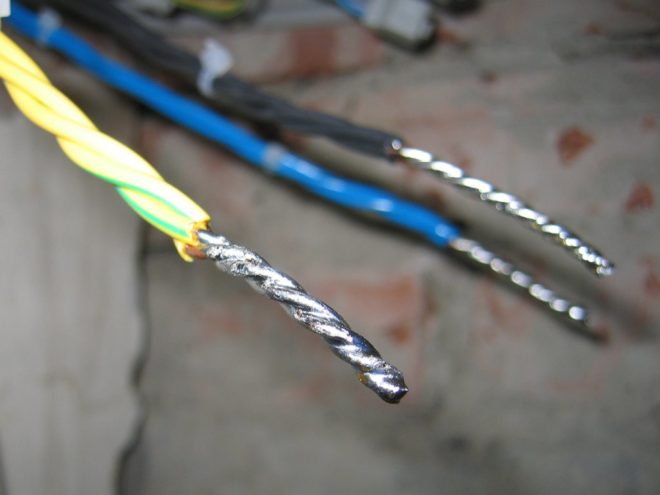
Soldering is when electrical wires are connected using molten solder. This type of connection is most suitable for copper wires. Although there are now various fluxes for aluminum, experienced electricians prefer to refrain from such soldering. But if necessary, you can use special fluxes and even solder copper with aluminum.
Positive sides
This type of connection with twisting cannot be compared, soldering is much more reliable (in terms of reliability, it is second only to welding).
With the help of soldering, you can connect stranded and solid wires, as well as cores of various cross-sections.
This type of connection does not require any maintenance during the entire period of operation.
Soldering is considered low in cost, only a soldering iron is needed from the devices, and flux with solder are very inexpensive, and their consumption is very scanty.
Negative sides
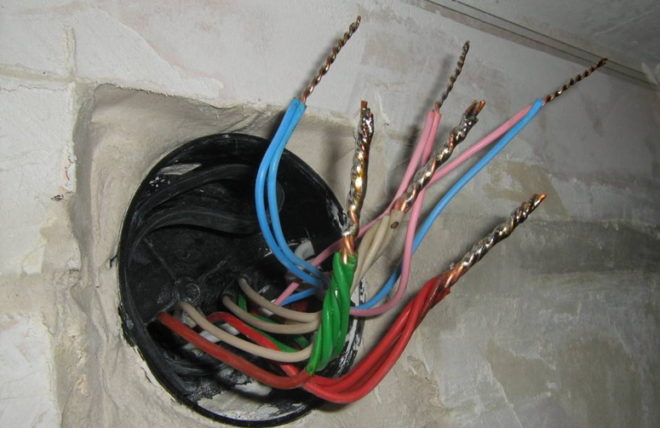
The disadvantages of this method include high labor intensity. Soldering requires certain preparatory work, the conductors of the wires must be tinned before twisting. The surfaces to be soldered must be free of oxides and absolutely clean before starting work.
And of course, you need experience in owning a soldering iron, that is, the one who will connect the wires using the soldering method must have a certain qualification. Indeed, in the process of soldering, it is very important to maintain the required temperature regime. An unheated soldering iron will not warm up the connection well; overheating is also unacceptable, because the flux will burn out very quickly, without having time to do its job.
Soldering is a slow process, but this disadvantage is compensated by the reliability that is obtained from the contact connection.
Mounting
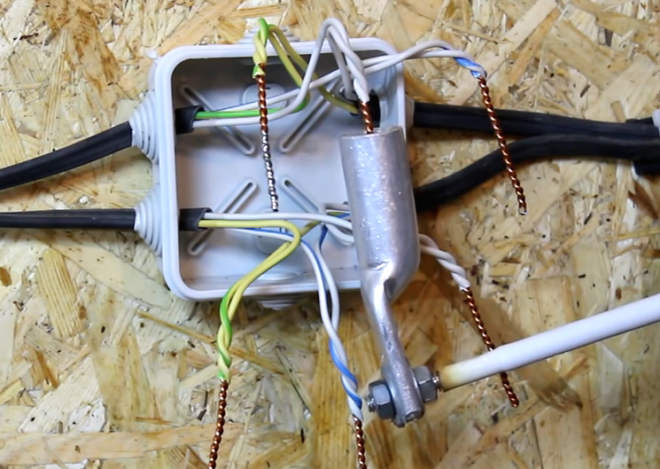
The step-by-step process for performing soldering is as follows:
- Strip the insulation from the cores by 40-50 mm.
- Sand the bare cores until shiny with sandpaper.
- Dip a heated soldering iron in rosin and run it over the cleaned surfaces several times.
- Twist.
- Bring the soldering iron tip to the solder.
- Now immediately heat the twist with the recruited solder, the tin should melt and fill the gaps between the turns.
- Thus, the entire twist is wrapped in tin, after which it is allowed to cool.
- Wipe hardened solder with alcohol and insulate.
Soldering wires with a soldering iron is shown in this video:
Soldering wires with a gas soldering iron:
Soldering twists by dipping into molten solder:
Welding
In order for the connection of electrical wires to be as reliable as possible, the considered twisting method must be further secured by welding. It is similar to soldering, only now a welding machine is used instead of a soldering iron.
Positive sides
This method is most preferable over all the others, since it meets all regulatory requirements in terms of reliability and quality.
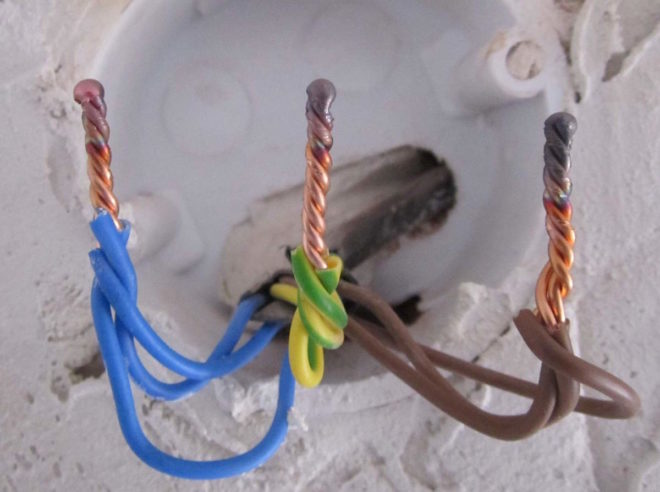
The welding method is based on contact heating of the wire ends with a carbon electrode until a ball (contact point) is formed. This ball is obtained as a single whole from the fused ends of all the connected cores, which provides safe and reliable contact, it will not weaken and oxidize over time.
Negative sides
The disadvantage of welding is that to carry out such work, certain knowledge, experience, skills and special devices are needed, often you have to contact specialists.
Mounting
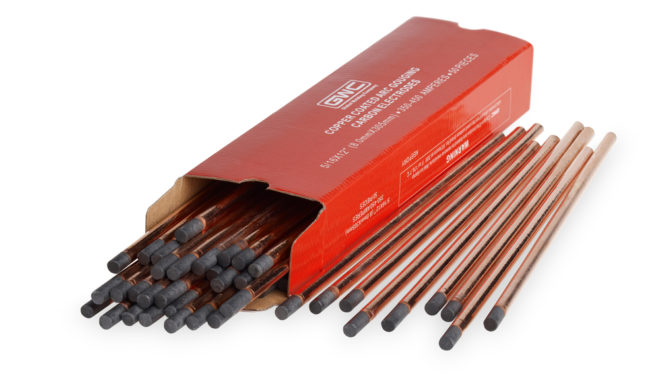
In order to make a wire connection by welding, you will need the following fixtures, tools and materials:
- a welding inverter with a power of at least 1 kW, its output voltage must be up to 24 V;
- carbon or graphite electrode;
- glasses or a mask for eye protection;
- welding leather gloves for hand protection;
- an assembly knife or stripper for removing the insulating layer from conductors;
- sandpaper (for cleaning the connected conductive surfaces);
- insulating tape for further insulation of the welding joint.
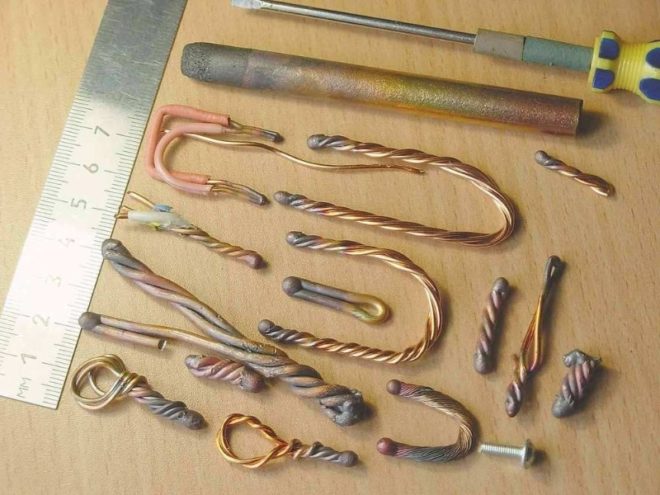
The sequence of work is as follows:
- Free each wire to be connected from insulation by 60-70 mm.
- Sand the exposed veins to a high gloss with sandpaper.
- Twist, after biting off, the length of its ends should be at least 50 mm.
- Fasten the grounding clamps on top of the twist.
- To start the arc, bring the electrode to the bottom of the twist and lightly touch the connected wires. Welding is very fast.
- It turns out a contact ball, which you give time to cool down, and then insulate with tape.
As a result, an almost solid wire is obtained at the end, that is, the contact will have the lowest contact resistance.
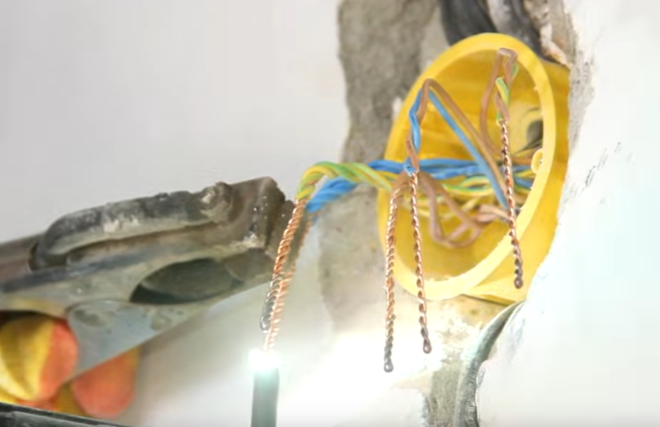
If you will connect copper wires in this way, then choose a carbon-copper electrode.
I would like to recommend that if you purchase a welding machine (after all, it will come in handy not only to connect wires, but also for many other purposes), then choose the inverter option. With small dimensions, weight and consumption of electrical energy, it has a wide range of welding current adjustment and produces a stable welding arc. And this is very important to be able to adjust the welding current. If you choose it correctly, the electrode will not stick, and the arc is stable.
How welding is performed, see this video:
We examined the main types of wire connections. Now let's briefly talk about methods that are used less often, but also guarantee quality and reliability.
Crimping
For this method, special tubular sleeves or lugs are used, with the help of which the wires to be connected are crimped and crimped. The essence of the method lies in the joint deformation of the sleeve and the veins inserted into it. When deformed, the sleeve shrinks and squeezes the conductive surfaces. The conductors come into mutual engagement, which ensures the reliability of the electrical contact.
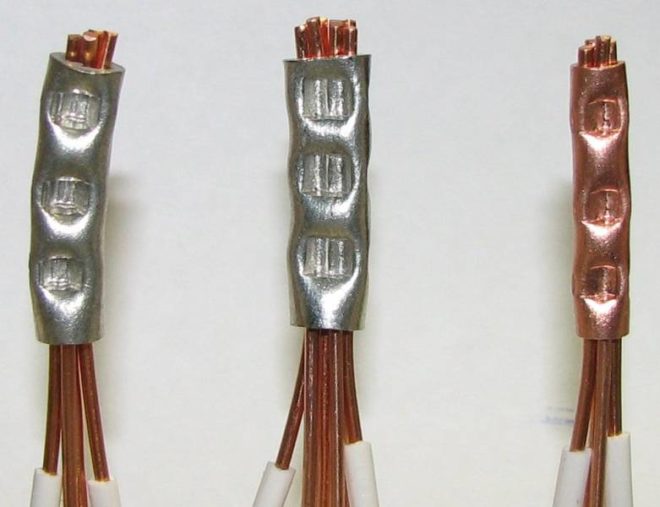
The advantage of such a connection is reliability, as well as the fact that it can be classified as "made and forgot", it does not need maintenance.
But along with the positive aspects, crimping has a number of disadvantages. First, a special tool is required (swaging press or mechanical or hydraulic pliers). Secondly, the quality of the connection directly depends on the correctly selected sleeve (it is selected depending on the number of connected cores and their cross-section).
Before connecting two wires using crimping, they are not only stripped of insulation, but also lubricated with a special paste. Aluminum is treated with a quartz-vaseline paste, it removes the oxide film and prevents it from reappearing. For copper conductors, quartz impurities are not needed, technical vaseline is enough. It is needed to reduce friction. Also, lubrication minimizes the risk of core damage due to deformation.
Next, the cores must be inserted into the sleeve to the mutual stop and alternate crimping is performed on both sides. The crimped joint is insulated with an insulating tape, varnished cloth or thermotube.
How to connect wires with sleeves is shown in these videos:
Bolted connection
Bolts for connecting wires were often used in the past, now this method is more inherent in circuits with increased voltage. The contact is reliable, but the electrical unit connected in this way is too cumbersome. Until recently, large junction boxes were installed in apartments, in which at least somehow, but it was possible to arrange such a connection.Modern boxes are smaller and are not designed for wiring using this method.
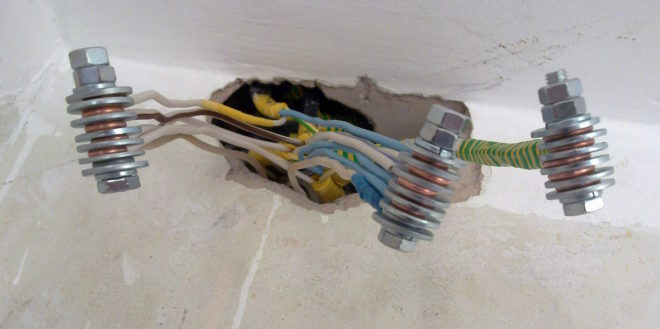
But you definitely need to know about it, because this is one of the ways to solve the eternal problem of connecting conductors made of different metals. The bolt contact is ideal for switching absolutely incompatible cores - thin and thick, aluminum and copper, single and multi-core.
The conductors of the wires must be stripped and the ends twisted in the form of rings. A steel washer is put on the bolt, then the rings of the wires to be connected are thrown (this is in the case when they are made of a homogeneous metal), then another steel washer follows and everything is tightened with a nut. If aluminum and copper wires are connected, another additional washer must be placed between them.
The advantages of such a connection are its simplicity. If necessary, the bolted structure can always be unscrewed. If necessary, you can add more wire strands (as far as the length of the bolt will allow).
The most important thing in this type of connection is to prevent direct contact between copper and aluminum, do not forget to lay an additional washer between them. And then such a switching unit will serve for a long time and reliably.
Modern technologies
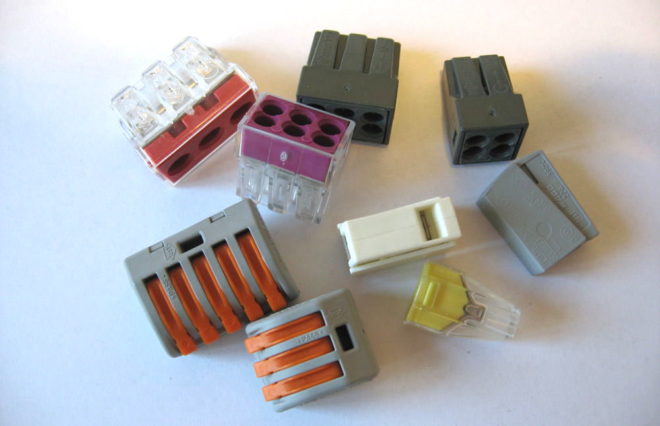
In many cases, these methods are gradually becoming a thing of the past. They were replaced by factory wire connectors, which greatly facilitated and accelerated installation and switching work:
- Terminal blocks with tubular brass sleeves inside. Stripped wire strands are inserted into these tubes and fixed by tightening the screws.
- PPE caps with crimp springs inside. The cores are inserted into the cap and then it is turned clockwise with a little effort, thereby reliably squeezing the wires to be connected inside.
- Self-clamping terminals. It is enough to place the wires in them, and there it is automatically fixed by the pressure plate.
- Lever-type terminal blocks. Such a connector is reusable. It is enough just to raise the lever, insert the conductor into the contact hole and lower the lever back, a reliable fixation is ensured.
We do not talk in detail about all existing terminal blocks, since there is a separate article about this, where each type of wire clamps is considered in detail.
We hope that we have clearly explained to you how to connect the wires correctly. Choose the method that suits you best. When choosing, take into account the cross-section and material of the conductors, the place of installation of the connection (outdoors or indoors), the magnitude of the load current that will flow in this electrical circuit.


