DIY installation of electrical wiring in the apartment - step by step instructions

If you are buying an apartment in an old house or in a new building, electricity will already be installed there and sockets with switches are connected. And before buying real estate, you cannot influence their location in any way. But as soon as you become a homeowner, you have the right to redo the wiring in the apartment with your own hands in a completely different way. Of course, this is a long, complex and financially costly process. Trying to somehow save money, many are wondering - is it possible to make the entire electrical part in new housing by ourselves? In reality, if you are not lazy, you studied well at school, you are friends with physics and electrical engineering. So our topic is relevant today - do-it-yourself electrical wiring in the apartment. Step-by-step instructions from drawing up a diagram to installing wires will help you.
Content
The beginning of all work - scheme
I would like to start this section with an analogy. What is the basis for a good, solid home? Foundation, of course. So, a kind of foundation for a reliable and high-quality power supply is a well-designed wiring diagram in an apartment. Many people completely in vain neglect this and there are good reasons for this:
- Firstly, the installation of electrical wiring in the apartment will be much easier for you when the diagram shows almost the final result. Agree, it is quite rare when at the first stage of repair people can imagine what will happen in the end. And with an electrical diagram, this is possible, because all switching devices, lighting elements and stationary household appliances will be displayed on it.
- Secondly, the electrical wiring diagram in the apartment will help you draw up a clear plan for the implementation of the work - where to start wiring, in which direction to move, what to leave for the final stage.
- Thirdly, when you have a ready-made layout of electrical elements in an apartment, you can easily determine the amount of materials - sockets, switches, junction boxes, socket boxes, wires, cables.
- And most importantly, when the installation and repair work has already been completed, you will have a wiring diagram in the apartment. Do not throw it away under any circumstances. If you need to drill a hole somewhere in the wall for a picture or photo frame, you will take out the circuit and see what is the path of the wires so as not to run into and damage the conductive core. Also, many sometimes glue junction boxes with wallpaper so as not to spoil the appearance of the room. Actually, this cannot be done, but if it is already sealed, you can always look at the diagram where the box is located. If you need some work, cut off a piece of wallpaper, get access to the box, and then glue it again.
We hope we have explained to you in a popular and accessible way that everything in the world of electrics should always start with a diagram. Now a little more detail on how to compose it correctly and what should be displayed on it.
Drawing up a diagram
Before making a scheme, you need to get together with the whole family and think carefully about where the main consumers of electrical energy will be located in your apartment:
- conditioners;
- electric hobs and ovens;
- Washer;
- refrigerator and freezer;
- dishwasher, microwave oven;
- exhaust forced ventilation;
- heating system boilers or water heaters.
Also, the arrangement of furniture, especially bulky, plays an important role. So that it doesn't turn out like this later - the repairs are completed, the furniture is placed, and the socket is behind the wardrobe, which has already settled in this place for many years. And then you will have to resort to the help of carriers, only earlier, at least under carpets, it was possible to hide wires, but now it is not fashionable, everything is parquet and laminate. So pay special attention to this issue.

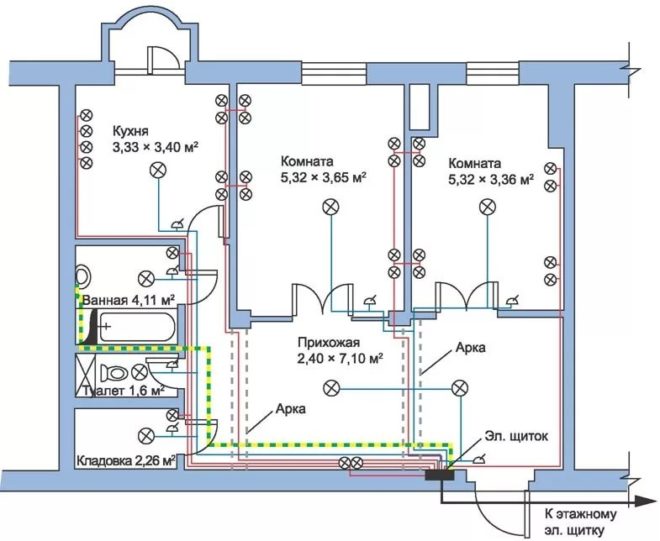
Then take paper (preferably in a box), a pencil (preferably several multi-colored), a ruler. Draw in duplicate on paper a plan of your apartment with door and window openings, to make it easier, take a technical passport and transfer the drawing from there. Assign a serial number to each room, for example, if you have a wiring diagram in a one-room apartment, let it look like this:
- Corridor (entrance hall, hall).
- Bathroom.
- Kitchen.
- Hall (living room).
If there are more rooms, respectively, you can continue further numbering - a bedroom, a nursery, a sports room, you also need to take into account a pantry, a loggia (if you are going to wire the lighting there as well), etc.
Now schematically display stationary household appliances and furniture (in the form of squares and rectangles) in one drawing. Household appliances can be marked in red, and furniture in gray. On the second drawing, mark the installation locations of the switching devices. That is, where in the first drawing you have household appliances indicated, there will be sockets on the second in these places.
In the same way, in the first drawing (where the equipment and furniture), draw crosses in yellow at the places where lamps, sconces, floor lamps, chandeliers are installed. Here it will be convenient for you to see - where the bed is, there it means a bedside lamp; where there is a sofa or armchairs, it means a sconce, under which you can read, etc. Then transfer all these bulbs to the electrical circuit. At the same time, think over and mark the installation locations of the switches. Imagine in your mind in which direction your interior doors will open so that later the switches will not be behind them.
Decide right away, perhaps in some place you need to install an outlet block (most often this is done on the kitchen work panel), whether you will have group lighting or a multi-track chandelier in the main room, then you will need a two-button switch.
Mark on the diagram the place where the introductory switchboard for the apartment will be located.
Examples of how to correctly draw up a diagram seem to be available, we hope that you will not have any difficulties with this. Now let's figure out the amount of materials.
Necessary materials
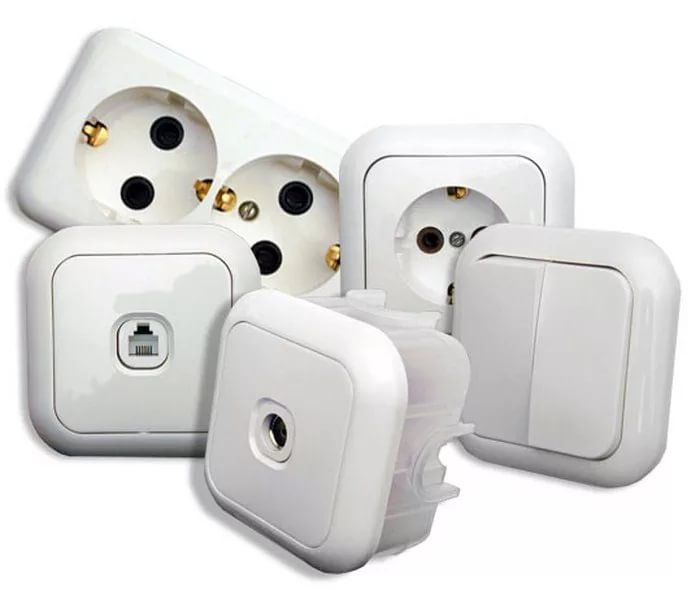
Calculate the required number of switches and sockets according to the diagrams drawn up. Do not forget that for each of these switching devices you need a socket box if you plan to lay hidden electrical wiring in the apartment. Also count how many junction boxes you need.
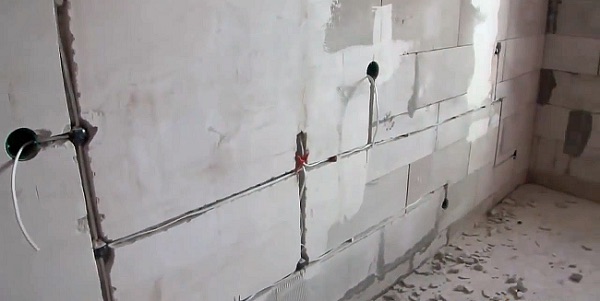
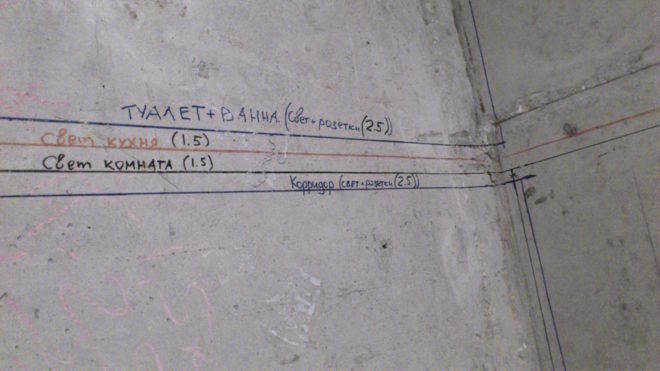
To calculate the number of wires, it is best to transfer the switching devices and junction boxes outlined in the diagram to real walls. Then mark the walls, that is, in the literal sense of the word, draw the paths of the wires between them, measure everything with a tape measure and count the total number. Keep in mind that the wiring in the apartment is carried out strictly along vertical and horizontal lines, there should not be any oblique turns.
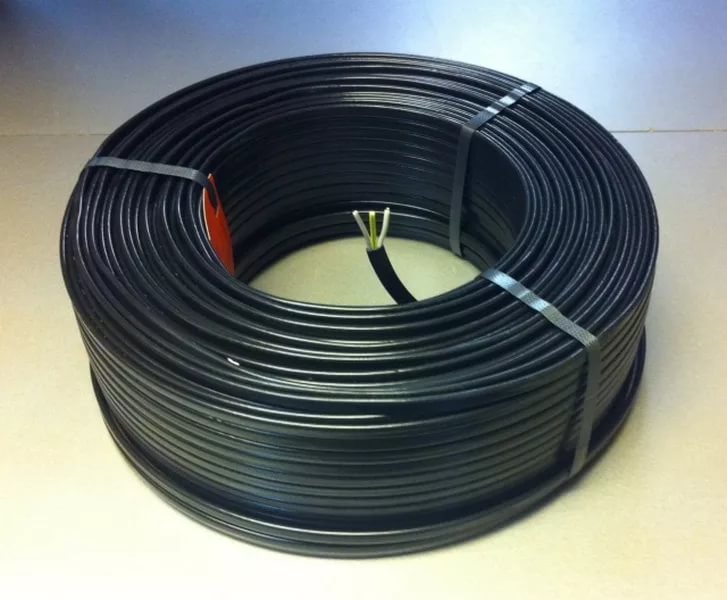
According to the experience of professional electricians, for wiring an apartment of three rooms, purchase 100 m of a three-core wire with a cross section of 1.5 mm2 (this will be the laying of lighting wiring in the apartment) and 100 m of a three-core wire with a cross section of 2.5 mm2 for powering outlets.
Powerful electrical appliances, such as a water heater or a hob, are usually powered by a separate line from the input switchboard through a separate machine. For them, it is better to lay a three-core wire with a cross section of 4-6 mm2.
Another important nuance, do not forget to count the wire with a margin for cutting the conductors at the joints and connections of the switching devices. It is customary to leave a supply of wire for sockets, switches, lamps of at least 20 cm.If you plan to lower the ceilings in the future, then increase the supply of wire for lamps to 50 cm.Also leave a supply of wire about 50 cm for the assembly of the switchboard.
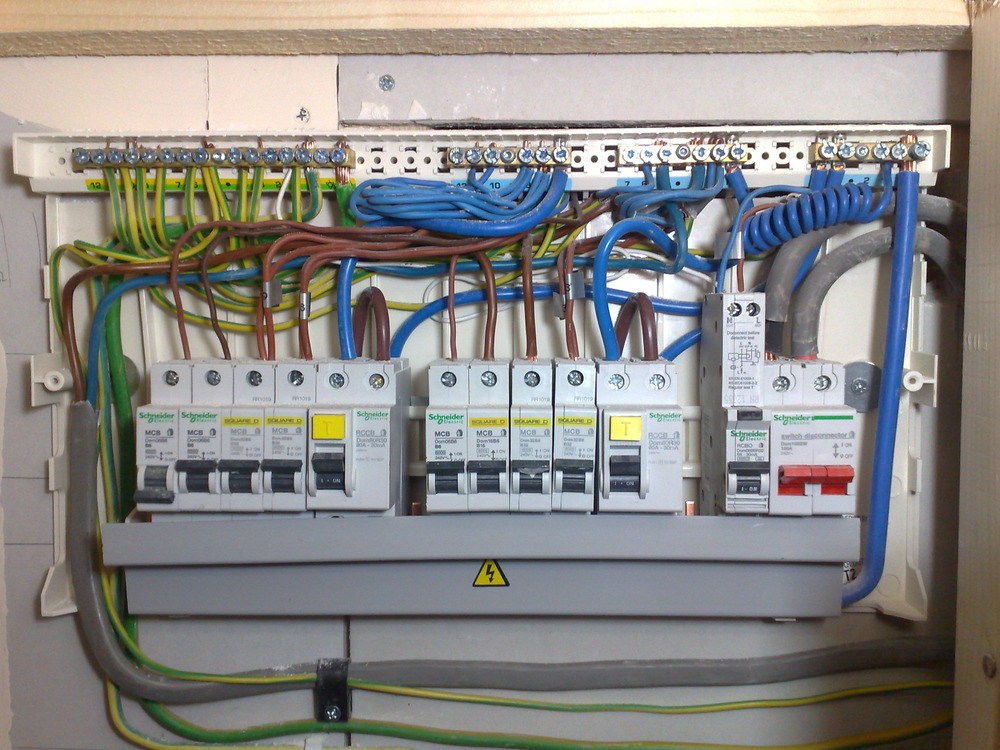
Distribution board
Do-it-yourself wiring in any apartment starts from the switchboard. What is he like? This is a kind of box in which the electricity meter and all the protective automatics are mounted.
What shields are there?
This box is made of metal or plastic. Each option has its own advantages. A plastic shield is more practical, as it weighs little, and besides, it looks attractive and aesthetically pleasing. The metal box is durable and reliable.
According to the method of fastening, the shields are of external and internal design. The outer shield (it is also called the invoice) is hung on the wall using self-tapping screws or dowel-nails. This greatly facilitates the installation work, but at the same time, this type of shield takes up free space in the room. An internal or built-in flap requires the installation of a special wall niche, but it does not take up room free space.
What is the shield equipped with?
What else is needed to install the switchboard, besides the box itself:
- An introductory machine, it protects the entire apartment network by disconnecting if necessary, the supply cable for the apartment comes to it.

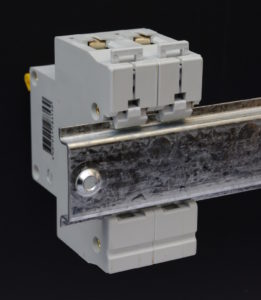
- A DIN rail is a special metal plate on which all automation is attached.
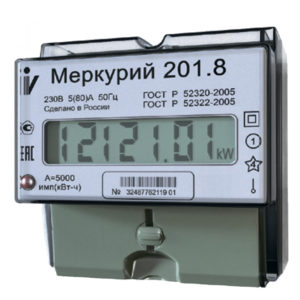
- The electricity meter, after completing all the installation work, it will be necessary to invite a representative of the energy sales company to seal the meter.
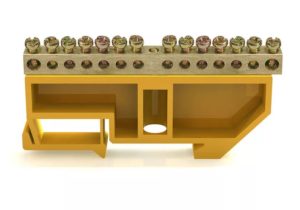
- The buses PE and N, on which all neutral and grounding conductors will be connected.
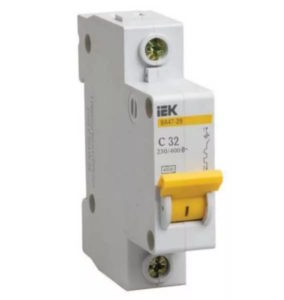
- Circuit breakers, they will protect a certain group of pantographs from short circuits by tripping at overcurrents. Also, with the help of machines, it will be possible to forcibly disconnect one or another line from the general network if necessary.
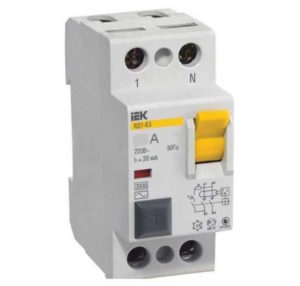
- Residual current devices (RCDs), they are not mounted independently, but are connected after the circuit breakers. The RCD performs a protective function if the body of some electrical equipment is energized. In such a situation, the RCD protects a person from possible electric shock. You can use a combined option, which includes an automatic machine and an RCD - differential automatic machines.
- Connecting wires or distribution combs.
To determine the number of machines, it is necessary to calculate and distribute the load in the apartment.
Load in the apartment
A modern electrician in an apartment includes a huge variety of different consumers of electricity. Agree that our homes are literally crammed with household appliances. It is recommended by rules and regulations, before wiring in the apartment, to separate the lighting network and the line of outlets from different machines. But taking into account the current load on the apartment network, it is impossible to plant all household appliances on one line.It is advisable to evenly distribute everything into several chains powered by separate machines.

This separation is of great practical value. Imagine that the electrical wiring in the apartment is damaged. With your own hands, without calling an electrician, you decided to figure it out, find the cause and eliminate it. If each line has its own protection, you can easily find the cause of the emergency (determine by the disconnected position of the machine). And while you repair damage on this line, all other consumers will not remain de-energized, that is, the refrigerator will continue to cool, and the washing machine will wash.
It is recommended to choose machines of the following power:
- for lighting load - 10 A;
- for sockets - 16 A;
- for connecting household appliances up to 4.5 kW - 20 A;
- to enter the apartment - 50 A.
How to divide the total apartment load into groups?
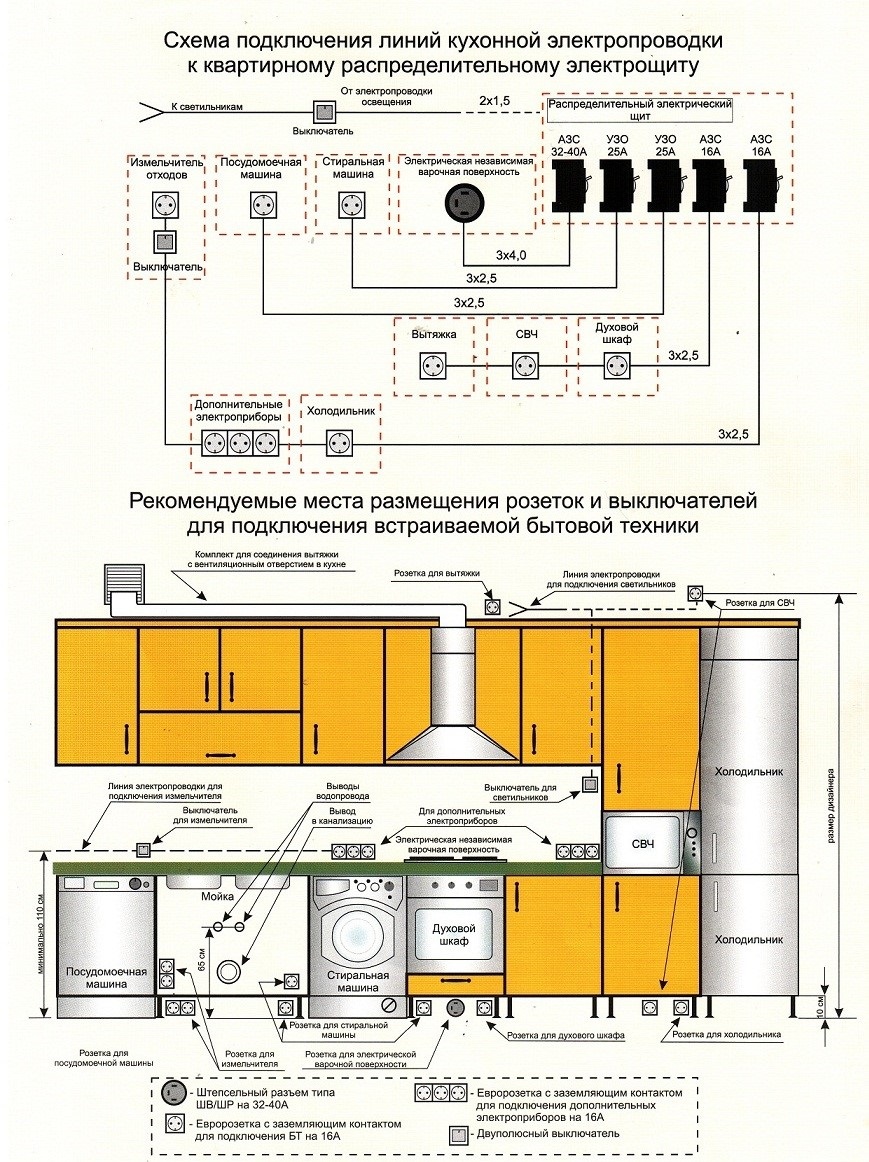
First, it is advisable to supply all powerful consumers of electricity with a separate line (washing machine, water heater, dishwasher, hob and electric oven, air conditioners).
Secondly, it would be good to make the sockets of each room in separate groups (children's, adult's bedroom, hall, study). If this does not work out, then in any case, the kitchen sockets must be powered through a separate line and an automatic machine, because it is in the kitchen that there are most powerful household appliances (bakery, microwave oven, coffee machine, electric kettle, food processor, blender, etc.)

The power supply of the bathroom must be carried out by a separate group, since it belongs to a dangerous room in terms of electrical safety (the so-called "wet" group).
The lighting of the apartment stands out as a separate group, but it will be much more convenient if the lighting of each room is divided into groups.
The number of required machines and RCDs will depend on how you group the entire load of your apartment.
Installation of wiring
It remains to decide what type of wiring to choose for your apartment. Today there are two ways:
- Open. This is when all the conductors will pass along the wall surfaces, they are fixed in plastic cable ducts (or ducts). Such a gasket requires much less material costs and physical effort, but there is one significant drawback - the appearance of the room is not quite aesthetic. The exception is the laying of a special cable through porcelain insulators, when the design of the apartment is made in a retro style, it is now very fashionable and gaining popularity.

- Hidden. With this method, the wires are laid in special grooves on the wall surfaces (in grooves). To grind, you need special devices, the process is time consuming, takes a lot of time and effort. But all the guides will be hidden.
Preparatory stage
According to your project, mark the paths for the wires on the walls. To get everything perfectly straight, do it with a laser level or a taut cord. There is a counter in the dashboard, and after it there are machines by load groups. From these machines, the wires should come to the first junction box, and from there they should already disperse to all other rooms and rooms. At the entrance to each room, its own junction box should be installed.
Mark the locations of sockets, switches, junction boxes on the walls.
There is one caveat for the open way of laying - the walls must be perfectly flat so that the plastic boxes lie on the wall surface without distortions. In the case of laying on porcelain insulators, this is not necessary, the slight curvature of the walls will not be so noticeable.
For the hidden version, you need to make grooves along the marked lines using a chasing cutter or a grinder. You can use a puncher, but then the strobes will not turn out so perfectly flat.The hammer drill is suitable for mounting holes for boxes and socket boxes, you just need a special nozzle - a cutter (crown) for concrete. If you do not have such a tool, it will be very expensive to buy it, try to rent it.
Open wire routing
- Cut the plastic boxes to fit the marked lines. To do this, use a construction knife or hacksaw.
- Fix the boxes to the wall surfaces. We do not recommend using glue or double-sided tape, this fixation will not last long. It is best to secure the boxes with dowels and screws.
- Place the conductors in the boxes and close the covers. The ends of the wires were left leading to the junction boxes and switching devices.
Concealed wiring
- Clean the prepared grooves from dust; this can be done with an ordinary broom or vacuum cleaner.
- Lay the wires in the grooves, it is recommended to first place them in corrugated pipes made of non-combustible materials.
- Secure the electrical wiring laid in the grooves with alabaster mortar. At first, fix only in a few places so that the wire does not fall out. When you complete the installation completely and check the operation of the entire electrical network, then you will completely brick up the wires.
- Lead the ends of the wires into the socket boxes and junction boxes.
- Also, using the alabaster solution, fix the mounting boxes and socket outlets in the prepared holes.
The final stage
Do not forget that before performing any work related to electricity, it is necessary to secure the workplace - remove the voltage and check for its absence.
It remains only to connect everything. Install sockets, switches, lights. Make all necessary connections in the junction boxes.
Apply voltage and check the operation of the entire system. If everything is working correctly, you can close up the grooves.
As you can see, do-it-yourself electrical wiring in the apartment is quite real. We hope that the step-by-step instructions for drawing up a diagram, calculating the load, installing the shield and wiring will help you do everything right. If in doubt, it is better to seek the help of specialists.


