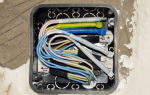
How to connect wires in a junction box
When building a house or renovating a new apartment, a household electrical network is installed at the first stage. Deciding where the sockets, switches, junction boxes and chandeliers will be installed is a small fraction of the total amount of work required. The most important thing is to lay a network around the house with many branches for lighting and connecting household appliances. Such a network is carried out with electrical wires, which must be selected in cross-section according to the expected load and laid according to certain standards. Here we will talk about how to properly connect the wires in the junction box.
There are many options for connecting wires, but among them one cannot single out and call it ideal. Something is more convenient and simpler, but is not recommended by the Electrical Installation Rules (PUE). Some method is suitable for single conductors, but not suitable for multiple conductors. On the other hand, more complex methods in implementation guarantee the quality and reliability of contacts. All methods of connecting electrical wires in a junction box have their own advantages and disadvantages. Let's consider each of them in more detail.
Content
Twisting method
The most common and simplest option is twisting. For it, you need only two tools - a knife, with which you can strip the insulation on the veins, and pliers to ensure reliable twisting.
Connection principle
This method is often called "old-fashioned", electricians have been using it for more than a dozen years, despite the fact that it is not recommended to connect the wires in this way according to the PUE. It is often used as a temporary option, for example, when you need to check how the wiring diagram in the junction box works. Subsequently, the twisting points are replaced with more reliable types of connections.
The essence of the method is that several wires are twisted together. It is important that all the wires to be connected are twisted together at the same time; it is not allowed to wrap one around the other.
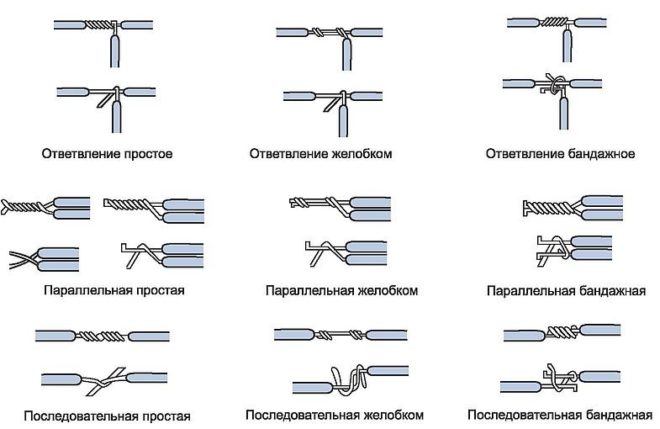
The whole job is incredibly simple. First, with a knife, the insulating layer is cut from the wire cores to the same length (10-30 mm). Then twisting is made with pliers and insulated from above. There are many options for twisting itself, the most common of them are:
- Mutual twisting.
- Bandage connection.
- Grooving.
Let's explain in a little more detail using the simplest example. Attach each twisted wire to each other so as to align them with the removed layer of insulation (in this case, you will have to cut 40-50 mm). At the end of the wires to be connected, make a 1 cm bend at 90 degrees. Hold the insulating layer with one hand, grasp the fold with the other hand and begin to rotate clockwise. Some people ask the question, is it possible to twist counterclockwise? It is possible, but backwards is somehow not very accepted, the whole world is used to existing in the course of the clock. If at the end it is already difficult to twist with your fingers, do it with pliers.
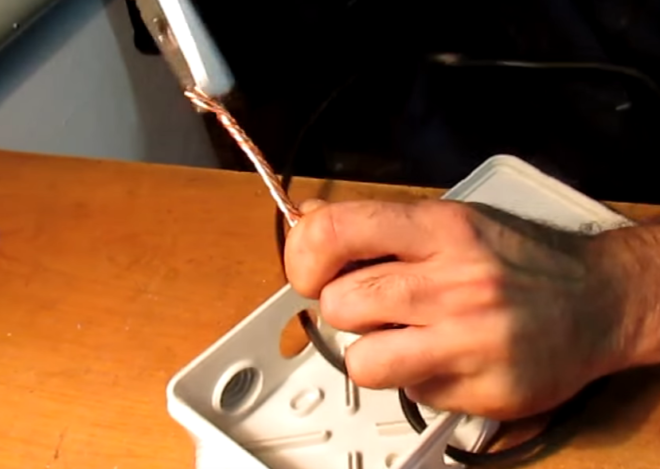
You can connect 5-6 wires in this way, but then it will be difficult to twist, you need to make the bend longer (by 20 mm) and rotate immediately with pliers. When a beautiful, even twist is obtained, the fold is cut off.
A thermotube can also be used as an insulating layer at the twist site. Keep in mind that it must be put on in advance on one of the wires to be connected. When the twist is ready, the tube slides into place. If you heat it around the edges, then due to the effect of temperature, the thermotube will shrink and grip the wires tightly.
How to properly twist wires is described in detail in this video:
Benefits
The main advantage of this method is its ease of operation.
The second advantage of twisting is the absence of any material costs.
If there is a need for this, then several wires can be twisted at the same time by this method, but their total number should not be more than six.
disadvantages
The main disadvantage of twisting is unreliability. And we know that such a concept is not allowed in electrical engineering.
In the main regulatory document of electricians PUE, in the section that lists all permitted types of wire connections, the twisting method is not mentioned, so it is not recommended for use. That's right, experts cannot admit to the standards of a connection that is sensitive to impulse current and high contact resistance.
With the twisting method, the contact area of the veins is small, the consequence of this is unreliable contact. As the load increases, the cores will heat up more, and the contact connection will become weaker, which will eventually lead to burnout.
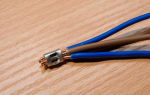
Twisting cannot be used to connect conductors made of different materials (copper and aluminum).
Welding method
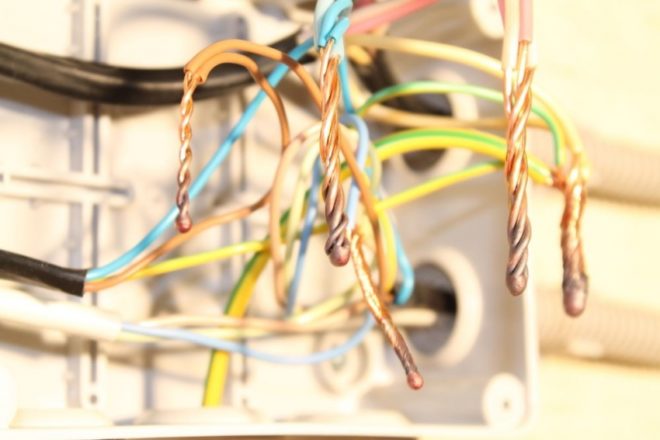
For a more reliable contact, the connecting wires are welded in the junction box. With this option, the ends of the cores are fused and form a single whole, which is a guarantee of safety and reliability. Solid contacts do not oxidize and welds do not weaken over time.
The disadvantage of welding is that you have to be able to handle special equipment, or you have to bring in a professional.
Required tools
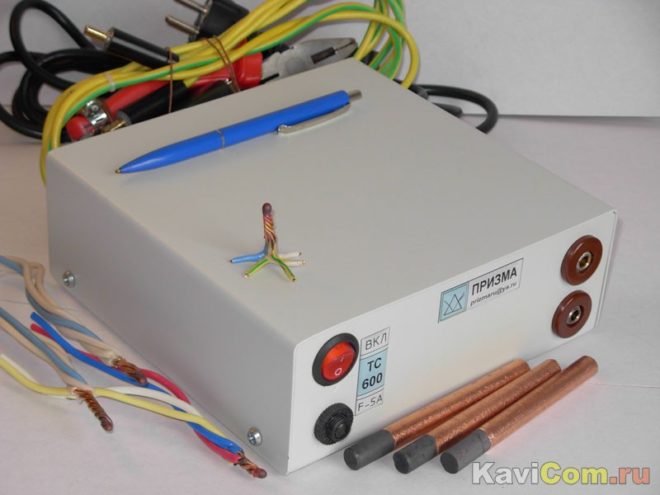
In addition to the fact that you must be able to cook, you will need:
- knife (to remove the insulating layer from the cores);
- sandpaper (to clean the surfaces to be joined);
- welding inverter;
- gloves (protect hands during welding);
- goggles or a mask (protect eyes during welding);
- graphite electrode (carbon);
- flux to protect the melt from air.
Welding Algorithm
- Remove the insulation 70-80 mm from the cores with a knife.
- Sand the veins until they are shiny.
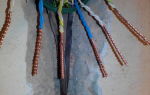
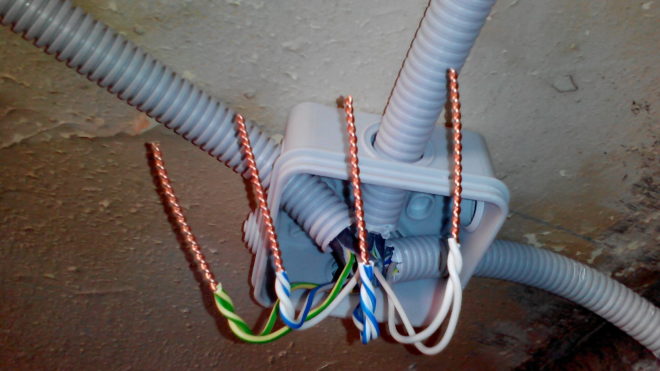
- Using the method described above, twist the wires, its length should be at least 50 mm.
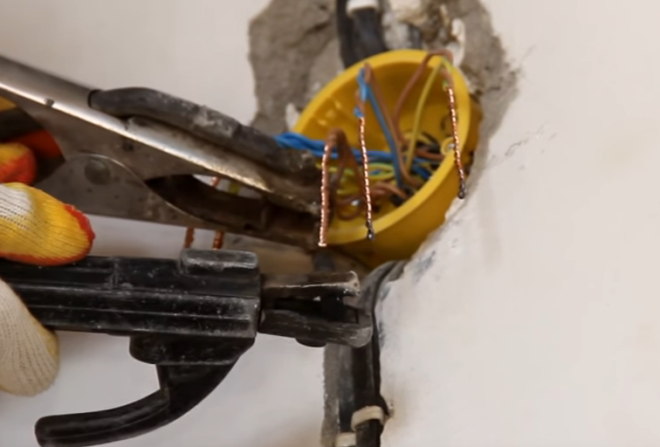
- Gently hook the grounding clamps onto the top of the strand.
- Bring the electrode underneath the twist, lightly tap to start the arc, and remove. Welding of wires takes place literally in a fraction of a second.
- Then allow the weld to cool down and insulate the connection.
Another important question, how many amperes should be set on the welding machine? For cores with a cross section of 1.5 mm2 30 A of welding current will be enough, for 2.5 mm2 - 50 A.
Welding twists in a junction box is clearly shown in this video:
Soldering method
Soldering the wires to be connected in the junction box is no less reliable than welding.
The essence of the rationing method is similar to welding, only now, instead of an inverter machine with electrodes, solder with a soldering iron is used. You will also need rosin or soldering flux. There is one small nuance here, before twisting the veins, they must be tinned.To do this, warm up the soldering iron, dip it in rosin and slide it over the veins stripped from the insulating layer several times until a characteristic reddish tint appears.
Now twist as we described above. Take the solder on a soldering iron and heat up the twist until the tin melts and starts filling the space between the twists. Thus, the place of twisting is wrapped in tin, due to which the correct connection of the wires and reliable contact in the box is ensured.
Most often, copper conductors are soldered in this way. But there is a special solder with which you can do the same with aluminum conductors.
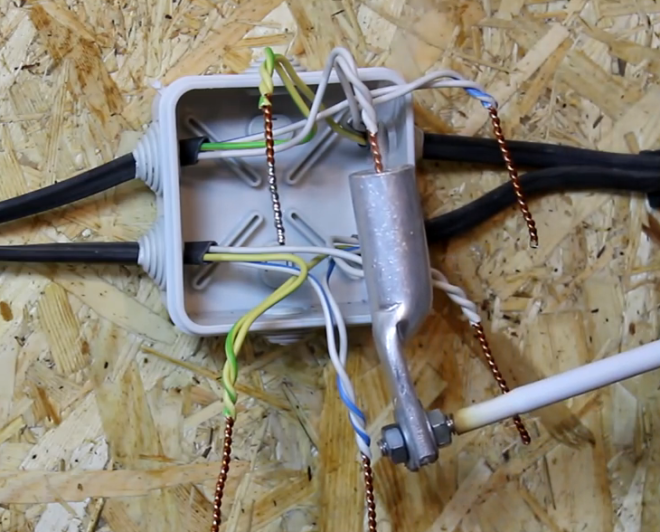
Soldering twists using the method of dipping into a molten tin sleeve is shown in this video:
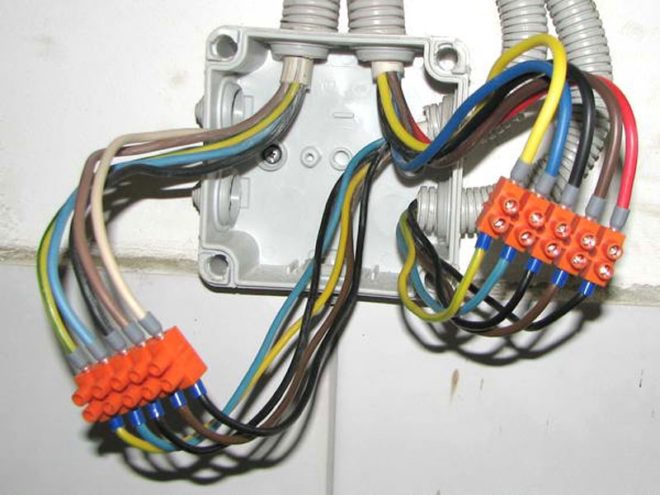
Terminal blocks
The connection of wires in the junction box is greatly facilitated by the use of terminal blocks.
The modern market provides a wide range of pads, which differ in both the feature of the performance and the size, and the price. The terminal itself can be small or large, it all depends on the cross-section of the connecting wires. Nevertheless, constructively they are all arranged according to the same principle.
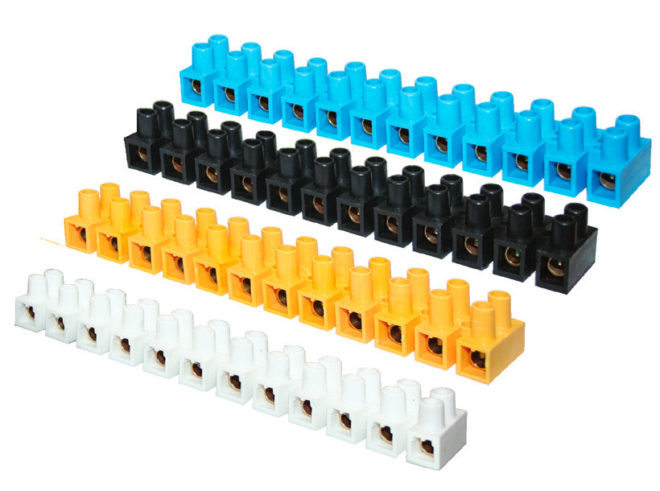
As a rule, terminal blocks are sold in sections, but sometimes they are bought by the piece, asking the seller to cut off the required amount.
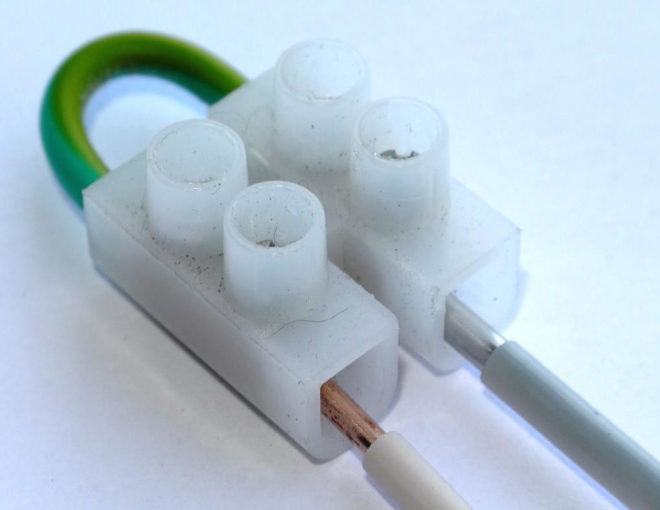
Device
The terminal block is a transparent plastic case with a brass sleeve inside. It is these sleeves that differ in diameter, depending on what section of the core the given block is designed for. There are two threaded holes in the sleeve, screws are screwed into them, clamping the wires.
Connection principle
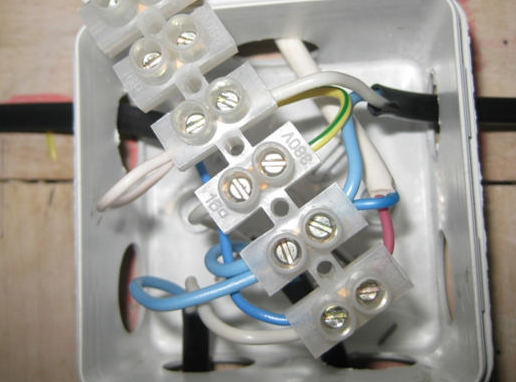
How are the wires connected in these terminal blocks? For example, in a junction box, you need to connect the socket to the mains. You take the block into two sections, unscrew the clamping screws, thereby freeing the sleeve for the wires to pass into it. On the wires to be connected, remove the insulating layer (5 mm is enough) and carefully clean the conductive surface of each core. Insert the phase conductors of the socket and the supply network into one terminal, and zero into the other. And by tightening the screws, clamp the wires in the sleeve.
Benefits
Why is it good to disconnect the wires of the junction box using terminal blocks?
Firstly, in most houses, the electrical network is carried out with solid wires (not flexible and not stranded), and with the help of such terminals, the installation of single-core wires becomes very simple and will not cause difficulties even for novice electricians.
Secondly, with the help of a terminal block, it becomes possible to connect aluminum and copper conductors to each other. Twisting is not suitable in this case, because these two metals are characterized by an internal unrelatedness. Aluminum and copper are mutually oxidized, which leads to the appearance of an oxide film on the surface, then, as a result, poor contact, heating and failure of electrical wiring. And due to this type of connection, aluminum and copper do not come into contact with each other, which is an indisputable advantage of using a terminal block.
Plus, such a connecting method of wires using terminal blocks will require a minimum of your time.
In addition, this option is detachable, that is, at any time you can disconnect the desired wire or cable.
disadvantages
The disadvantages of the terminal block include the unwanted connection of stranded flexible wires in them.Such a seemingly convenient terminal combines everything that a stranded wire does not like - rotational movements, an uneven screw clamping surface and the so-called point (uneven) pressure. While clamping them with a screw, it can push and break one or several small thin veins. The wire will no longer have the required current carrying capacity, which will lead to heating of the contact. If such a need has arisen, to connect stranded wires in the terminal blocks, then it is advisable to use sleeve lugs that crimp the bundle of veins.
In such a block, it is necessary to tighten the screw extremely carefully if you are connecting aluminum wires. You don't need to demonstrate all your strength and power here, otherwise you will simply break your vein.
Varieties

The most modern type of terminal blocks are self-clamping. The connection is very fast, you don't even need to take a screwdriver in your hands. Each hole has a spring loaded contact. The core is inserted into the hole until a characteristic click, which means the terminal clicks into place.
Lever terminal blocks proved to be even better. The small lever needs to be raised, thereby freeing the contact hole into which the conductor is inserted. Then the lever is lowered and the secure connection is ready. If it is necessary to reseal the contact, the lever is raised again and the wire is pulled out.
The different types of terminal blocks are described in this video:
Bolt method
A reliable connection of wires in the junction box is achieved by using bolts. The only drawback of this method is its cumbersomeness. And the main advantage is that due to the bolted connection, it is possible to ensure a high-quality connection of veins from dissimilar materials (aluminum and copper). Modern manufacturers of junction boxes make them small in size, it will be difficult to shove a bolted connection into such a device. But if in your house there are still enough old-style boxes with large sizes, then this method is suitable for you.
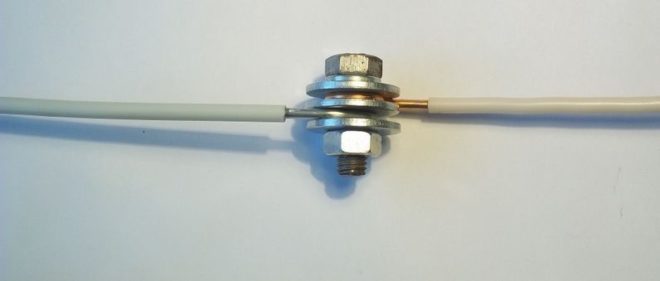
In addition to the bolt, you will need three steel washers and a nut. The stripped parts of the wires must be twisted in the form of a ring. Then put on the bolt in turn:
- washer;
- a ring of one vein;
- puck again;
- a ring of another vein;
- washer;
- nut.
Due to this pyramid, the bolt method is cumbersome. For connecting several pairs of wires, it will not work.
We looked at several options for how to connect the wires in the junction box. Choose the appropriate method for the price and ease of installation. But remember that the basic concepts in electricity were, are and will be quality, connection reliability, durability and safety.