How to install a socket in drywall
After the completion of the work on covering the walls with plasterboard, the last stage remains - the installation of the sockets in the drywall. This work is not difficult, it does not require great knowledge and skills in electrical engineering - it can be done on our own, without inviting a master, even for an unprepared person. But it is necessary to carry out the installation of outlets carefully and efficiently, since the level of fire safety of housing depends on this.
Content
Installation tools

In order to install sockets without interruption in search of the missing tool, you need to prepare it in advance. You will need the following:
- tape measure and marker for marking holes;
- drill and special cutter (crown) for drilling holes in drywall. The diameter of the working part of the cutter should be equal to the diameter of a standard glass of the socket - 6.8 cm. In the absence of a drill, a screwdriver can be adapted for this;
- air bubble level (short enough up to 0.3 m);
- a screwdriver with an indicator of the presence of voltage in the tested wires;
- a screwdriver (Phillips or standard, depending on the shape of the slots on the bolts) necessary for attaching the socket, wires and the outlet itself;
- a clerical knife needed to strip the insulation from the wires when connecting them to the terminals.
- Preparatory activities
The locations of the outlets are determined even before the start of wall cladding work.
Installation is carried out in the following sequence:
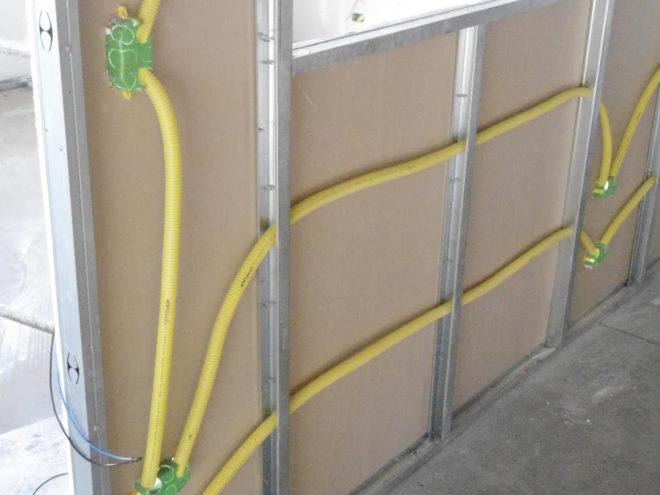
- First, a frame is assembled for attaching drywall sheets and attached to the wall. Its ends are attached to the floor and ceiling of the room.
- If a partition is being constructed, one side is sheathed immediately. Wiring will be laid along it.
- A wiring diagram is created and the locations of the socket boxes are marked on it.
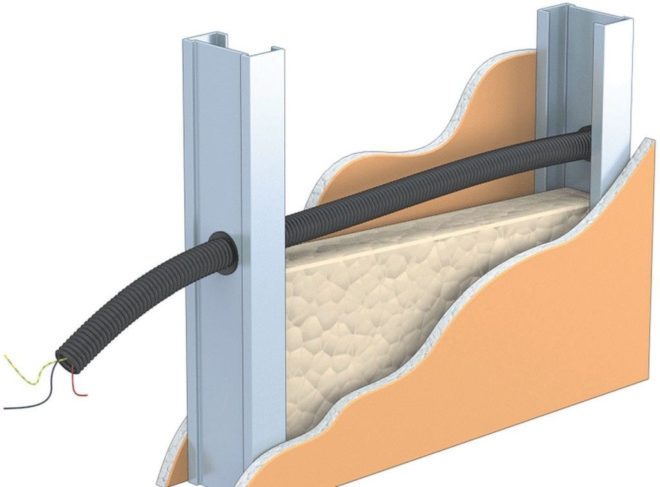
- In the vertical parts of the frame, holes are drilled with a drill for wiring.
- Wires laid to the locations of the socket boxes should be placed in a corrugated plastic sheath and laid through the holes prepared in the frame.
- The most optimal would be a cable with 3 cores in double insulation (with core diameters from 1.5 to 2.5 mm). If you plan to use electrical appliances with high current consumption, the cross-section of the wires must be increased.
- The wires laid under the casing should be secured with wire pieces or plastic clamps for reliability.
At the end of the laying of wires and marks on the plan of their exit points, you can begin to attach the gypsum board to the frame.
Choice of installation locations
The installation locations of the sockets are not regulated by modern rules, so the installation of the outlet can be carried out where it is convenient to use it.
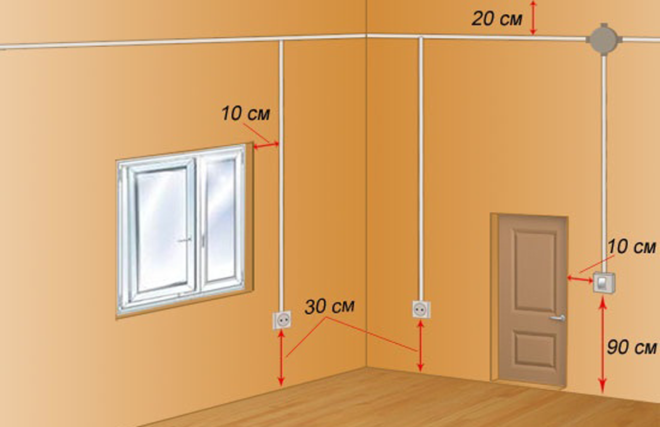
According to European regulations, the socket must be placed 0.3 m above the floor. In some cases, this is justified, but, for example, in the kitchen, such an arrangement of them will make the housewife beat off a lot of bows when turning on and off kitchen appliances while cooking.
It is also better to set the outlet behind the aquarium higher for the convenience of connecting the backlight, filter, compressor. And the power cords will not roll on the floor and interfere with movement around the room.
How to install
Installation of the socket in drywall begins with the preparation of holes for the installation of socket outlets. Plastic sockets will be inserted into the holes, and sockets are already fixed in them.

When creating a hole, you need to do the following:
- for a start, you need to find the installation location, in accordance with the diagram. Then the specified distance from the floor is measured with a tape measure and a mark is put;
- using the level, the center of the future hole is found horizontally and a cross is placed;
- when drilling holes for socket boxes, an electric drill is used with an attachment in the form of a cutter (crown);
- Aligning the center of the cutter with the center of the cross, carefully cut a hole.
Installing the socket
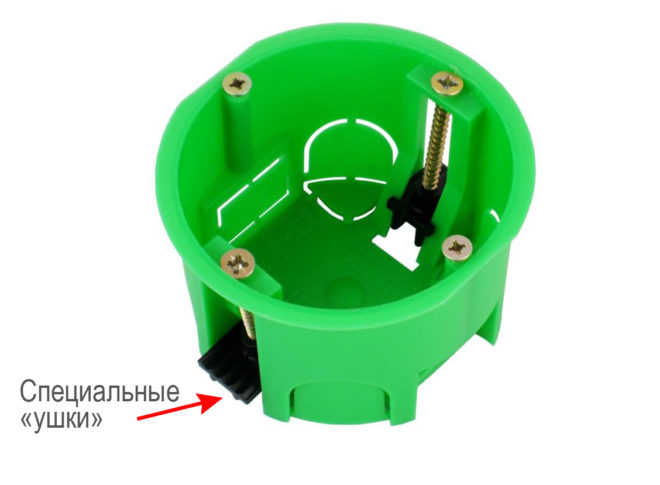
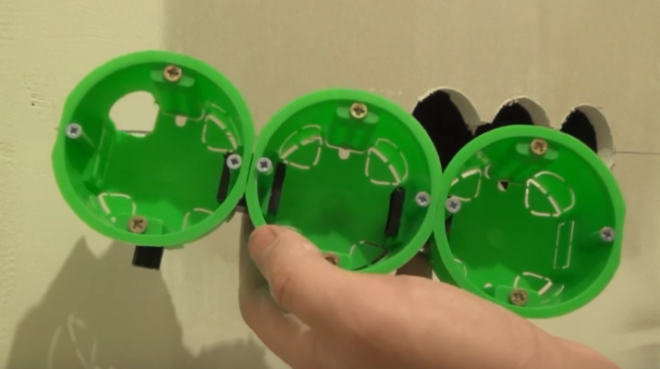
The socket box is made in the form of a plastic glass, which must be installed and fixed in the finished hole in the drywall.
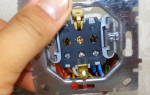
The drywall socket has four screws. Two are for attaching it to drywall and two for attaching a metal cover to the outside.
The installation of the socket is carried out in the following sequence:
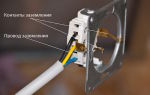
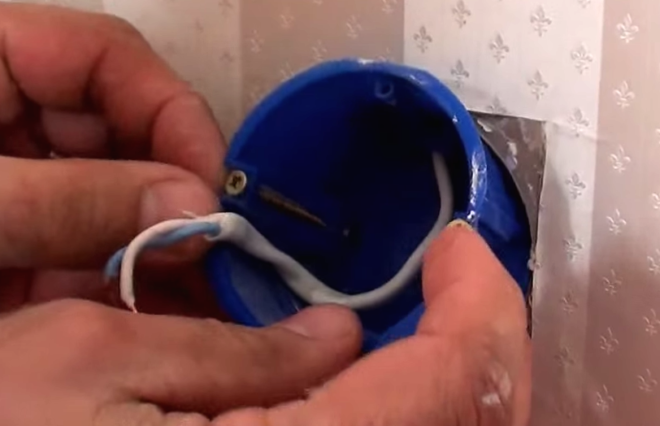
- Before installing the socket in place, you must pass the wires through the hole on its bottom. If several points are installed, you need to lead power to them using a loop connection. With this connection, from the first socket, the wire segments are passed to the second, from the second to the third, etc.
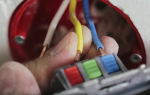
- Despite the simplicity of the loop connection, there is a danger of excessive heating of the contacts of the first socket due to the fact that the total load of all other points passes through them. Therefore, experienced electricians prefer to make connections through siza - plastic caps with an internal tapered thread, designed to isolate twists.
- Using siza, the phase wire is twisted with several wires according to the number of plug-in sockets. The same twist can be done on the neutral wire, but since it is not so strongly exposed to heating, it can be started up with a loop.
- With the help of a level, the socket is placed horizontally and fixed with the clamps on the drywall. In this case, you need to ensure that he does not pinch the wires.
Sometimes it happens that the distance from the wall to the drywall is less than the height of a standard flush-mounted glass. Then, in the material of the wall, using a perforator or chisel for concrete, you need to make a depression of the appropriate depth. It is possible to prepare a recess even before the cladding, but then you will have to determine its location with pinpoint accuracy.
Connecting wires
Before attempting to connect the wires, you must turn off the electricity on the switchboard. You can make sure that there is no voltage using indicator screwdriver.
If there is no voltage, you can start connecting the wires:
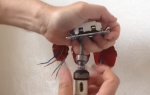
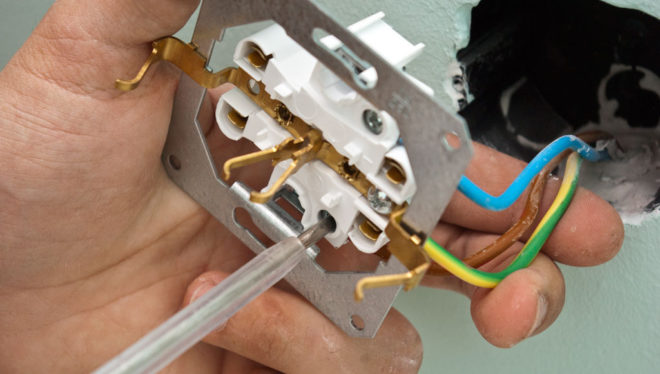
- All decorative elements are removed from the outlet;
- The bolts on the socket terminals are loosened, the wires are inserted and the bolts are tightened until they stop. When using a three-core wire - the ground wire is connected to the middle terminal;
- The socket with the connected wires is inserted into the socket and fixed in it using spacers or bolts on the socket;
- Before finally fixing the socket, you should once again check the strength of the clamping of the wires on the terminals;
- It remains to impose the frame and install the cover. When tightening the screw, you do not need to make great efforts, so as not to crush the plastic parts.
- When installing several adjacent sockets, you can purchase a common frame for them, from 2 or more.
Video instructions
We recommend watching the following videos:
Perhaps, when installing the first outlet, there may be some difficulties due to not knowing how to install the outlet, but installing the next one will be much easier. The main thing is to follow the recommendations and exercise the utmost care when carrying out electrical work. The above technology will not only allow you to install the socket in drywall - it is also applicable when installing switches and double sockets.