How to install a socket into a concrete wall with your own hands
Correct installation of the socket into a concrete wall is done in several stages, the most difficult of which is cutting a hole in the wall, where the device will be mounted. If you have the necessary tools, experience, or at least a great desire to do everything yourself, then this task will be quite within the power of any home craftsman.
Content
What tools need to be prepared

Before installing the outlet, the following tools and parts should be prepared - they will be needed in this order:
- A pencil, marker, ember, or anything you can use to draw markings on the wall.
- Ruler. Even an ordinary school one is suitable for one device, and if a block of outlets is installed, then a large one is desirable.
- Level - bubble or laser. At the initial stage, it will be useful only when installing the socket strip.
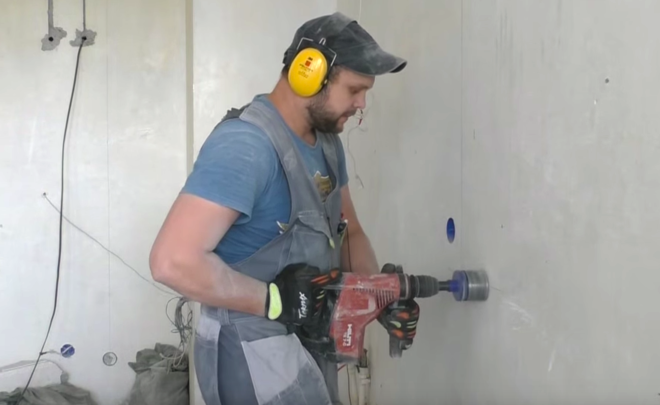
- Drill with a bit for concrete attachment. If there is no nozzle, then a concrete drill will do. Some cut the wall with a grinder. If the wall is especially strong, then water will not interfere, which will cool the crown.
- Chisel and hammer - needed for fine adjustment of the hole walls.
- Power socket - provides rigid fixing of the device in the wall.
- Putty - gypsum, alabaster or cement mortar.
- A spatula that can be placed in a socket.
- Voltage indicator - by and large could be useful at the beginning, but you cannot do without it at this stage.
- Additional wires are needed if several points are installed.
- The knife can be the smallest.
- Pliers - preferably with wire cutters.
- The outlet - for the sake of it, everything is started.
- A screwdriver - most often a Phillips screwdriver, but in some cases a slotted screwdriver is also useful - it all depends on the bolts that need to be tightened.
It is understood that before installing the outlet into the wall, wires have already been drawn to this place and it is known which of them is the phase and where is zero with grounding. If not, then you will have to plan large-scale work on punching grooves (grooves) in the wall for wiring. To do this, you will have to rent a wall chaser, get ready to drill them with a drill and a puncher, or cut them out with a grinder.
Why do markup
If you install one single outlet in a concrete wall, then by and large markings are not needed. There is not much difference if it is located plus or minus centimeter. It's another matter if there are other sockets nearby and the owner of the premises has a “perfectionist look”. For some people, this is developed by nature, and if any thing gets out of the general picture, then it will cause irritation.
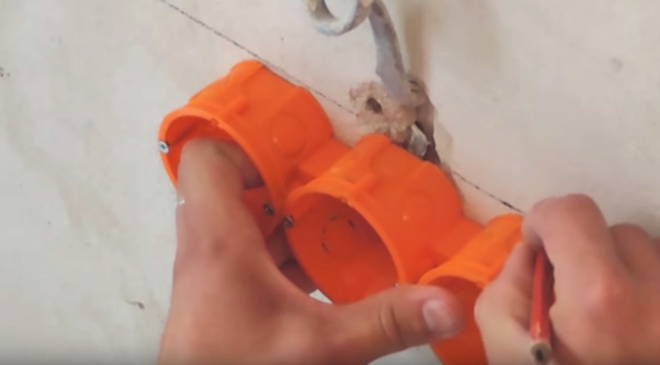
As a result, it is better to spend an extra few minutes to calculate and draw on the wall the location of the future outlet. Without fail, this must be done when installing a block of outlets, which will be located close to each other. Here the level will come in handy, although if the floor is curved in the room, then you will have to think about how to make the markings - at the level or parallel to the floor surface.
A correctly made "drawing" of the marking is a horizontal line on which the centers of the holes for the socket boxes are marked. To see if the crown has jumped off the mark, the marking should be slightly larger than its diameter. The most reliable way to calculate the center-to-center distance is to fold the outlet covers together and measure the center-to-center distance.
Hole drilling
This is the dustiest and heaviest piece of work, although it all depends on the strength of the concrete.
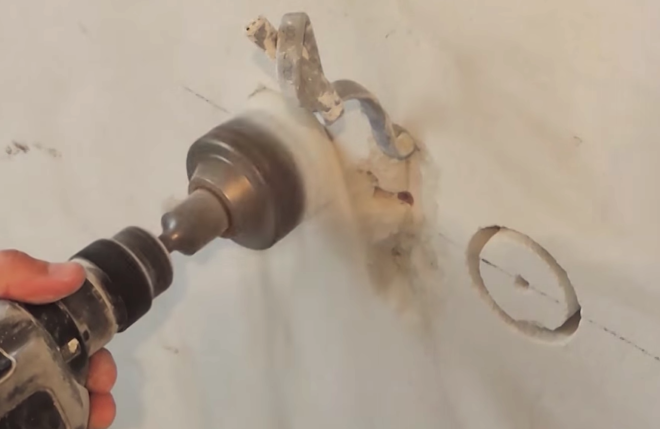
- If a crown is used for drilling the socket, then first of all, a hole is drilled in the center of the marking for its central axis, after which the crown itself is used.
- This part of the work will take a little longer if you only have a drill with a conventional drill for concrete. In this case, you will have to drill holes around the circumference of the future socket, and then knock out the inside with a puncher or chisel.
- If the perimeter of the hole for the socket is not round, but square, then there is no violation in this - it will still be covered with cement mortar. Based on this consideration, it is possible, tangentially to the diameter of the future socket, to make cuts in the wall with a grinder, remove the inside and correct the rest with a puncher or chisel.
- In especially difficult cases, you can combine these methods - first drill the holes with a drill, and then work on them with a crown or grinder.
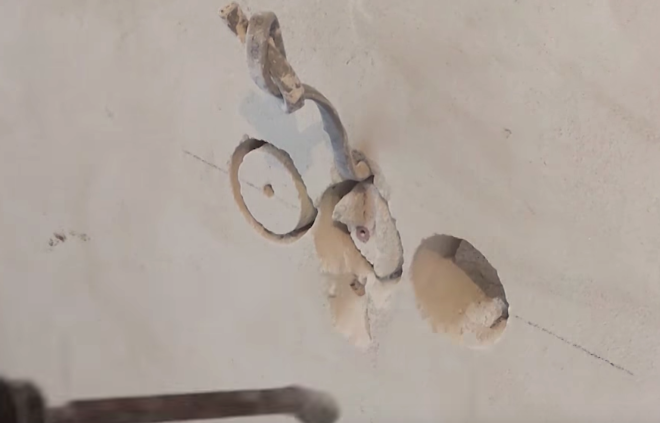
The result of the work should be a hole into which the socket box that will be installed "falls through" a little beyond the wall surface.
Installation of the socket

In fact, here you just need to wedge the socket outlets into the wall, but do it so that the installed plastic glass is flush with its surface with its upper part.
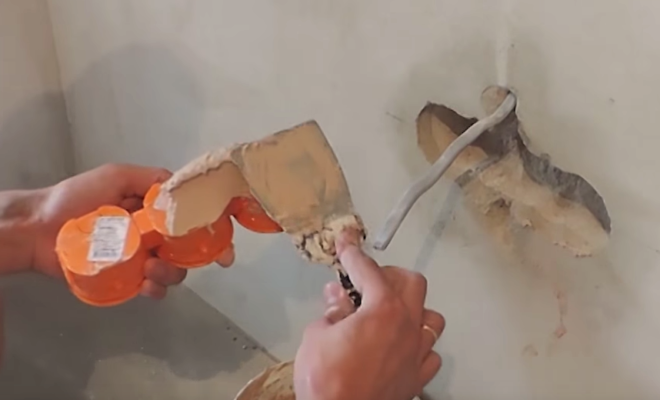
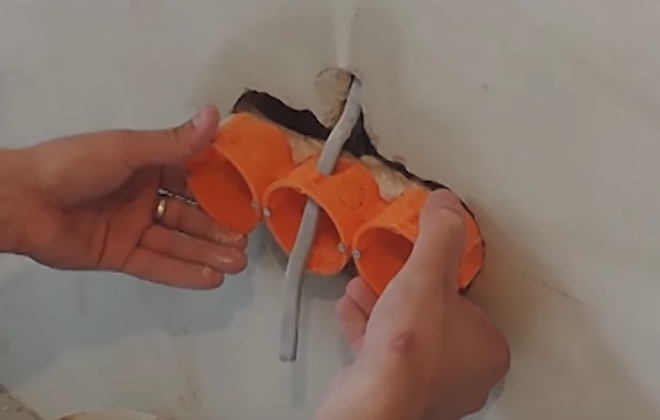
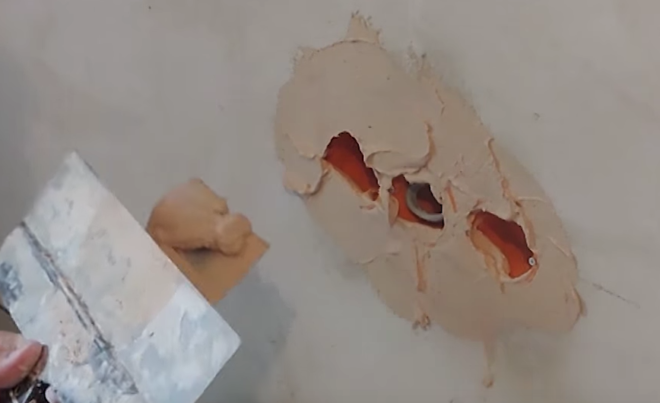
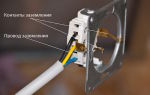
A cement or gypsum mortar is prepared and spread with a spatula on the inner surface of the holes obtained. Then a socket box is inserted there (before that, you must not forget to start a wire into it) and align. In this case, a certain amount of solution will be squeezed out of the wall - it is advisable to remove it not immediately, but after a few minutes, when it begins to solidify. It remains to slightly trim the resulting seam with a spatula and wait for the mixture to completely harden - depending on the material used, this will take from half an hour to a day.
For more information on mounting a socket box, see this video:
Wiring connection
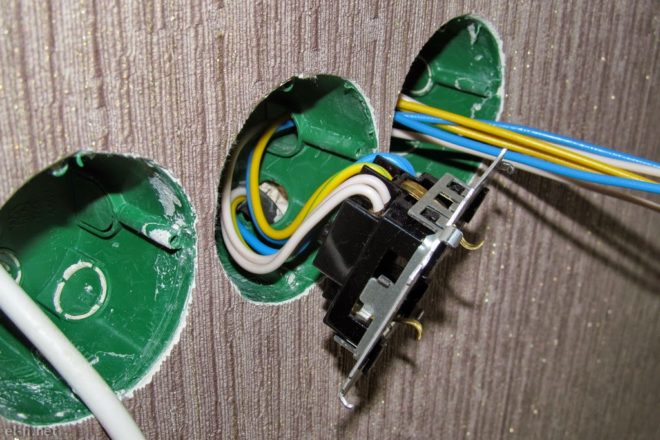
The most important part of the whole work is to connect only two or three wires (depending on the availability of grounding), but do it without errors.
First thing with an indicator screwdriver make sure the wiring is de-energized. Spending a minute or two opening the circuit breaker and checking for voltage will make your work much more comfortable and safer.
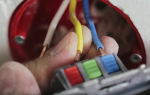
Wire stripping. It is necessary to remove 1.5-2 cm of insulation from the ends of the veins. Further, the bare piece is bent into a ring, and if it is stranded, then it can still be divided in two so that the ends of the wires take the shape of the letter "V".
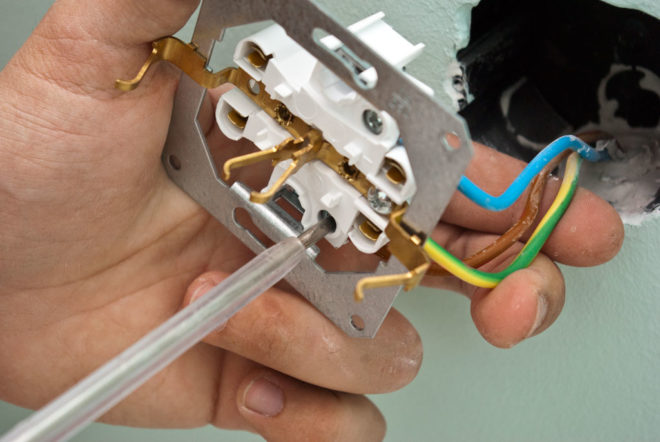
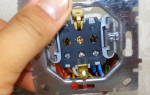
Connecting wires. The outlet has only two current-carrying terminals and a third for grounding. All of them are clamped with bolts and there is simply nowhere else to insert wires. If wiring with the correct color coding is used, then the yellow-green wire goes to the ground contact (it "hangs" on the plate with the "whiskers" sticking out forward), blue to zero and remains per phase (can be any other color). The grounding must be connected to the contact intended for it, and the phase with zero to the remaining ones - no matter in what order.
Socket strip connected by loop or star... In the first case, wires from the previous one come to the contacts of one outlet and immediately go to the next. In the second, the wires from each outlet go to a common "collection point" and are connected there - phase to phase, zero to zero. It should be borne in mind that the PUE prohibit the connection of grounding by a loop - this way you can connect the phase and zero, and the "ground" must be led by a star.
End of installation
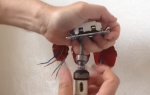
When the wiring is securely "sits" in the contacts, the inside of the socket can be inserted into the socket.To do this, bend the wires so that they are parallel to the back wall and push everything inward.
The inner part is fixed in the socket with spacer lugs - so that they spread apart, tighten the fastening bolts, which are always located in the front part. When the bolt turns clockwise, the foot moves to the side, but vice versa - it just hangs along the body. Sometimes the paws interfere with inserting the socket into the socket, opening ahead of time, so they are either tied to the body with a thread or pulled together with a clerical elastic band.
Additionally, the socket can be fixed with bolts that are screwed into the front of the socket.
The last step is screwing on the cover. It has centering pins, so fixing it to the socket incorrectly is quite problematic. When everything is ready, the electricity is turned on and the operation of the outlet, as well as grounding, is checked. The check can be done even before installing the interior in the socket box, but this is how someone feels the quality of their work.
Step-by-step instructions for installing and connecting the outlet in this video:
As a result, installing a household outlet into a concrete wall is not an overwhelming task, even for a non-professional. If you have to install several of them, then all the nuances will definitely be deposited in memory - later it will be possible to act as an instructor.