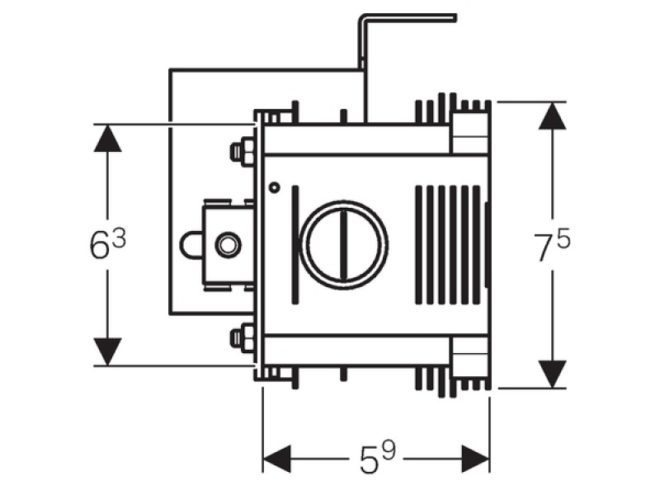
The dimensions of the socket boxes and the subtleties of their installation
Such a concept as the diameter of the socket is not entirely correct when it comes to installation. If the dimensions of the socket and the socket are suitable for each other, then the diameter of the hole must be calculated, which must be drilled in the wall. Here you already need to look at its material (for example, there are many nuances when installing on ceramic tiles), how many sockets will be set and how close they will be to each other.
Content
What you need to know about mounting a socket to choose the diameter of the hole
Installation with some nuances can be made into walls from any materials. The main differences are between drilling holes in concrete, bricks, drywall and wood, and installation in walls made of other materials will be carried out by analogy with those listed.
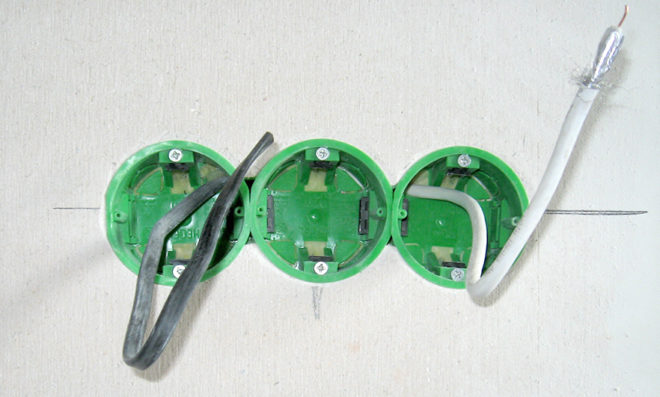
There is a significant difference between installing one single outlet and their block, consisting of two or more connection points. In the second case, in addition to the location, it is necessary to calculate the distance between the centers of the socket boxes, however, this is not difficult, since it will be equal to the distance between the centers of the decorative strips of the socket covers.
Installation of a single socket
All the markings that are done in this case concern the location of the outlet itself, and the angle of its inclination is adjusted already when installing the inner part.
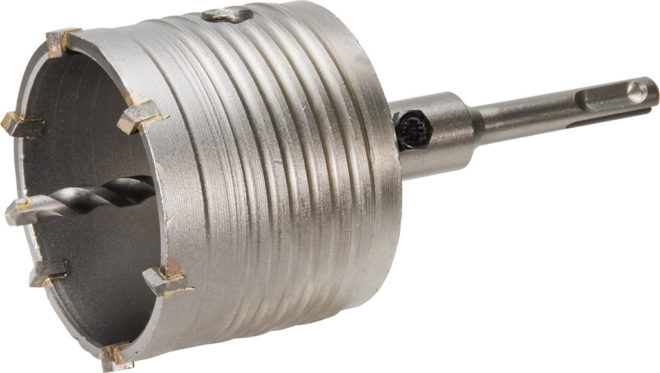
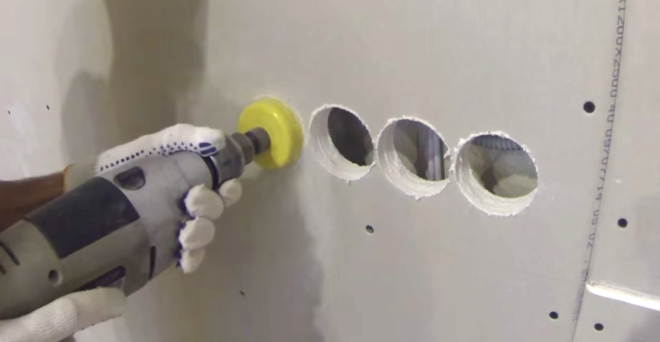
It greatly facilitates the work of having the necessary tools, such as a good drill and a crown for socket boxes, with which it becomes a matter of two to three minutes to make a hole in the wall. If the drill bit for a socket in concrete is not included in the existing tool kit, then a drill with a victorious tip will do.
The diameter of the socket itself is chosen in such a way that the inner part of the socket fits freely (but without much clearance) into it. This is not at all difficult - the dimensions of the vast majority of devices are made according to a single standard, and rare exceptions will most likely be visible to the naked eye. As for the diameter of the holes for the socket boxes themselves, their sizes depend on the material of the wall in which they will be cut.
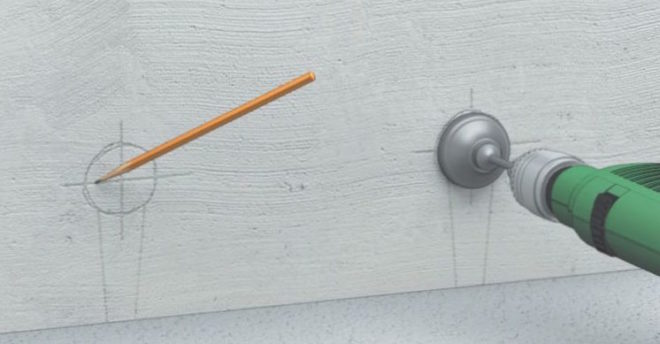
When marking the center lines, you can and should draw a little further than the required diameter of the circle along which the crown will be selected. If suddenly the drill jumps off the center, then this will be noticeable and subsequently it will be possible to align the socket itself when covering it with a solution. The extra lines, even if they are not erased, will be covered with a decorative outlet cover.
Concrete
The most important thing to remember is that the concrete crown is selected of such a diameter that there is a gap of 0.5-1 cm between the socket and the wall.This is necessary so that you can push the mortar there, which, after hardening, will securely hold the socket in the wall. It is no longer recommended, in this case, there is a possibility that the solution will not hook properly on the wall and the whole structure will fall out sooner or later.
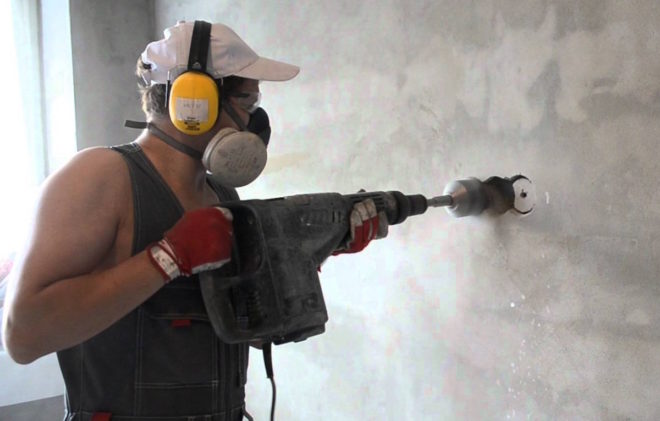
The drilling of the holes itself is very simple - a small indentation is made in the center of the marking with a drill to fix the central axis of the crown there. Drilling starts at low RPM so that the bit will cut through the original channel.
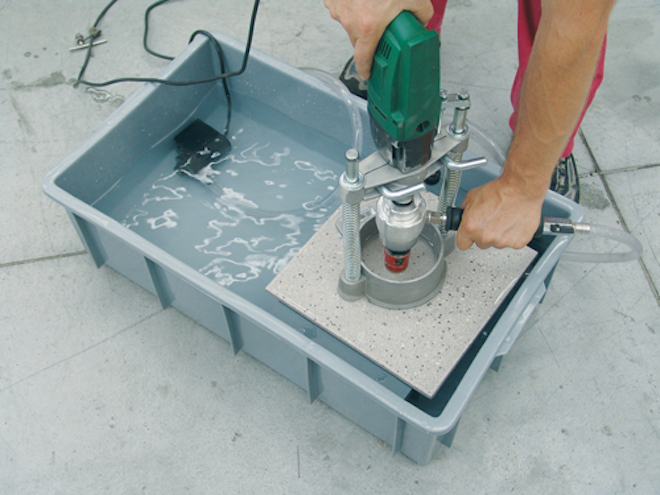
It is imperative to take into account the effect of heating and expansion of materials from friction - to avoid this, water must be poured onto the crown when drilling. To do this, you can invite an assistant, or make a device that is put on the drill itself.
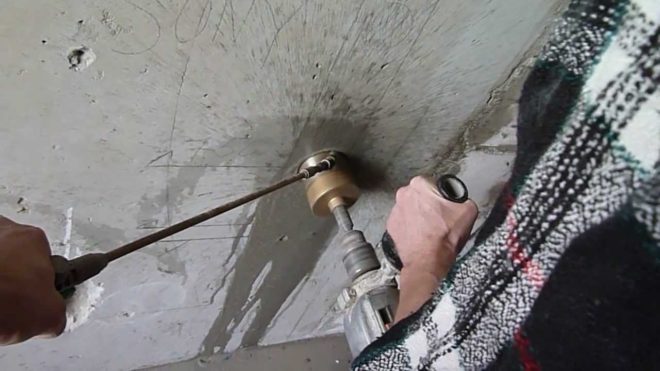
When the crown goes deep into the wall to the required depth, it remains to remove it, knock out the piece to be cut out and trim the hole itself.
If there are no crowns for rosettes, then you can use the "old-fashioned" way to make a hole for a socket - drill grooves along the diameter of the marked circle (as close to each other as possible) and remove the inner part with a chisel or puncher.
The two can be combined if the crown is already old or the concrete is too hard. It is necessary to drill holes along the perimeter of the circle with a drill, after which the crown for the socket will already be used.
This video shows an example of installing flush boxes in a concrete wall:
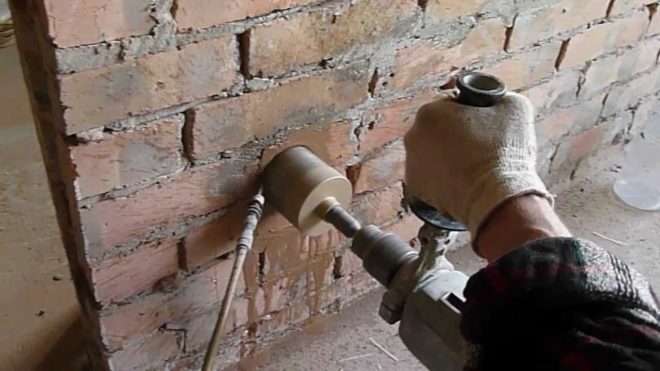
Brick
The drilling methods here are the same as for a concrete surface and the size of the hole is selected according to the same principle - it is made slightly wider in order to push the mortar there. The difference is that the depth of the socket is calculated differently, because additional finishing should be done on the brick - mainly plaster, and the body of the socket should be flush to the wall.
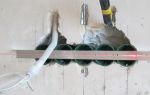
The easiest method to solve this issue is to lay the wire in the wall, even before plastering it. When the plaster is laid down, the end of the wire is brought out, and when the solution hardens, the installation of the socket is performed. The hole for it is drilled just below the wire and very carefully so as not to catch it. Then a groove is made to the wiring with a chisel or perforator and the socket can be installed.
Ceramic tile
In addition to the fact that it is necessary to decide how to make a hole in the tile for the outlet, there is the same difficulty here as when installing the socket into a plastered wall - it must be flush to the wall surface.
A more complex option involves laying the tiles last, and installing the socket outlet from the very beginning on the main wall. Here you will have to calculate how much it should protrude from it - the layer of tile glue and the thickness of the tile itself are taken into account. The disadvantage of this method is the likelihood of poor fastening of the socket box, because the solution will bind it only to the load-bearing wall, and the rest will not be fixed as rigidly as required.
An additional complication is the need to accurately calculate the place where the hole should be cut in the tile itself - a few millimeters of discrepancy and the socket simply will not fall into place - you will have to re-drill the wall or cut another tile.
A simplified version is done according to the same principle, but in a slightly different order. A hole is drilled in the main wall in which the wire is hidden (the strobe of the wiring itself at the entrance to the socket box should be made as deep as possible), and the hole itself is closed. This place is remembered (height from the floor and distance to the wall) and further work is done on plastering the wall (if necessary) and laying the tiles. When the plaster and tile adhesive are completely cured, you can cut a hole for the flush plate.
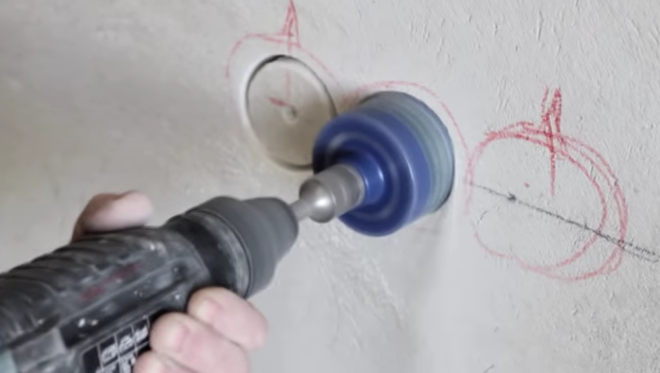
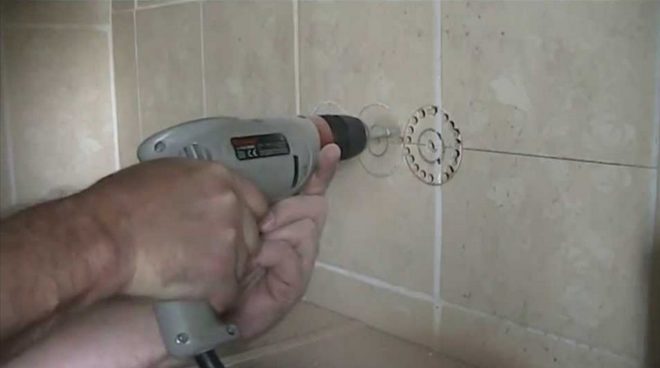
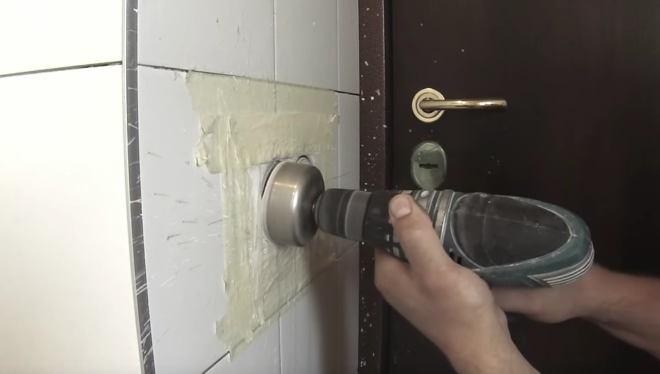
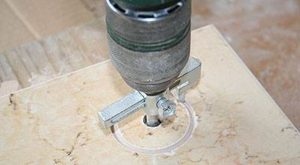 There are two main ways how to cut a hole in a tile when it is already glued to the wall; two are the use of a diamond-coated crown (it will cut through the wall along with the tile) or the use of a "ballerina" - a tool designed specifically for tiles. In the first case, the technique is the same as for a concrete wall, and in the second, a kind of compass is put on the drill, which will scratch a hole of a given diameter in the tile - then it will be necessary to drill the wall separately.
The most important thing here is to stop in time so as not to damage the wire. If you are confident in the calculations, then you can drill a hole on top of the existing one, where the wire is hidden. You can also make a hole for the socket on the side, get the wire, push the solution into the hole where it was.
More details about the nuances of installing socket boxes in a tiled wall can be seen in this video:
Drywall
An ordinary socket will not work here - for this material you need to purchase glasses with presser feet. Their distinctive feature is that the holes in the drywall must be drilled exactly to the size of the socket - it will not need to be "planted" on the mortar. Fixation takes place due to the edging, which is pressed against the drywall from the outside, and the fastening legs, which are attracted to it from the inside.
The only exception to this procedure may be when a sheet of drywall is used, from which the socket may break. In this case, from the inside, it must be reinforced with plywood - the legs of the socket will rest against it and the effort will be distributed over a larger area.
Detailed instructions for installing the socket outlets in drywall in this video:
Installation of two or more socket outlets
Everything is done in exactly the same order, depending on the material of the wall on which the installation is being made. The only difference is in the need to calculate the distance between the installed socket boxes, for which there are three main methods.
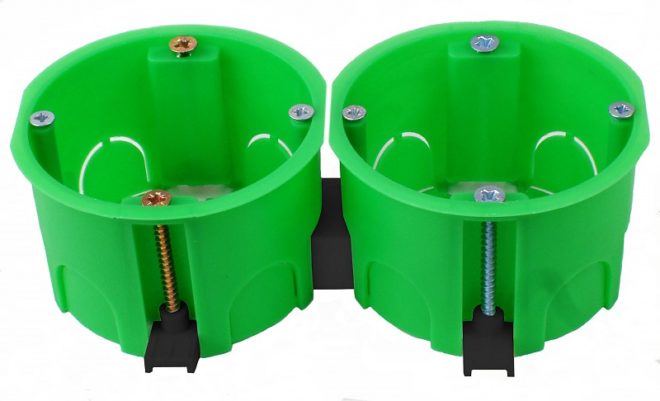
- The easiest way is to use a socket box. These are all the same plastic glasses, but there is a jumper between them - it is made there initially and cut off in the store if a person needs to buy only one socket. In this case, everything has already been calculated in advance and it remains only to transfer the dimensions between the centers of the socket boxes to the wall.
- Much the same can be done with outlet covers. After all, they will be installed close to each other, so you just need to put them on the table, measure the distance between the centers and transfer this to the marking.
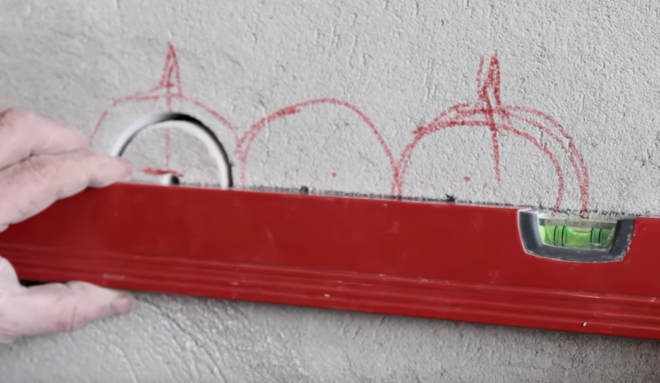
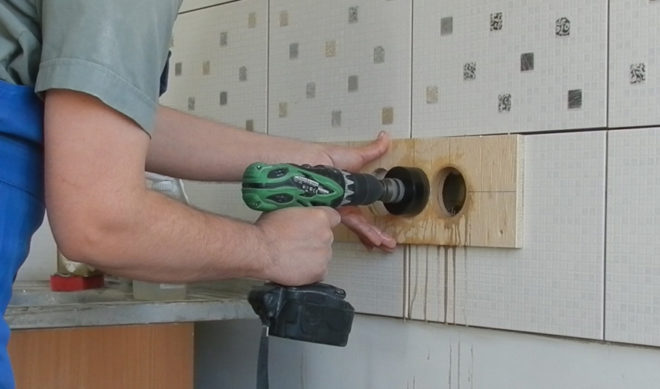
- Electricians who are constantly engaged in installation, so as not to measure the distance between the sockets every time, make stencils. To do this, a smooth board is taken, a horizontal line is drawn in its center, on which the distance between the centers of future outlets is marked. Now it remains to drill holes in the frame so that a crown can be inserted into them. When drilling walls, the main task is to set the frame and drill the central grooves to which the crown is equal.

This video shows a working method for installing socket boxes using self-made templates:
Briefly about the main
The diameter of the socket to be purchased depends solely on the socket that will be fixed in it. To make sure that they are similar to each other, it is advisable to buy them in the same store or feel free to bring a power outlet with you and try on.
The hole in the wall can be made slightly larger than the diameter of the socket itself, or exactly to its size. This depends on whether the mortar will be used to fix it in the wall.
The minimum distance between the sockets is determined by their decorative covers - if the sockets are located close to each other, then the distance between the centers of their covers must be measured.