How to make electrical wiring in the garage with your own hands - from diagram to installation

Say what you like, but you cannot do without electricity in the garage. Even if you only appear in it a couple of times a day for five minutes to pick up and then park the car. After all, you will not drive the car in the dark, and besides, you need to periodically charge the battery. Well, for most owners, a garage is a second home. Therefore, there was, is and remains an urgent issue such as wiring in the garage. Let's talk about this in more detail, how to do it, where to start, what requirements and rules to follow?
Content
Power supply diagram
Pay special attention to the power supply before wiring the garage. Whatever the structure - a huge house or a small garage - you should always start with it. First of all, draw a schematic drawing of your room. What should be reflected on it?
- Introductory line that goes to the garage building.
- The places where the lamps will be installed are the garage itself, the pit for inspecting the car, the cellar. Perhaps, additional lighting will be needed above some kind of machine (turning, drilling).
- The position of the switchboard, it is most correct to install it at the entrance. When you leave the room, you can safely turn off the power and immediately go out into the street, and not wade through the entire garage in a hurry.
- Planned outlet locations (near a workbench, workbench, or machine tool, or anywhere else you may need to plug in a power tool).
- The approximate route of the garage wiring (that is, which path you plan to take the wires from the switchboard to the lights and sockets).
- If you have mechanical machines in your garage, a compressor for pumping tires, then display their location on the diagram, because separate lines from individual automatic machines will need to be connected to these pantographs.
The electrical wiring diagram in the garage is done in order to clearly determine the amount of necessary materials - sockets, switches, automatic machines, lamps, junction boxes.
You will make a list, walk through several electrical stores, calmly decide on prices and select high-quality switching devices and wires available to you.
Also, the wiring diagram in the garage will help you determine the maximum load. You will calculate the total power of all electricity consumers and select the correct input and output cables and machines by cross-section and rated current.
Lightning protection
Any buildings must be protected from lightning strikes, and the garage is no exception.
Protection of large residential and industrial buildings is carried out permanently at the stage of construction. When a garage is located near some high-rise building, then, in principle, there will be nothing terrible if there is no lightning rod on it. It is unlikely that lightning will hit him. In the case when a garage cooperative is being built, lightning protection is also performed centrally. But if it is located separately, away from tall buildings, take care of installing a lightning rod even before you start installing electrical wiring in the garage.
Here you will not have any special difficulties. The entire system consists of three main elements:
- a lightning receiver;
- a conductor that leads the current to the ground;
- earthing switch.
A steel rod with a diameter of at least 1 cm and a length of at least 20 cm is used as a receiver. It is mounted vertically at the highest place in the garage.The use of a steel rod is due to the fact that at the moment of a lightning strike, the receiver material must withstand mechanical and thermal stress.
The rod is connected to the current-carrying conductor; this is done by welding, soldering, or a bolt and nut. The shortest path must be chosen between the receiver and the ground electrode.
Earthing switches can be artificial and natural. In the case of a garage, the option of a natural ground electrode is hardly suitable, since various pipelines are most often used as it. For the installation of an artificial ground electrode system, old springs, metal rods and corners are suitable.
The earthing switch must be buried in the ground. The distance from it to the entrance gate to the garage and the paths along which people constantly walk should be at least 5 m.
According to the rules, within a radius of 4 m, the earthing switch must be protected so that in the event of a lightning strike, a person does not fall into the step voltage range.
Most often, metal rods are used as a ground electrode. Their size depends on what kind of soil is in a given place and how close the groundwater comes to the surface. In the case when the soil is dry and the water level is low, it will be enough to take rods 2-3 m long. They are driven into the ground, and at a depth of 0.5 m they are tied together using a metal bridge.

Lighting
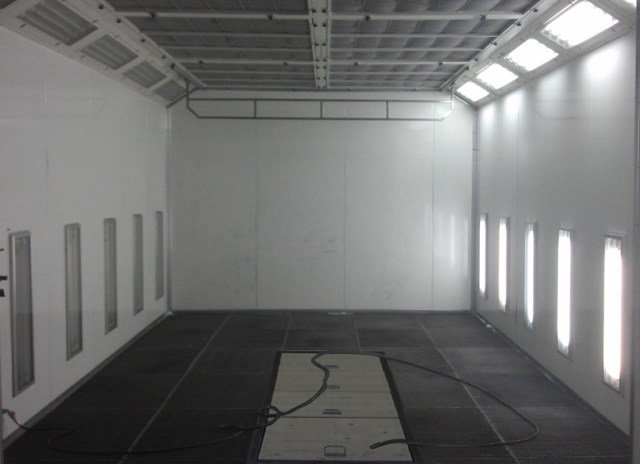
Do-it-yourself lighting wiring in the garage is done without any difficulties. Especially if you only have a garage for storing a car, in this case, a couple of lamps are generally enough.
If you spend all your free time in the garage doing car repairs and other work, then in addition to the main lighting fixtures on the ceiling, you may need additional ones on the walls. It is also advisable to install another lighting device above the entrance to the garage. And also, if you have various machines there, then the lamps right above these workplaces will not be superfluous.
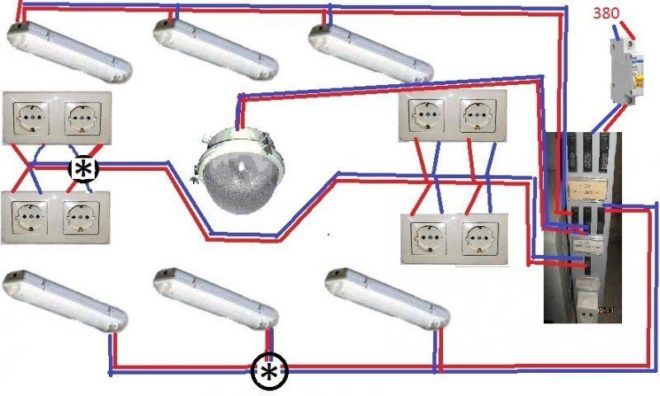
It would be rational to place fluorescent lamps on the side walls and connect them to a two-button switch. One key turns on one side, the other - the other. This is very convenient if the car is inside the garage and you need to do some work from one side, for example, change wheels, work with fenders or doors. We turned on the right side of the lighting with one key and do it yourself calmly, then we switched to the other side in the same way.
For lighting electrical wiring in the garage with your own hands, you can install the following lamps:
- NBP, PSH, NPO, NSP models designed for incandescent lamps;
- LPO and LSP models of fluorescent lamps;
- the most profitable LED luminaires, they have the longest service life, while low power consumption. They work at any temperature, but there is one drawback - this is the price, such lighting devices are not cheap.
Remember that metal housings of lighting fixtures must be grounded.
If you mount the light sources at a height below 2 m from the floor level, they must be protected from accidental mechanical damage.
Wiring rules for utility rooms
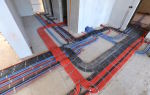
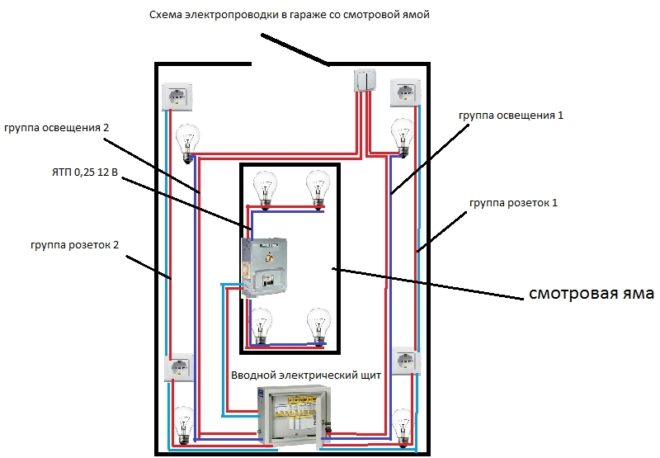
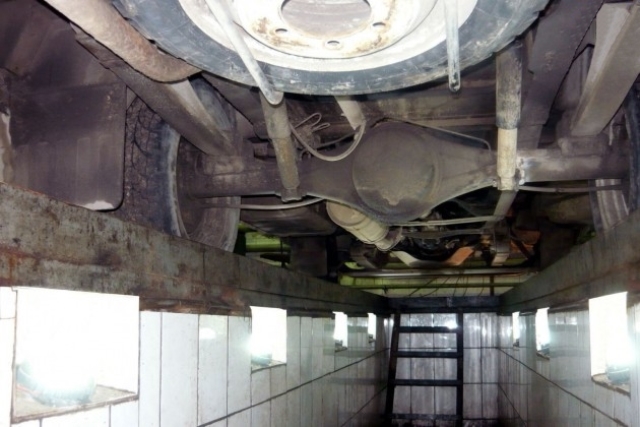
Often, garage capital buildings are equipped with pits for inspecting cars and basements. Therefore, before you make the electrical wiring in the garage, read some of the nuances and rules for these particular premises.
To ensure the safe operation of the lighting wiring in the inspection pit and basement, it must be powered with a 220/36 V step-down transformer. Due to the fact that these rooms are deepened and are damp, the transformer itself should be located at the entrance gate to the garage or near the switchboard ...

In dry basements, a voltage of 220 V can be used for lighting, but the connection must be made through a differential automatic or RCD.
Lighting wiring in the garage for the basement and observation room is carried out in an open way along the surfaces of ceilings and walls, it is allowed to use pipes or electrical boxes made of plastic.
The basement and the inspection pit must be connected from the switchboard by two independent lines. It is prohibited to install switching devices in them. If there is an emergency, it is allowed to install sockets and switches with a protection class of at least IP 44 in dry inspection pits and basements.
The inspection pit has limited dimensions, so make niches for mounting the fixtures. When this is not possible, then use luminaires with a protective grill. When using portable auxiliary lights, connect them with a step-down transformer (36 V) or a car battery (12 V).
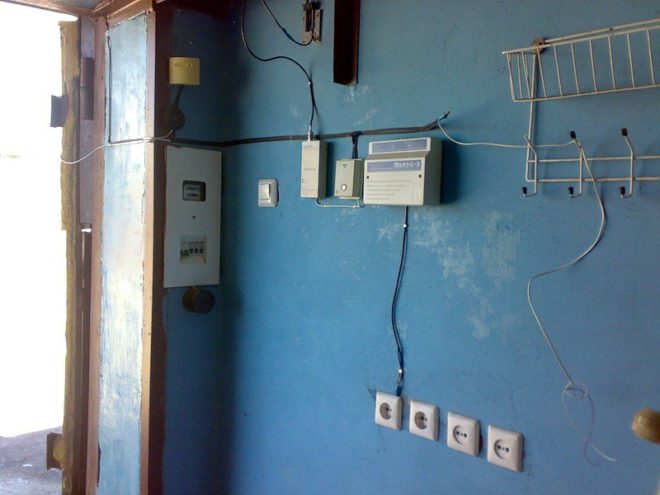
The main elements of the switchboard
How to properly assemble a switchboard in a garage? Most often, the owners of cars and garages simplify the scheme and get by only with circuit breakers, neglecting other protection elements. Yes, it is much cheaper, but not always justified. It is desirable that the following main elements are mounted in the shield:
- Automatic switches. Their installation is mandatory, since this is the main protection against short circuits and overloads. If you have a completely old garage with one light bulb in the center and one outlet, you can easily do just an introductory machine. But for modern garages, this is no longer enough, since it is often necessary to use various power tools, heating systems, chargers and starters.
In the circuit, outgoing circuit breakers are located after the meter.
- Residual current devices (RCDs), which are connected together with ordinary circuit breakers, or differential circuit breakers. Their main purpose is to protect a person from leakage currents that arise in the event of damage to the insulation of electrical wiring. The installation of such protective elements is especially important if you have to work with an electrified tool in a basement or inspection pit, where the environment has high humidity.
- Relay for voltage monitoring. In garage cooperatives there are a lot of craftsmen who make something from morning to evening. Not always there are only first-class professionals among them, there are also those who have "crazy hands", so often in garages there are faults in the electrical network. For example, if a zero is broken in a three-phase circuit, an increased voltage will appear, which in turn can lead to the combustion of motors and lighting lamps. A voltage monitoring relay in such a situation will automatically de-energize your circuit and save the equipment.
- Surge suppressors. They are installed when the garage is powered from an overhead power line. During a thunderstorm, lightning can strike the line. The arresters installed on the overhead line must extinguish the trapped potential, but the residual value can still affect the wiring. In this case, the limiters will save the circuit, they will divert the increased potential to the ground circuit. These protective elements are installed between the input machine and the meter. In the absence of limiters, when a thunderstorm is approaching, turn off the input machine to the garage.

Internal wiring
If at the time of the construction of the garage, hidden wiring was immediately made in it, then you can easily use it, only by improving it according to your scheme. If there is none, then do not waste your time, do not groove the walls, carry out the wiring in an open way.
Choose a cable with copper conductors and a sheath made of non-combustible materials, the VVGng brand is suitable, lay it in cable channels, corrugation or metal pipes.
For the lighting load, a section of 1.5 mm will be enough2, for sockets 2.5-4 mm2.
Single phase wiring
Do-it-yourself single-phase electrical wiring in the garage is simple, the diagram looks like this:
- An input cable comes to the switchboard and is connected to the input contacts of the general machine. For a single-phase 220 V power supply, a two- or three-core wire is sufficient, and a two-pole machine is best suited for a rated current of 25 A or 32 A.
- After it, an electric energy meter is mounted, to which the phase and neutral wires are connected.
- After the counter, zero goes to the zero bus, and the phase to the outgoing single-pole machines.
- All zeros of differential automata and RCDs are connected to the zero bus.
- Lighting is powered through single-pole machines, and sockets through differential ones.
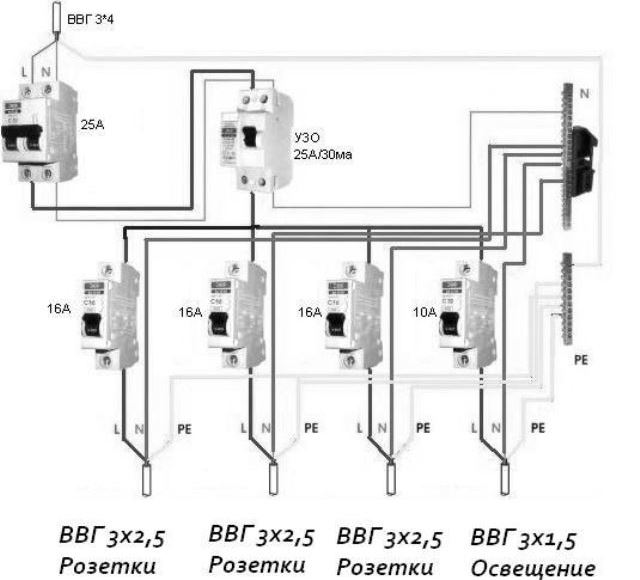
As a rule, all the electrics in a regular garage consists of two or three automatic devices for lighting (the garage itself, a pit, a cellar) and two differential automatic devices for outlet groups. Keep in mind that differential circuit breakers can be replaced with residual current devices (RCDs) in conjunction with ordinary circuit breakers.
Three-phase wiring
Many garage owners do not just store a car in it and occasionally take care of it, but also perform various work on special electrical equipment. In this case, the electrical wiring in the garage will need three-phase (380 V). With this option, electricity is supplied to the switchboard by a four- or five-core lead-in cable.
The veins of the line drawn to the garage are connected to a three-phase input automatic machine, after which there is an electricity meter in the circuit, then another general three-phase automatic machine.
To connect single-phase automatic lighting, take one phase from the general automatic machine. Just distribute the load evenly, do not hook all single-pole machines to one phase. For this switching, a two- or three-core wire will be enough for you (one core is a protective ground).
For connecting three-phase electrical appliances, use a 380 V line with a four- or five-core conductor (here the fifth core will be for protective grounding).
Clearly about the installation of electricity in the garage in the video
Remember! When there are no people in the garage, the power supply must be turned off. This is required by fire safety technology.
Briefly told you how to do the wiring in the garage with your own hands. As you can see, this is not a house or a bathhouse, everything is much simpler here, you can master it yourself without the help of professionals. Although, if your garage is located in a cooperative array, be sure there will be helpers there.