Open (outdoor) wiring - advantages and disadvantages, requirements, installation features

Open wiring is the easiest way to lay electrical lines. Unlike hidden, it is not laid in the thickness of building structures, but above their surface. It is rarely used in modern homes. At the same time, this method requires much less time and is associated with less labor costs than laying a closed-type line. There is also no need for chipping, due to which the integrity of the ceiling and walls is practically not disturbed.
If you do not plan to carry out retro-style wiring throughout the house, then the open method is best used only in certain areas, for example, in the case when you need to slightly expand the line. Otherwise, a large number of wires that are perfectly visible to the naked eye will spoil the interior.
Installation of open wiring requires careful preparation. This installation method is associated with certain rules that require strict adherence.
Content
Open-type electrical wiring installation requirements
Here are the basic rules that must be followed when laying open wiring in an apartment.
Neglecting them is a violation of electrical safety standards and can cause a short circuit and line failure. So:
- It is forbidden to lay a line under pipelines on which condensate accumulates.
- There should be no heat emitters near the cables.
- It is not recommended to use a simple pipeline for laying such a line. It is desirable that the cable has additional protection. Depending on the location of the wiring, it can be rigid or flexible, as well as shielded.
- If the conductor is laid in plumbing niches, then you should not use junction boxes if you cannot quickly access the power transmission line.
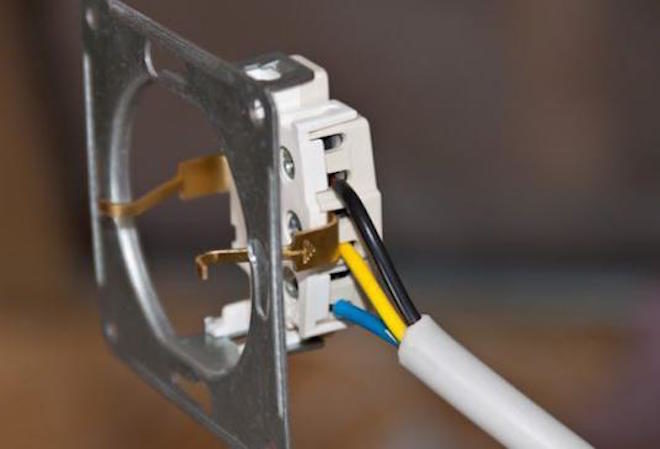
- It is possible to connect the cable cores together only in special junction boxes.
It is necessary to ensure the possibility of easy access to the cover of the latter. If the humidity in the room is high enough, gaskets are installed on the covers of the junction boxes to improve the tightness.
- The protective layer of the conductor must be maintained intact along its entire length, up to the connection of the conductors to an outlet, switch or electrical appliance.
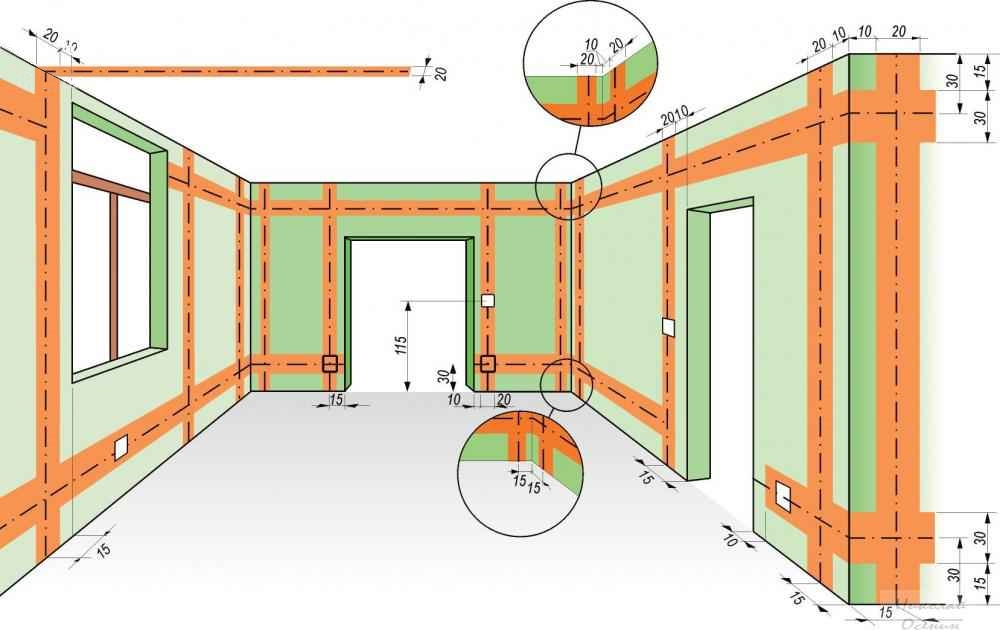
- For fixing the cable, it is recommended to use plastic clips matched to the conductor diameter. The distance between the clamps should not be too great, otherwise the conductor will sag under its own weight. It is necessary to place the brackets on both sides of the wire, and also be sure to install clamps near the points of connection to electrical elements. If the cable is laid horizontally, then the brackets should be located at a distance of no more than 40 cm from one another when attaching an unarmored conductor and 75 cm for a wire with an armored coating. If open electrical wiring is laid vertically, then the maximum interval between the clamps should not exceed 1 m.
- When installing conventional conductors with a protective coating in the horizontal direction, the interval between the brackets should not be more than 25 cm, and in the vertical direction - 40 cm.The distance from the electrical element to the clamp closest to it should not exceed 10 cm.
- If the wire needs to be bent, the minimum bending radius should be 8 cm.
- If the line crosses a non-electrical pipeline, then the minimum spacing between them should be 3 cm.

When routing the cable through the wall, it is recommended to use an insulating tube to protect it along this length.
Features of the installation of an open-type electric line
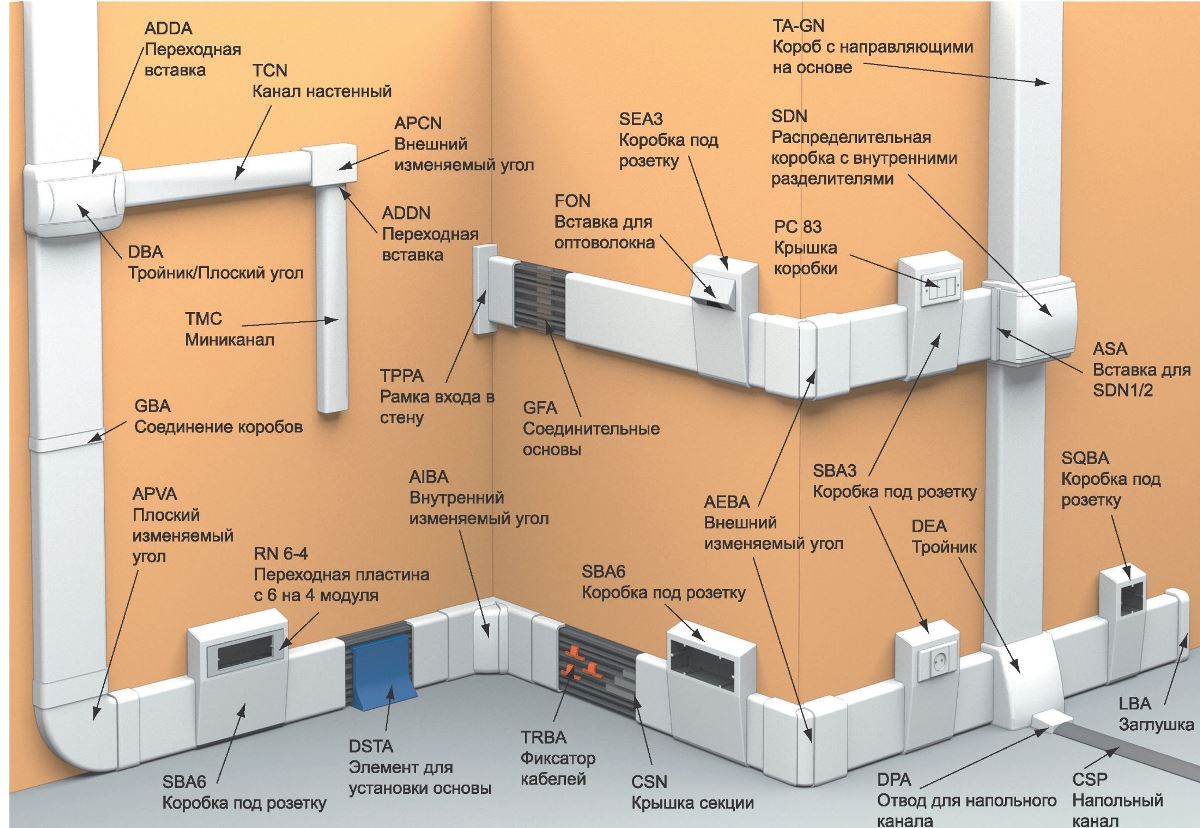
The open method of installing electrical wiring is most often used when laying wires above the baseboard, at the junction of walls with ceiling tiles, as well as in the corners of rooms. The conductor used must be perfectly flat.
If exposed wiring is installed in an apartment with false ceilings, then the cable must be attached to the walls. With a large number of wires, it is worth using throughput channels.
In no case should you simply run an electric wire along the suspended ceiling. Installation of junction and branch boxes must be done so that access to them is not difficult.
An example of mounting an outlet with open wiring in the video:
Advantages and disadvantages of external wiring
Like any other method of laying communications, the installation of open wiring has its pros and cons. The benefits include:
- Ease of installation.
- Minimal violation of the integrity of the walls (ceiling).
- No need for additional equipment.
It has open wiring and its disadvantages. They are as follows:
- Unattractive appearance.
- The need to take into account the technical standards of the room.
- The need for strict compliance with the installation of fire and electrical safety standards.
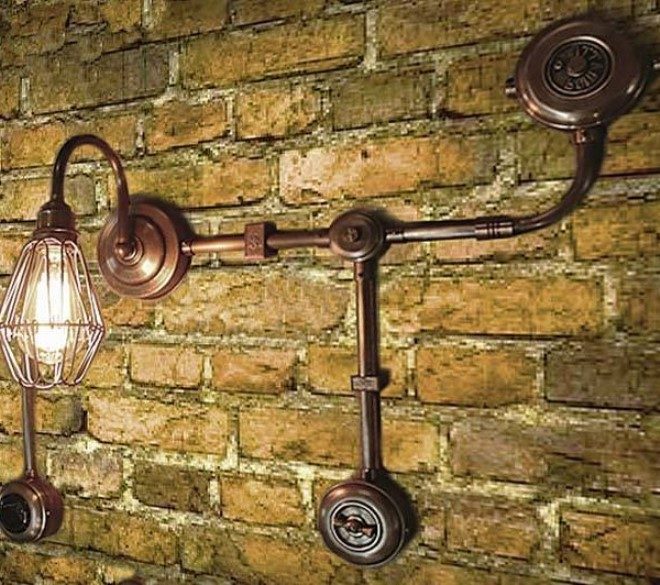
Of course, outdoor wiring does not always look unpresentable in an apartment. For example, a vintage line in a retro style can be a great addition to the interior and give the house an old-fashioned charm. But, firstly, the elements for such wiring are expensive, and secondly, it is worth installing it only if the design of the room is designed in the appropriate style.
An example of a finished open electrical wiring laid in cable channels in the video:
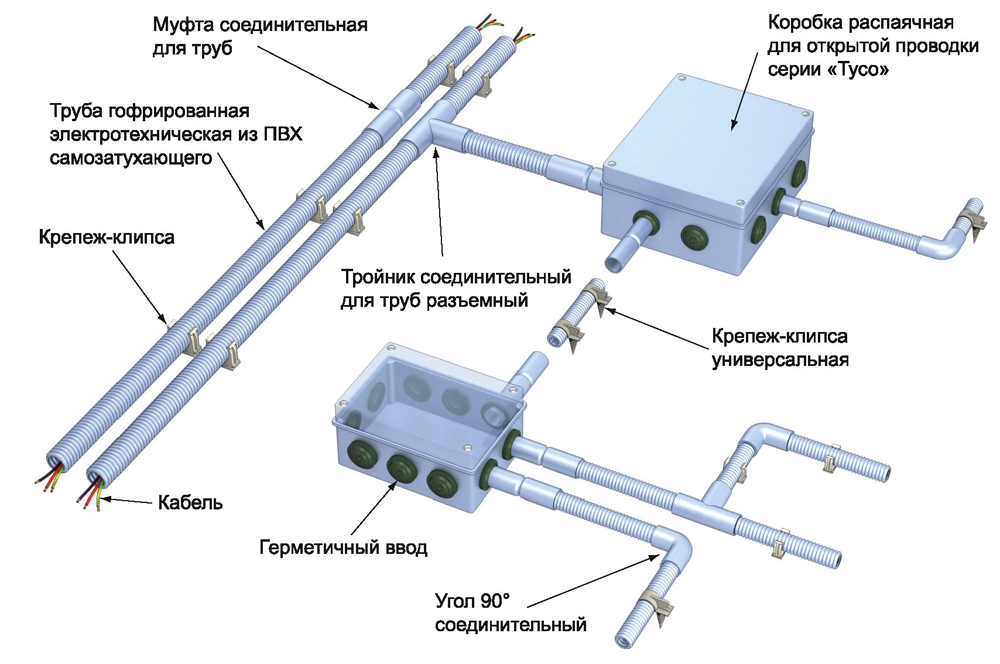
Rigid pipe wiring
Recently, many people are discovering the installation of external wiring using rigid plastic pipes. In this case, the cables are placed inside the pipelines, which are then fixed to the walls on special supports. To facilitate this installation, a large number of auxiliary devices (tees, cable sleeves, T-branches) have been developed.
The main advantage of such an installation is the high degree of protection of electrical conductors from the effects of water, as well as from mechanical damage.
In this regard, this method of installation is most often used in cellars, garages and basements. But this does not mean that external wiring cannot be laid in this way in a summer cottage, in a city apartment or a country house, since externally insulating pipes look quite attractive.
Features of mounting surface wiring in IRL pipes
When laying an electrical line in insulating pipes, there are some important points to remember:
- The pipelines must be fixed to the walls in such a way that the distance between them is 80 cm, while the distance from the electrical device or element to the nearest fixture must be at least 10 cm.
- The cables can only be connected to each other at the terminals of electrical elements or inside special junction boxes.
Connecting conductors in pipes is not allowed.
- The bending radius of pipelines should be at least 6 times greater than their diameter.
For this type of installation, special fixing devices are provided. A list of them can be found both on the Internet and in special literature.
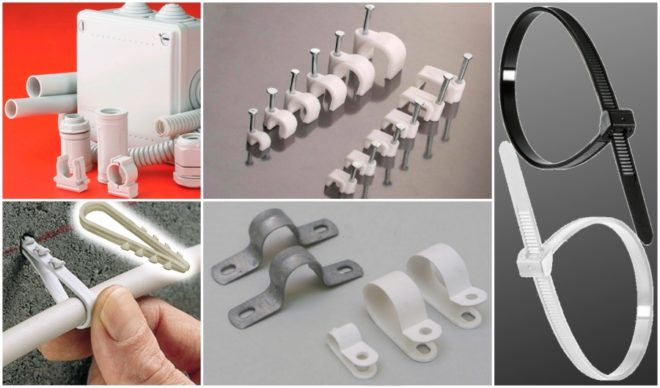
If for any reason you cannot buy special clamps, you can use ordinary construction punched tape to install insulating pipes. To do this, you need to cut off a piece of the required length from the skein and fix it on the surface. End fasteners should be done at an angle and slightly away from you so that the tape does not sag. Then the pipe is fastened with ties along the entire length. Sometimes, if it is impossible to get special clamps, fastening with punched tape can be quite a good solution.
An example of installing a pipeline for electrical wiring in the video:
Required tools for pipe wiring
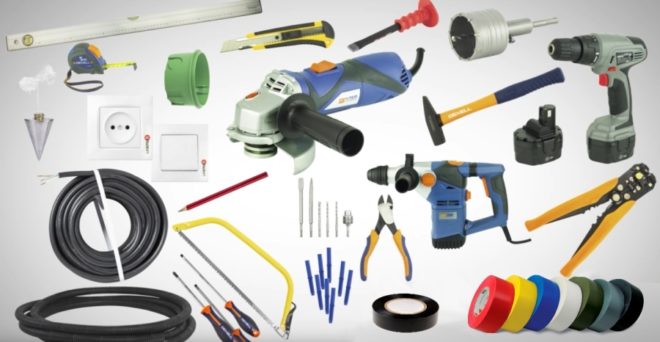
This installation method does not require a lot of tools. To work you will need:
- Marking cord.
- Perforator (for working with concrete walls). This device will also require a drill of the required diameter.
- Plumb line.
- Roulette.
- A hammer.
- Building level.
- Hacksaw for metal.
To connect in difficult areas, you will need two couplings, as well as a corrugation. Installation of pipelines is carried out in such a way that moisture does not accumulate inside them. Therefore, you need to pay special attention to the quality of the rubber seal, which is installed at the junction of the pipe with the electrical element.
It is advisable to use reinforced seals suitable for the diameter of the insulating pipe. When installing, the cuff should penetrate a small part into the wiring product.
If there is no sealing collar, it is recommended to enter the wire from below.
Advantages and disadvantages of the method
The advantages of installing electrical wiring in insulating pipes include:
- Ease of installation.
- Additional protection of conductors from mechanical damage and moisture.
- Attractive appearance.
The disadvantages of this method are as follows:
- It is necessary to accurately size pipes.
- Quite a lot of accessories are required.
In general, the installation of exposed wiring in pipes is quite a working method that allows you to reliably protect cables from damage and give the line an elegance.
Conclusion
In this material, we talked about what open wiring is, what are its features and how it is installed in various ways. This information will help you decide on the type of wiring, and, if necessary, lay the power line yourself.