How to easily disassemble a light switch
Are you familiar with such a situation when, when entering a room, you press the light switch button, and the lighting does not appear? It happened, probably, with many, and there may be several reasons for the absence of light. Perhaps at the moment there is no voltage in the whole apartment, or the electrical wiring is damaged, or maybe the switch itself is not working properly. In the latter case, you should not immediately run to the store for a new device or call an electrician to repair it. An ordinary keyboard switch is the simplest element, any man who is more or less familiar with electricity will be able to cope with it on his own. And we will help you a little and tell you how to disassemble the light switch and determine whether it is in good or bad condition.
Content
Is the switch exactly the reason?
Let's first make sure that the reason for the absence of light is in the switch itself.

Check if there is lighting in other rooms. If not, then look at the introductory machine, maybe you have exceeded the permissible load by simultaneously turning on the electric kettle, iron and microwave oven, and it turned off. Go to the site, ask the neighbors if they have a light, maybe there is no voltage in the whole house.
In the case when the light does not come on in only one room, but in all the others, the circle of possible causes narrows. Check the integrity of the bulb and the health of the socket in the lighting fixture. If everything is in order with the lamp, then there is no other way out but to remove the switch and examine its insides.
Materials and tools

Before disassembling the light switch, immediately prepare all the necessary tools and materials that may be required for repairs:
- indicator screwdriver;
- flat screwdriver;
- Phillips screwdriver;
- insulating tape;
- sandpaper;
- insulation stripping knife.
Relieving stress from the workplace
Using an indicator screwdriver, check that there is really no voltage at the workplace. How to do it right? First, check the operating condition of the indicator screwdriver in an area known to be energized, such as in the on-site switchboard. When in contact with the phase wire, the indicator window lit up, which means that the screwdriver is working. Now go back to the room and check the absence of voltage in the junction box by touching the mains wires. The indicator screwdriver does not light up, which means that everything is in order, you have secured the working area and you can safely remove the switch from the wall.
Step-by-step parsing instructions
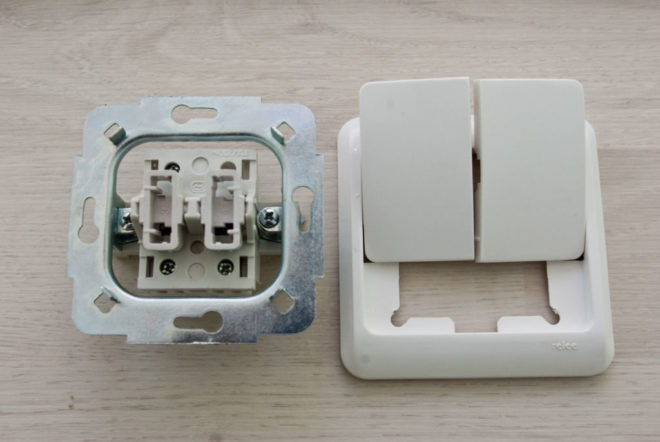
Now, in detail about how to remove the switch:
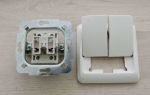
- The first step is to remove the key. In theory, it should be removed if you press the key from below with your thumb, and pull it towards you with the rest of your fingers. In some models, the keys sit tight enough, then you have to slightly pry it from the side with a flat screwdriver.Do this carefully so as not to scratch the protective frame and the key itself. If you have a switch with two or three keys, remove and remove them one at a time.
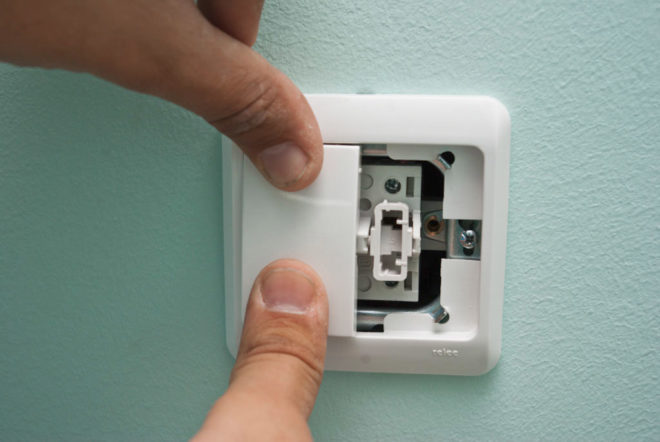
- Now remove the protective frame. In some models, it is fastened with two screws, unscrew them with a Phillips screwdriver. Sometimes the frame is attached using plastic latches, in this case it is even easier, just squeeze them out.
- Having removed all the protective plastic elements, we got to the working mechanism of the switch. There are two spacer screws on the sides, unscrew them and remove the working part from the socket. There is another option, when not spacer screws, but spreading legs are used to fix the working mechanism in the socket box. They need to be slightly weakened by reducing the angle of spread.
- Examine carefully the disassembled switch, especially where the wires are connected, for a weak contact, burning, melting. Disconnect the wires from the contact holes. So that later not to confuse anything at once, with the help of an insulating tape, mark the wire that was phase and was connected to the incoming contact of the switch. If you find that the strands of the wires are oxidized, strip them with sandpaper and reconnect. In the case when it is found that as a result of poor contact, the wire core has burnt out, it is necessary to reseal it, remove the insulation by 1 cm with a knife and fix it in the contact hole.
This video shows how the one-key is disassembled:
and a two-button switch:
When disassembling the switch, remember the sequence of actions. If everything is in order with the switching device itself (it has not melted and is ready for further operation), it will need to be assembled in the reverse order. In the event that damage to the switch itself is found (for example, the contact part is melted), and do not try to repair anything, immediately go to the store for a new device.