How to check the health of an LED with a multimeter

Light-emitting diodes are widely used in modern lighting fixtures. This is due to their cost-effectiveness and high reliability compared to conventional light bulbs. However, LED elements are not immune to malfunctions. You can check their performance in various ways, but the most accurate and simple method is to check with a tester. In this article, we will talk about how to test an LED with a multimeter, and what are the features of this procedure.
Content
Testing LEDs in Continuity Mode
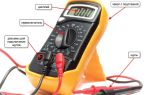
The multimeter is a versatile meter that allows you to check the health of almost any electrical device or element. To test a light emitting diode with a tester, it is necessary that the device can switch to the diode test mode, which is most often called continuity.
Checking the health of the LED with a multimeter is performed in the following order:
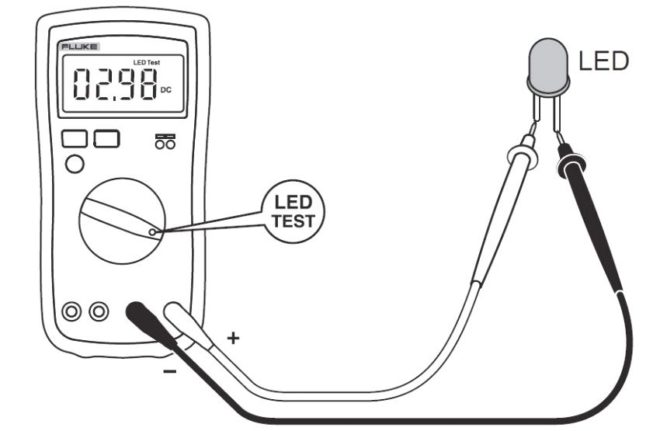
- Set the tester switch to diode test mode.
- Connect the test leads of the multimeter to the contacts of the element under test.
- When connecting the LED, take into account the polarity of its terminals (the black probe of the measuring device is connected to the cathode, and the red one to the anode). However, if the exact location of the poles is unknown, then there is nothing wrong with an incorrect connection, and the LED will not fail in this case.
If the probes are connected to the contacts incorrectly, then the initial readings on the tester display will not change. If the polarity is not reversed, the working diode will light up.
- The dialing current is of little value and is not sufficient for the LED to operate at full strength. Therefore, you can see the glow of the element by slightly darkening the room.
- If there is no way to dim the lighting, you need to look at the readings of the multimeter. When checking the working diode, the values on the instrument display will differ from one.
Visually checking the LEDs on the video:
Using this method, even a powerful diode can be tested for operability. The disadvantage of this method is that it will not work to diagnose the elements without soldering them out of the circuit. To test the LED in the circuit, adapters must be connected to the probes.
Sometimes the serviceability of a part is checked by measuring the resistance, but this method has not become widespread, since in order to use it, you need to know the technical parameters of the diode.
Checking LEDs without unsoldering
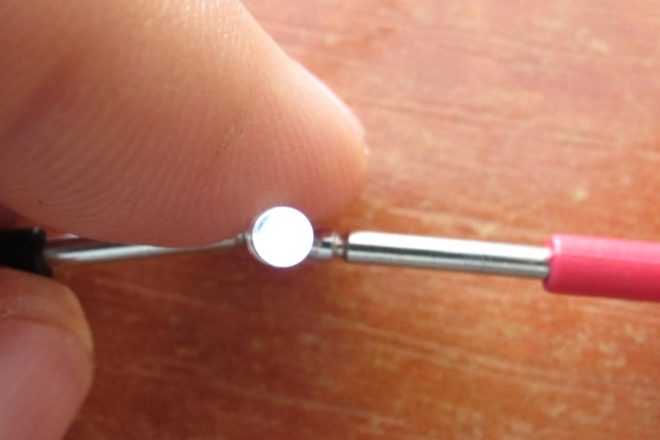
To connect the meter probes to the PNP shoe, small metal tips must be soldered to them, for which you can use simple paper clips.
To more reliably insulate cables with soldered lugs, insert a PCB gasket between them and wrap the structure with electrical tape.
Through these simple manipulations, we will get a reliable and at the same time simple adapter, with which we can connect the multimeter probes to the contacts of the light-emitting diode.
Then the probes are connected to the contacts of the LED element, while the last of the general circuit does not need to be soldered. Further verification is carried out in the same order as described above.
Let's give an illustrative example of checking the health of an LED without removing it from the circuit.
Checking light emitting diodes in flashlights
When testing elements of LED flashlights, the device must be disassembled and the board with mounted LEDs removed from it.Then the tips, soldered to the probes of the multimeter, are connected with the correct polarity to the legs of the LED directly on the board.
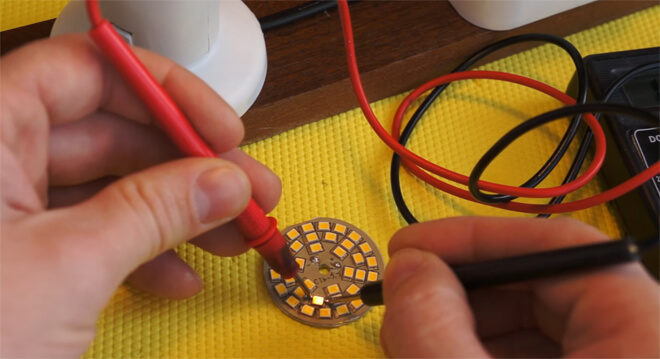
The tester's switch is set to the dialing mode, after which it is possible to determine whether the element is serviceable by the reflected readings on the display and by the presence (or absence) of light.
Checking the LEDs without soldering is also convenient because it allows you to determine the malfunction by measuring the resistance value in the circuit. So, when the LED is connected in parallel, a resistance approaching zero indicates a malfunction of at least one of the elements. Having received such results, you need to check each LED separately using the above methods.
On the video, checking the LEDs of the light bulb without soldering:
Conclusion
From this material, you learned how to check an LED for serviceability with a multimeter. This procedure is not complicated at all, and, having an ordinary tester at hand, everyone will be able to check the performance of LEDs in household appliances.