How to connect a lamp through a switch from an outlet
Even a child knows the main elements of electrical wiring with which the household network is equipped - a switch, a chandelier, an outlet and wires. All of them are created in order to provide a person with a comfortable living - lighting control, connecting household appliances. Most often, all these devices are switched in a common junction box. But sometimes there are cases when, in order to save materials, time and effort, you can bypass the junction box and connect one switching device from another. In this article, we'll talk about how to connect the switch from the outlet.
Where is it used?
Consider a situation when it is necessary to connect some new lamp or sconce from the outlet through the switch. There are cases when the repair has already been completely done, and there is a need for additional lighting. In order not to pull the wires from the junction box and not to cut all the walls, the connection of an additional switch and a lighting device is performed from an outlet that is located nearby.
The socket represents two potentials, one of which we take for the switch (phase), the second we will stretch to the light bulb (zero).
This option is widely used in kitchens. On the working wall (also called an apron) there are several outlets for connecting a variety of household kitchen appliances. It is advisable to place them in one frame and a switch, with the help of which the illumination of the working kitchen table will be turned on and off.
Step by step process
The algorithm for such work will look like this:
- De-energize your workplace by turning off the machine supplying directly to this room. If there is no panel with such a group division of rooms, then turn off the general input machine for the apartment. Use the indicator screwdriver to check the absence of voltage at the workplace.
- Make a hole for the switch near the socket and fix the socket in it. You will also need to make a small groove between the outlet and the switch, where the jumper wire will be laid.
- Install the lighting fixture in the desired location. Here, see for yourself how it is more convenient for you to do it. You can also carefully punch the strobe up to the lamp, lay a two-wire wire in it, and then glue it with wallpaper. Or you can lay the wire in a plastic box, it also looks nice and neat.
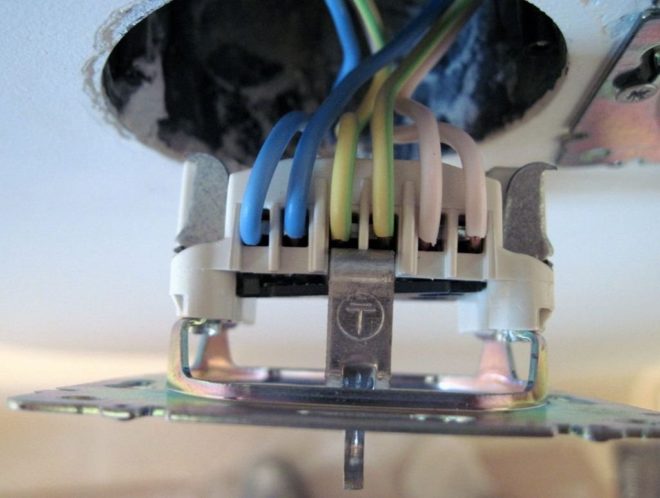
- Remove the cover from the socket and pull out its contact part from the socket. If you yourself installed this switching device in the past and observed the color coding of the wires, then the terminal to which the blue core is connected will be zero, and the terminal with the connected white (red or brown) core is the phase. In sockets with protective grounding, there is also an additional terminal in the middle, where the grounding conductor is connected, usually it is made in yellow-green color. If you do not know exactly where the phase and zero are, this must be determined by applying voltage to the disassembled outlet and touching the terminals with an indicator screwdriver. The glowing window on the screwdriver means that you are touching the phase wire, respectively, the second wire will be zero.
- Connect a wire conductor to the phase terminal of the socket, the other end of which should be connected to the input contact of the switch. Place this wire in the groove between the holes and fix with mortar.
- Connect the wire core to the zero terminal of the socket, which will go to the zero contact of the lamp holder. If the housing of the lighting fixture must be grounded, then the grounding conductor can also be pulled from the corresponding socket of the socket, only in this case a three-core wire will have to be laid on the luminaire.
- A wire core is connected to the output contact of the switch, which will be the phase of the lamp.
- This completes the switching operations. It remains only to fix the working parts of the switching devices in the socket boxes and put on the protective frames on top. The last button is fixed on the switch and the assembled circuit is tested in action.
- Apply voltage by turning on the input circuit breaker. Insert the plug of any household appliance into the socket, it should work. Now press the switch key, the lamp in the lamp should light up.
This option describes in detail how to install a one-key switch. In the same way, you can put the device with two or three keys, only a separate wire must go from each output contact of the switch to a certain group of lamps.
We examined how you can connect a switch from an already installed outlet. Remember that this option in a household electrical network is more likely the exception, not the norm, and is used in case of emergency.