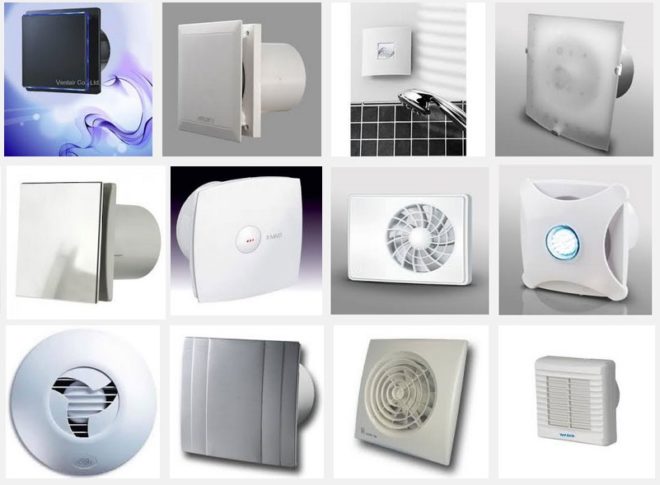
How to properly connect a bathroom fan to a switch
Surely you had to deal with such a situation in your life when an exhaust fan is located in the bathroom and it is turned on using a conventional switch. This is often the way to equip bathrooms in hotels, sanatoriums, boarding houses, guest houses. Maybe someone from your acquaintances or friends saw such a hood? This is a very good idea, by the way. And if your bathroom is not yet equipped with such equipment, we advise you to think about installing it. In this article, we'll talk about the advantages of the device and how to connect a bathroom fan to a switch.
Benefits
The bathroom belongs to rooms with high air humidity. And excess moisture leads to the appearance of fungi and mold, various unpleasant insects, such as centipedes and wood lice. If the bathroom is large, it can be equipped with various furniture (cabinets and shelves), and high humidity causes stratification of materials. There are also metal structures in the bathrooms (heated towel rails, towel and toilet paper holders), moisture accelerates their rusting.
Also, moisture is often accompanied by an unpleasant odor of dampness. It gets even worse when the downstairs neighbors are smoking in the bathroom and the ventilation duct carries these odors to you.
Condensation also constantly collects on mirrors and walls, which can lead to premature destruction of tiles.
Natural ventilation does not always cope with humidity and "odors" in the bathroom, sometimes it is additionally enhanced with the help of exhaust systems. One of these options is the fan.
Channel check
Before connecting the fan, it is necessary to check the condition of the ventilation shaft.
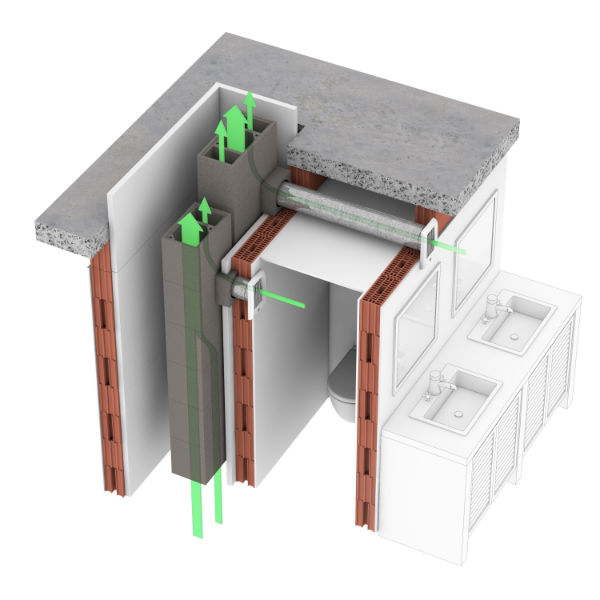
Some people advise this method, how to bring a sheet of thin paper to the air vent. It should be attracted if the hood is good. But it is more reliable to check with a flame, you can use matches or a candle. Light a candle and bring it to the hole, the flame should, as it were, stretch towards the channel. If this does not happen and the flame is even, then the ventilation duct is clogged and requires cleaning. To do this, you need to contact special housing and communal services.
Connection methods
Installing a future fan is half the battle, the main thing is to bring a power cable to it. If a good repair has already been made in the bathroom, this will be problematic. The ideal option would be to install a ventilation device at the stage of repair work, then the cable can be laid in the walls. Otherwise, he will have to come up with some kind of decorative design or plug it into an outlet.

Consider the options for connecting a ventilation device:
- Scheme of parallel switching on of a fan with a lighting lamp. In this case, both the fan and the lamp will work from one switch at once. That is, the ventilation device will start rotating at the same time as the light is on, and will be in operation as long as the light is on. The undoubted advantage is the simple and cheap implementation of such a scheme. However, there are many downsides. If the switch is off, then the fan is not working, and this is not enough to ventilate the room. We'll have to turn on and additionally leave the light on for a while. On the other hand, the fan will always work with the light on, and when a person takes water procedures, he does not need these drafts.
- Circuit from the switch.This method is definitely good, because it eliminates the stupid work of the hood. That is, the device turns on and off only when needed. You can install the switch separately for the fan, or mount a 2-key switching device and power the lighting from one key, and the ventilation device from the second. This option will increase costs as more cable is required. After all, the device is already connected directly from the switch with a separate line, and not parallel to the lighting.
- The latest models of fans are already equipped with automation, in particular, a timer. To connect such a device, you will need a three-core wire or cable, the third core is connected through a lighting lamp and is a signal one. There are two options for such a fan. It can start at the same time as the lighting is turned on, and then turn off after a set time. Or vice versa, while the light is on, the engine does not start, but as soon as the light goes out, the fan starts working, and then it turns off after a certain period of time.
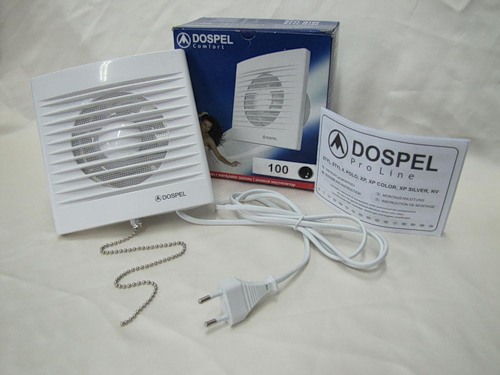
There are also fan models that are initially equipped with their own switch. It is shaped like a cord that comes out of the body. Pulling this cord starts and turns off the device. But keep in mind that such models are completely inconvenient to maintain. The fans are usually installed near the ceiling, and this place is difficult to reach to reach the cord every time.
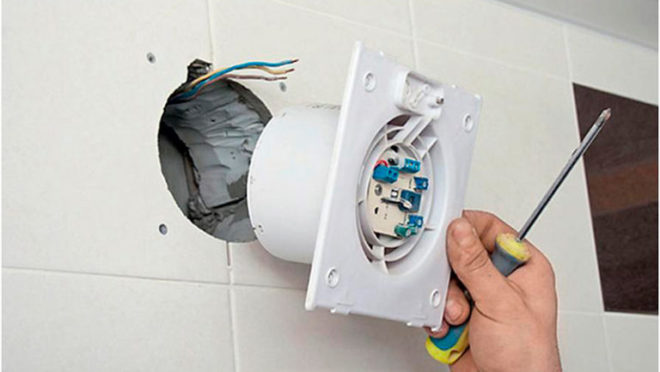
Fan installation
A two-core cable must be laid to the installation site of the ventilation device. The fan model with a timer is connected to a one- or two-button switch with a three-wire wire (the third wire will be a signal one).

Groove from the junction box to the vent. Remember that you can only gash with vertical or horizontal lines, there should not be any oblique lines. Do not make grooves closer than 10 cm to doorways. Lay the cable in the made groove and fix it with alabaster or cement mortar. One end of the cable should be led out into the ventilation hole, the other into the junction box.
You can also run the cable in a corrugated pipe. Be sure to make sure that the corrugation is not located across the ventilation opening, it must be moved and secured to the side, otherwise it may obstruct the air flow.
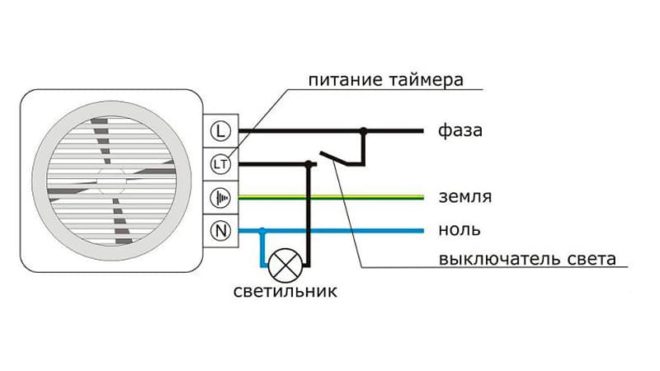
The fan terminals are marked with English letters:
- "L" for connecting a phase conductor;
- "N" to connect the neutral conductor;
- "T" - this letter is in models with a timer, it denotes where the signal wire is connected.
In the cable, the cores are usually distinguished by color. The zero core is made in blue, phase in brown or white. Connect the cable conductors to the fan terminals accordingly. Check the reliability of the contact connection.
To install the fan in the ventilation duct, first remove the top cover with a mesh. On the bottom panel, to which the device itself is fixed, there are four holes for self-tapping screws (usually they are included in the kit along with the dowels). But if you already have a tile laid and you don't want to drill it, use glue, such as silicone or liquid nails (anything can happen if the tile cracks or the glaze chips). Spread it on the back of the cover, insert the fan itself into the ventilation hatch, and press the cover firmly against the wall, hold it for 1-2 minutes and release it. Now replace the top decorative cover.
For more information on installing the fan, see this video:
And the fan connection diagram with a timer is detailed here:
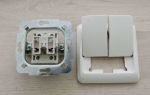
Switch mounting
Grooves from the junction box must also be made to the installation site of the switch (in the case of plasterboard walls, a corrugated pipe is used). It is necessary to lay a two-core wire in the grooves and fix it with a solution. The ends of the wire should be led out into the junction box and into the hole for the switch.
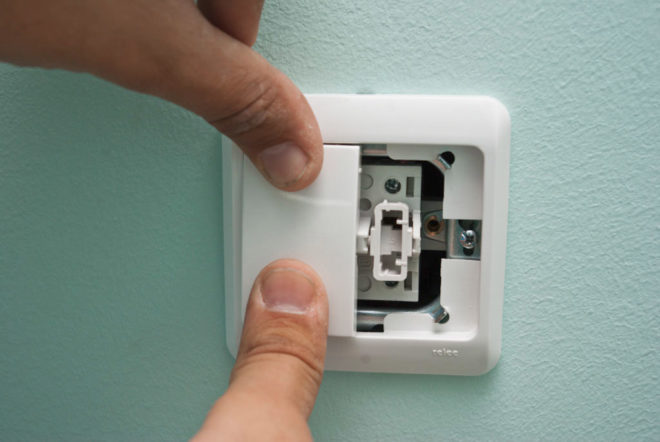
The switch consists of a working part and a protective cover with a key. A socket must be installed in the hole. Now take the working mechanism, its contact part has two terminals for connecting wire cores. One terminal is an incoming contact; a phase conductor from the supply network is connected to it. The second terminal is an outgoing contact, a phase from the fan will be connected to it. Make the necessary connections and check the reliability of the contact connections.
Fix the working mechanism in the socket. Install the protective cover and put on the key.
If a switch with two buttons is installed, then such a switching device has two output contacts, one of which must be connected to the fan, the second to the lighting device. Accordingly, one key starts the ventilation device, the second turns on the lighting in the bathroom.
Wire connection

The following connections must now be made in the junction box:
- Connect the zero core from the supply network to the zero core of the fan.
- Connect the phase conductor from the supply network to the conductor that goes to the incoming contact of the switch.
- Connect the phase core of the fan to the core of the wire that comes from the outgoing contact of the switch.
In the case of a two-button switch in the junction box, there will be additionally the following connections:
- The zero core from the supply network will still be connected to the zero of the lamp.
- The phase conductor of the luminaire must be connected to the conductor that comes from the second outgoing contact of the switch.
As you can see, nothing complicated. Be sure to consider installing a fan in your bathroom. Now they come up with many fashionable electrical things, but half of them are sheer whim. But the ventilation of such a room as a bathroom is really not an unimportant issue. So this article is relevant and helpful.